
Vegetable Gardening for Beginners: Tips and Tricks
Welcome to the world of vegetable gardening! If you're a beginner, you might feel a mix of excitement and uncertainty. But don't worry! With the right tips and tricks, you can turn your backyard into a thriving oasis of fresh produce. Imagine stepping outside, plucking a ripe tomato or crisp cucumber, and enjoying the fruits of your labor. Sounds dreamy, right? In this article, we'll guide you through everything you need to know to kickstart your gardening journey, from choosing the right vegetables to harvesting your bounty. So, grab your gardening gloves and let's dig in!
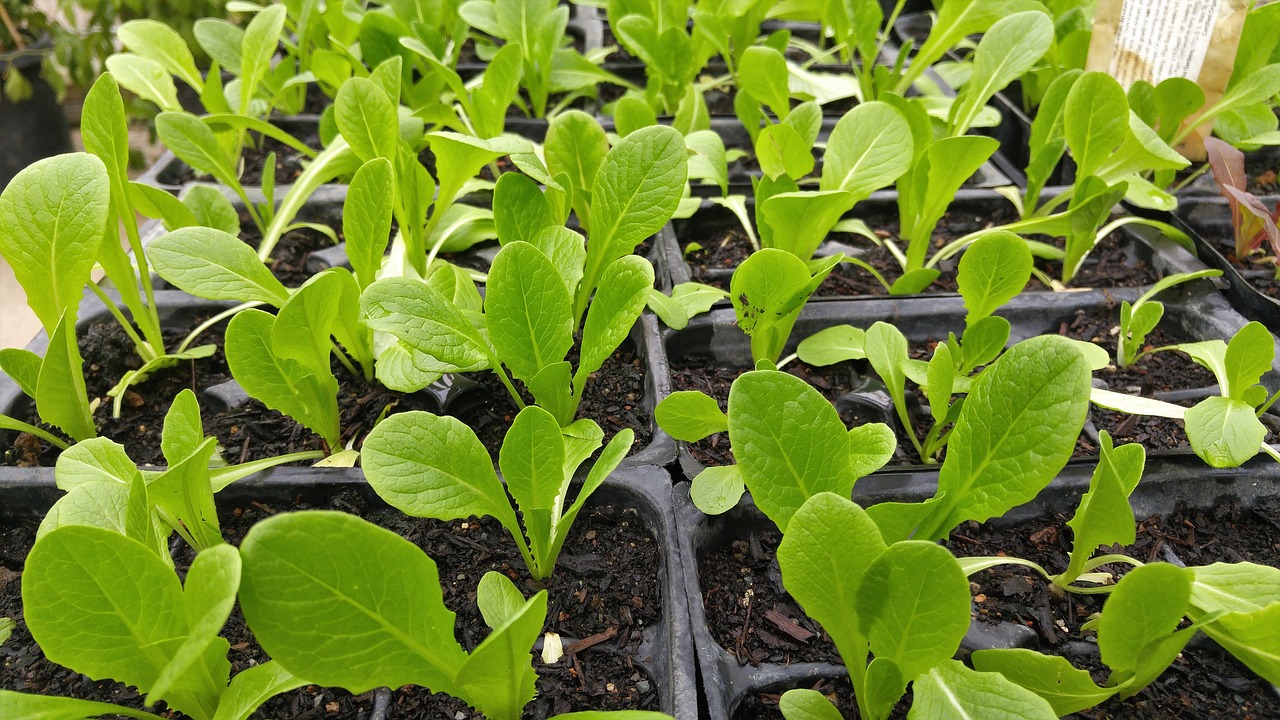
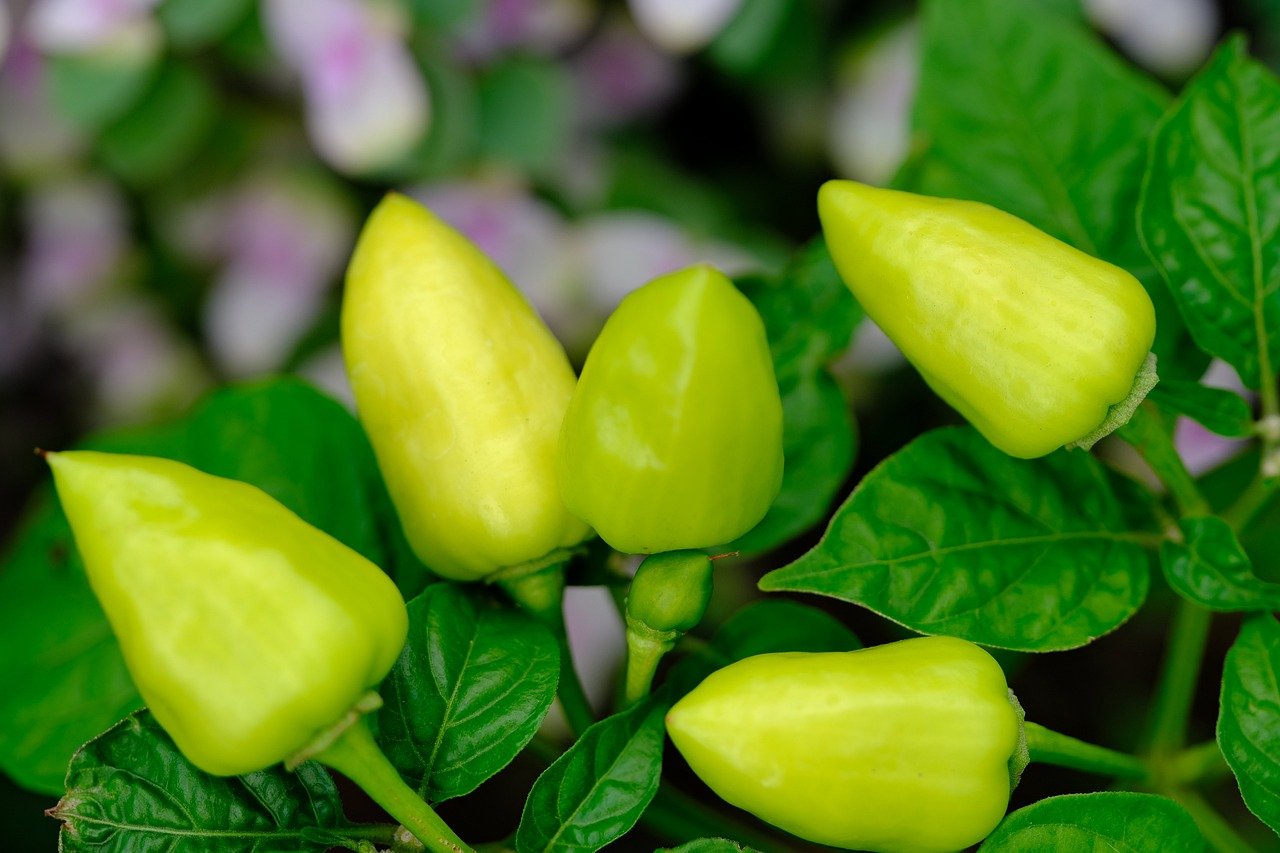
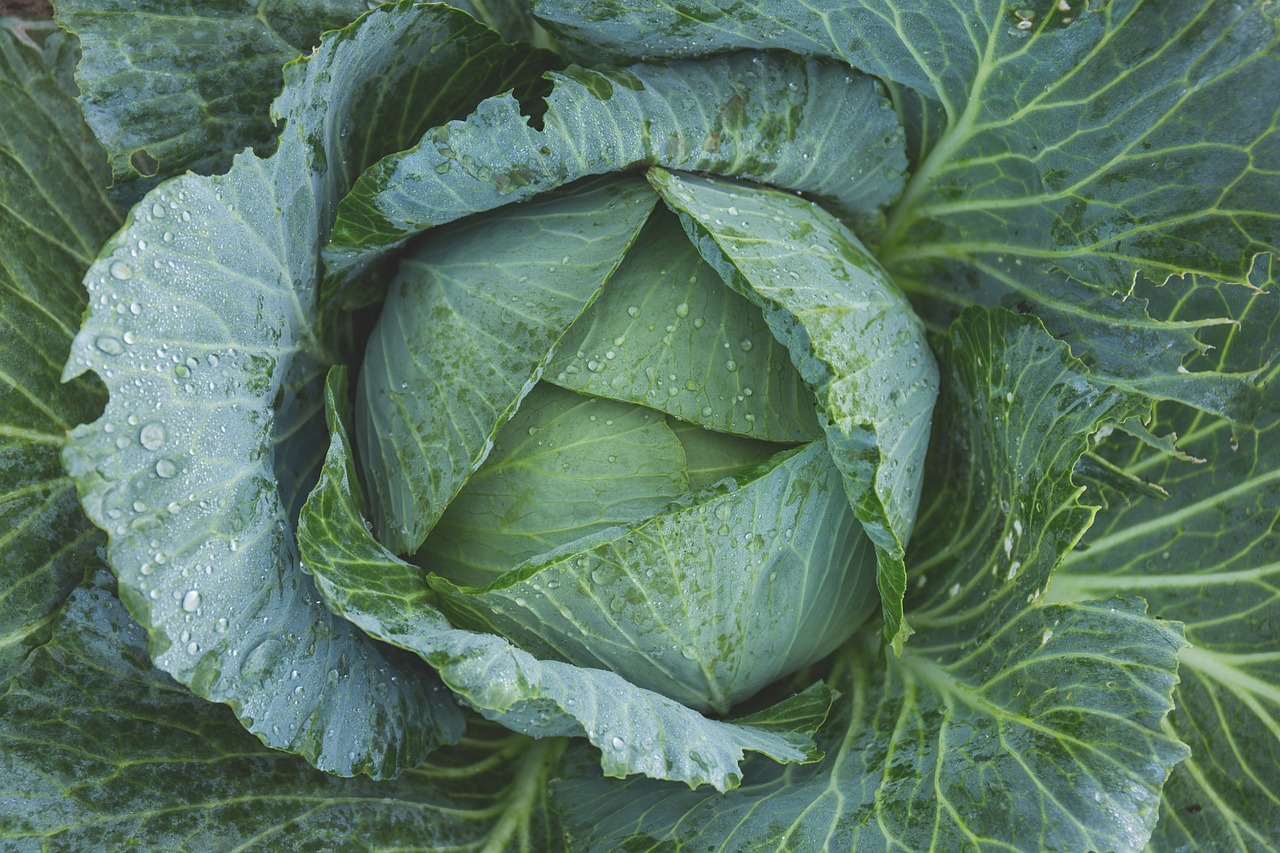
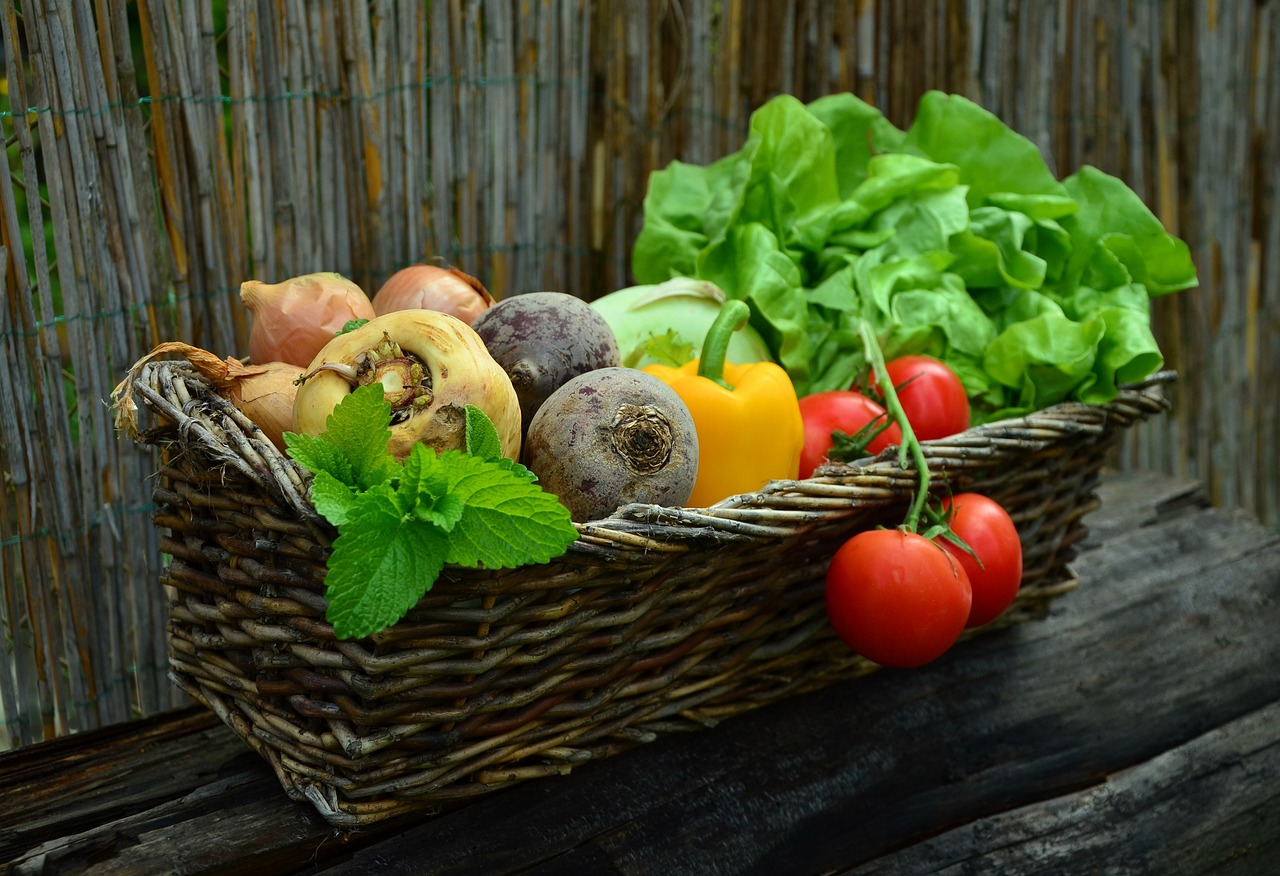
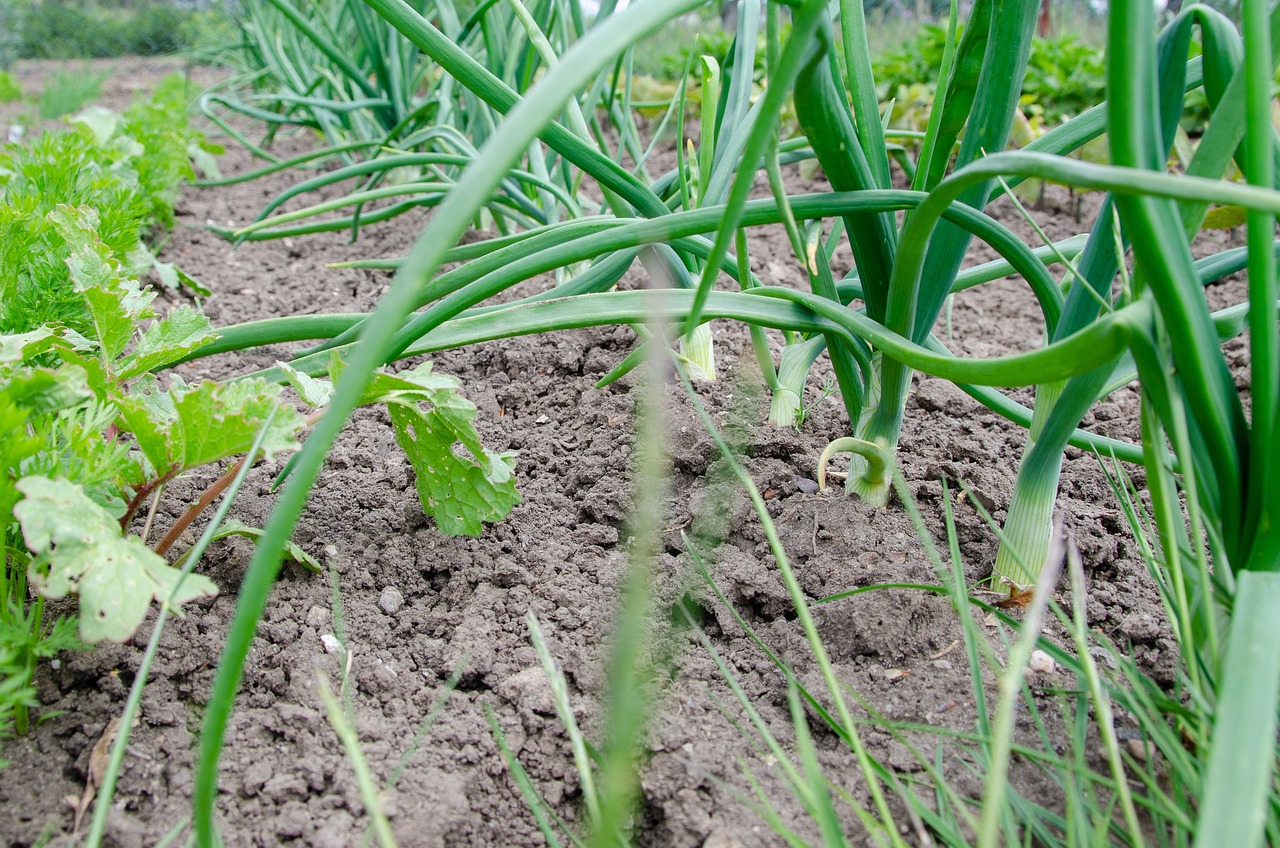
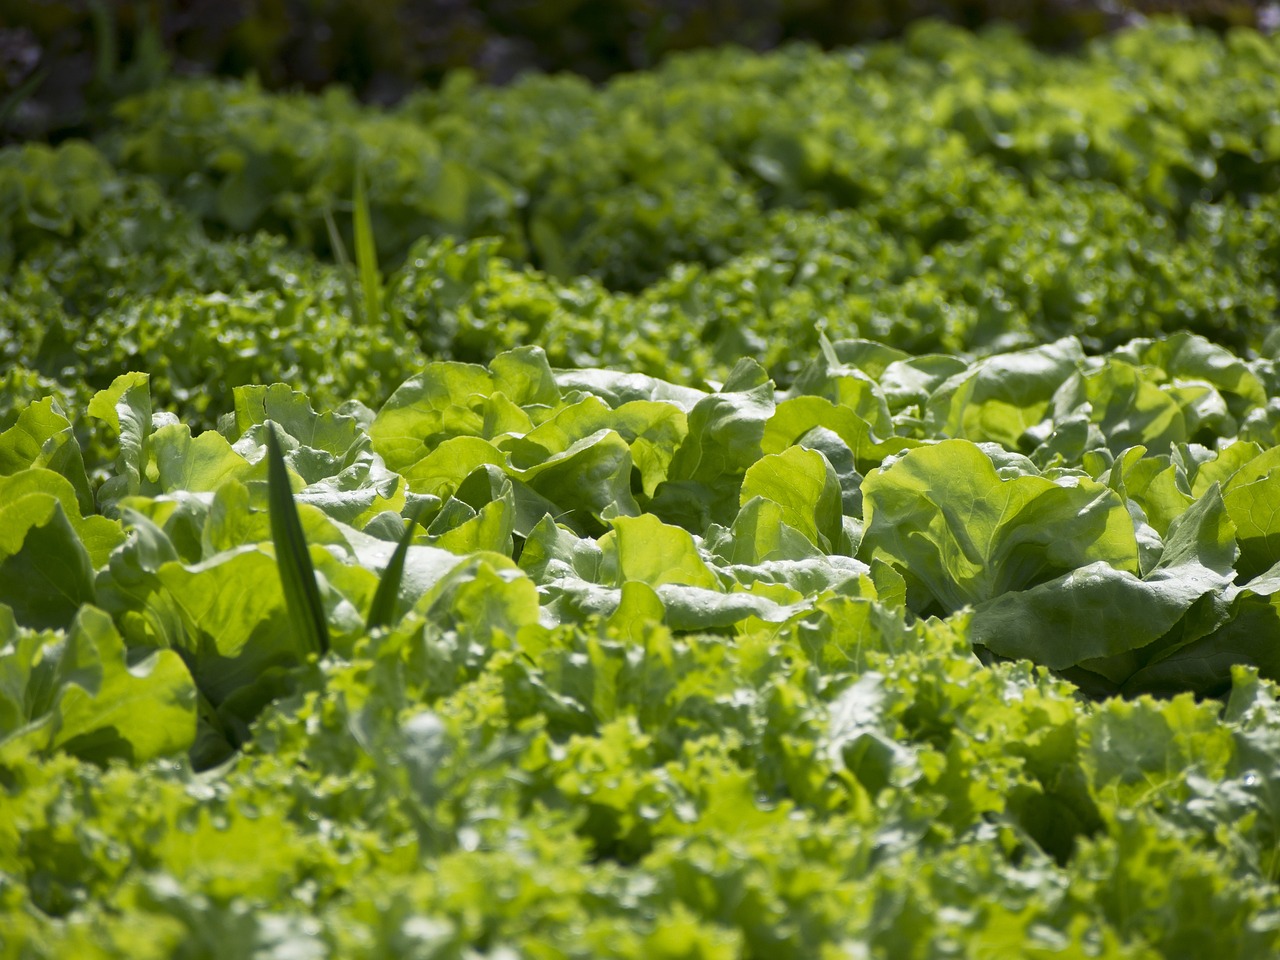
Selecting the right vegetables for your garden is crucial. Think of it like choosing the right ingredients for a delicious recipe; the better the ingredients, the tastier the dish! Factors such as your local climate, seasonal variations, and personal taste preferences will play a significant role in your vegetable selection. For instance, if you live in a warmer region, you might want to opt for heat-loving plants like peppers and squash. On the other hand, cooler climates are perfect for leafy greens and root vegetables. Don’t forget to consider your family's favorites—there's nothing better than growing what you love to eat!
Healthy soil is the foundation of a successful garden. Just like a sturdy house needs a solid foundation, your plants need nutrient-rich soil to thrive. Understanding soil types, necessary amendments, and testing methods is essential. A simple way to start is by checking your soil's texture. Is it sandy, clayey, or loamy? Each type has its benefits and challenges. For example, sandy soil drains well but may not retain nutrients, while clay soil holds moisture but can become compacted. To enrich your soil, consider adding organic matter like compost or aged manure. These amendments not only improve soil structure but also provide essential nutrients for your plants.
Understanding soil composition is vital for optimal gardening success. You can test your soil in several ways. The most straightforward method is to use a soil test kit available at garden centers. These kits typically measure pH levels and nutrient content. Alternatively, you can send a soil sample to a local extension service for a more comprehensive analysis. Knowing your soil's composition will help you make informed decisions about amendments and fertilizers, ensuring your plants get exactly what they need.
pH levels play a significant role in soil health. Most vegetables thrive in slightly acidic to neutral soil, with a pH range of 6.0 to 7.0. If your soil is too acidic or alkaline, it can affect nutrient availability, leading to poor plant growth. You can adjust pH levels by adding lime to raise pH or sulfur to lower it. Regular soil testing will help you maintain the right balance, creating a suitable environment for your vegetables to flourish.
Using organic amendments like compost and manure can greatly enrich your soil and promote sustainable gardening practices. Compost improves soil structure, enhances moisture retention, and provides a slow release of nutrients. Manure, when well-aged, adds nitrogen and other essential nutrients. By incorporating these organic materials into your soil, you're not only boosting its health but also fostering a vibrant ecosystem that supports beneficial microorganisms.
A well-planned garden layout maximizes space and sunlight. Consider the size of your garden and the types of vegetables you want to grow. Group plants with similar light and water needs together for optimal growth. For example, taller plants like tomatoes can be positioned on the north side of the garden to avoid shading shorter plants. Additionally, leaving pathways between rows will make it easier to access your plants for watering and harvesting. A thoughtful layout can make your gardening experience more enjoyable and productive.
Proper watering is essential for healthy plants. Overwatering can be just as detrimental as underwatering, so finding the right balance is key. Different plants have varying water requirements, so it’s important to develop a watering schedule that meets your garden's needs. Early morning is often the best time to water, as it allows plants to absorb moisture before the heat of the day. Consider using mulch to retain soil moisture and reduce evaporation. This simple technique not only conserves water but also suppresses weeds, giving your plants a better chance to thrive.
When it comes to watering, you have options! Drip irrigation systems deliver water directly to the plant roots, minimizing waste and preventing fungal diseases caused by wet foliage. On the other hand, traditional sprinklers can cover larger areas quickly but may lead to water runoff and evaporation. Weigh the pros and cons of each method based on your garden's size and your watering needs. No matter which method you choose, consistent watering is crucial for a successful vegetable garden.
Learning to recognize the signs of overwatering in your plants is vital for maintaining the right balance. Look out for yellowing leaves, wilting despite wet soil, or a foul odor emanating from the roots. These signs indicate that your plants are struggling to breathe due to excess moisture. If you notice these issues, it may be time to adjust your watering schedule and improve drainage in your garden beds.
Managing pests effectively is key to a thriving vegetable garden. While it might be tempting to reach for chemical pesticides, there are many natural methods to keep your plants safe from harmful insects. Start by encouraging beneficial insects like ladybugs and lacewings, which naturally prey on pests. You can also use physical barriers, such as row covers, to protect your plants from unwanted visitors. Always remember that a healthy ecosystem is your best defense against pests!
Discovering how beneficial insects can help control pest populations naturally is a game-changer for any gardener. These helpful critters not only keep harmful pests in check but also pollinate your plants, leading to better yields. To attract beneficial insects, consider planting a diverse array of flowers and herbs, which provide food and shelter. Think of your garden as a mini ecosystem—every creature plays a role!
Explore various organic pest control methods that are safe for your vegetables and the environment. Options like neem oil, insecticidal soap, and diatomaceous earth can effectively manage pests without harming beneficial insects. Additionally, companion planting—growing certain plants together to deter pests—can be an effective strategy. For example, planting marigolds alongside your vegetables can repel nematodes and other pests. By choosing organic methods, you not only protect your plants but also contribute to a healthier planet.
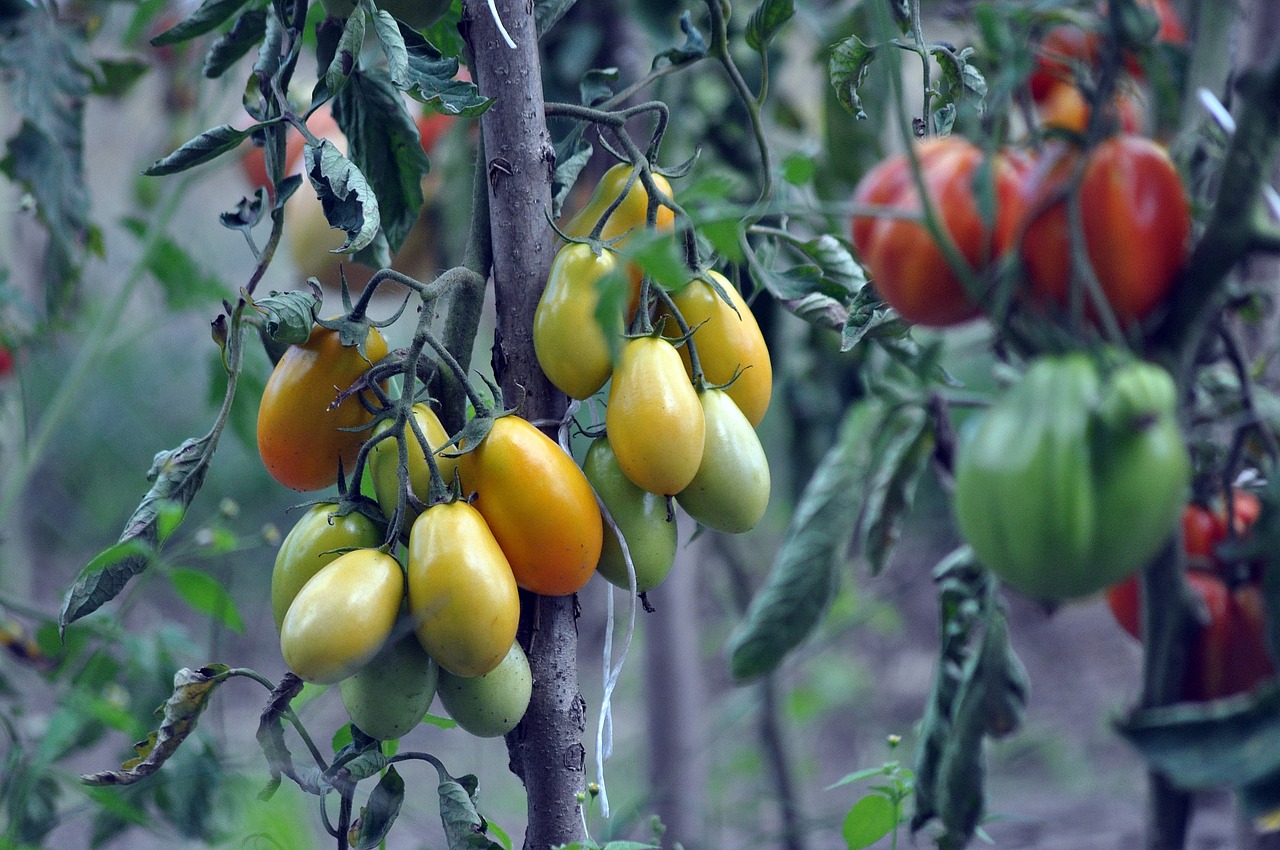
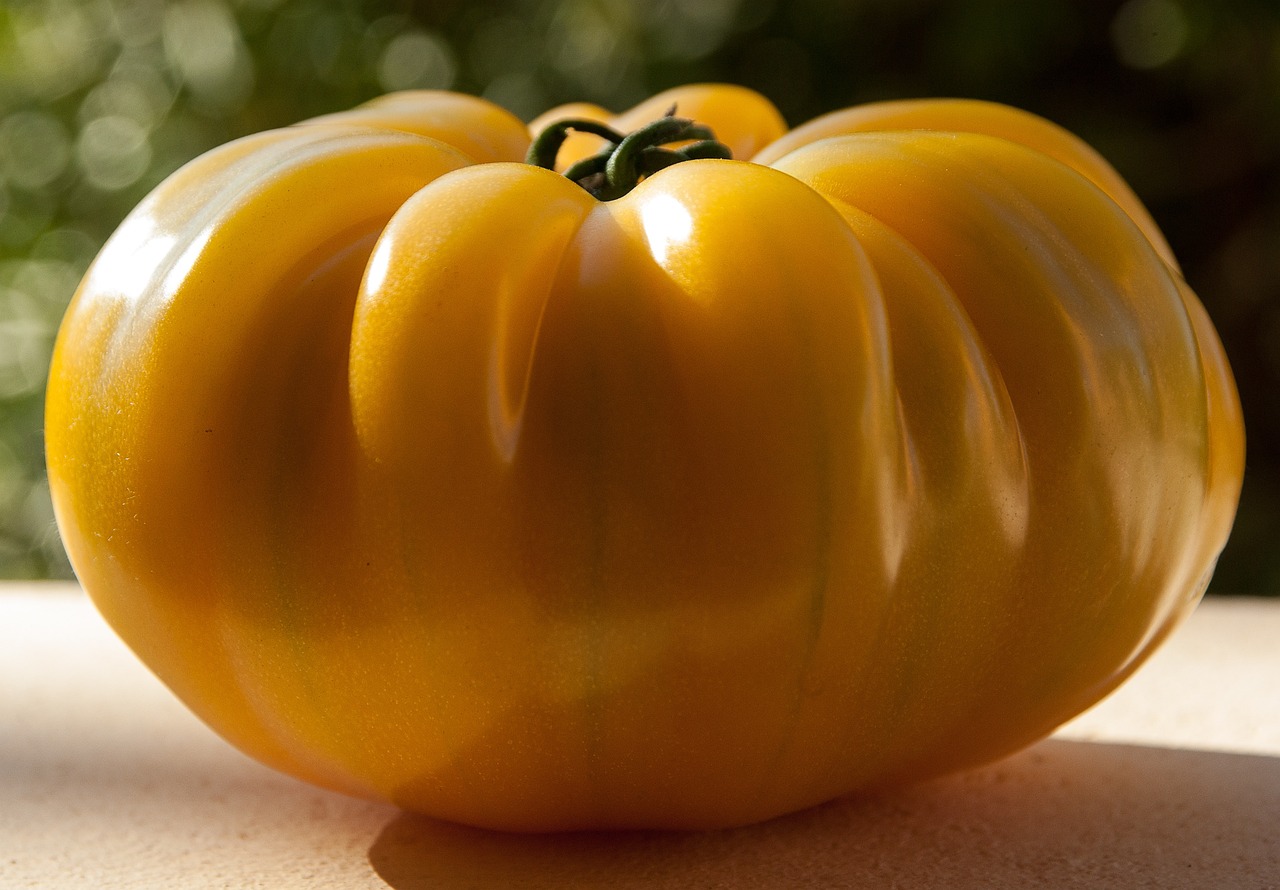
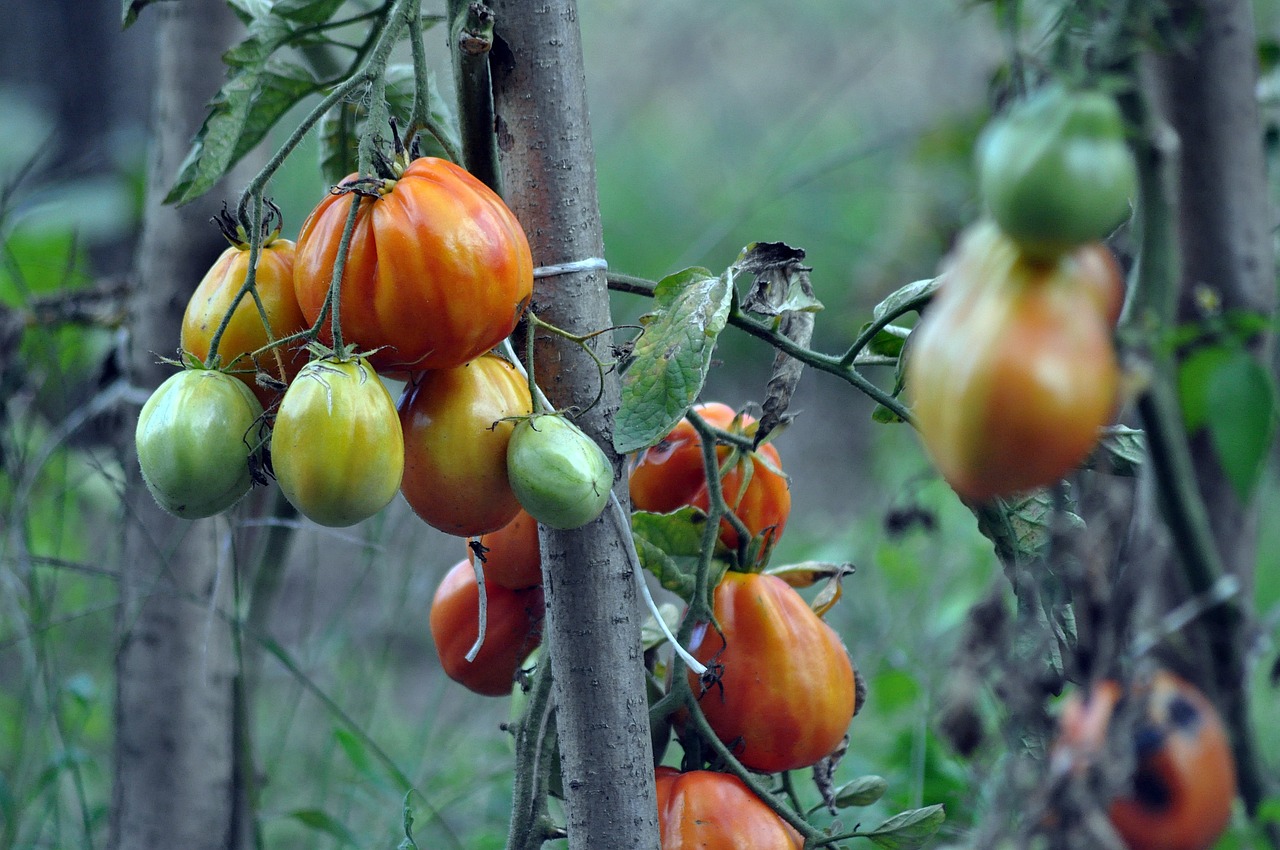
Knowing when and how to harvest your vegetables is crucial for maximizing flavor and yield. Timing your harvest can make all the difference between a bland meal and a burst of fresh flavors. Different vegetables have specific signs indicating they are ready for picking. For instance, tomatoes should be harvested when they are fully colored and slightly soft to the touch, while cucumbers are best picked when they are still firm and shiny. By paying attention to these details, you'll ensure that every bite is as delicious as possible.
Learn the signs to look for to determine the perfect time to harvest your vegetables for peak freshness and taste. Keep a close eye on your plants as they mature, and don't hesitate to pick them at their prime. A little patience goes a long way in ensuring that your hard work pays off with the best possible flavors.
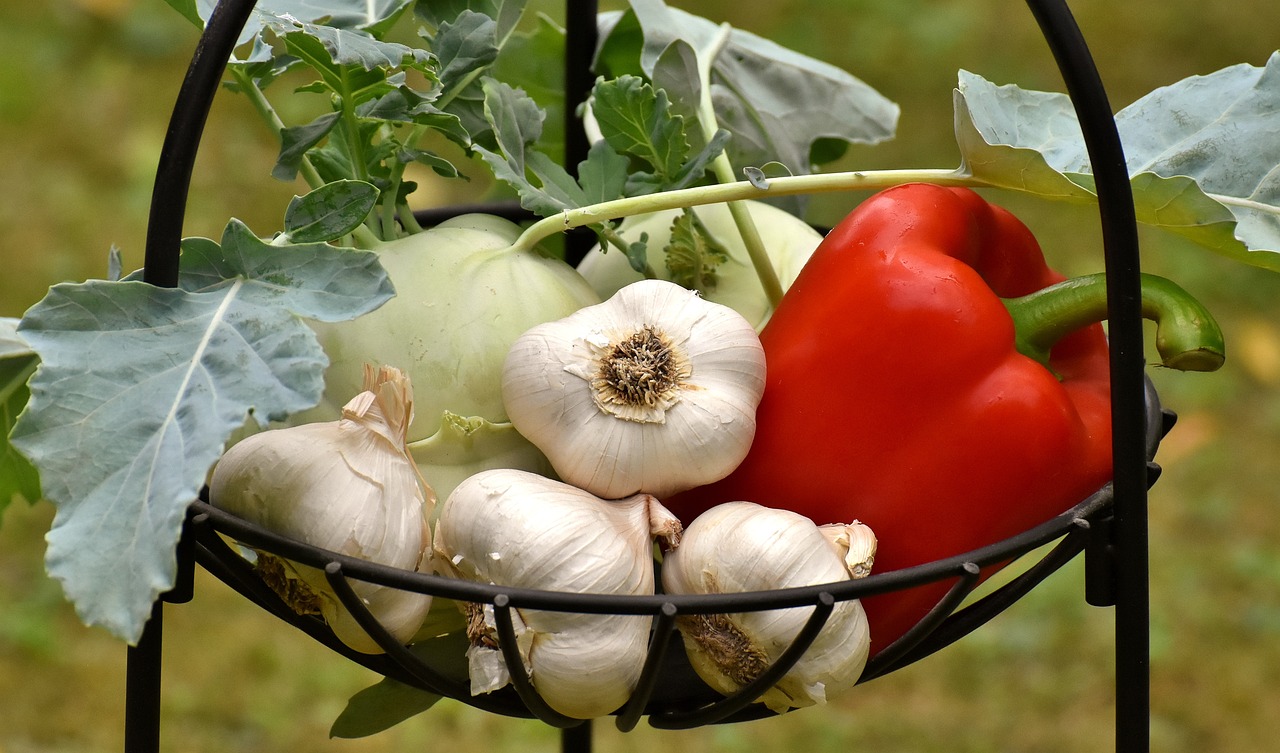
After you've gathered your bounty, it's essential to store your harvested vegetables properly to prolong their freshness. Different vegetables have varying storage requirements. For example, leafy greens should be kept in the refrigerator, while root vegetables can be stored in a cool, dark place. By using proper storage techniques, you can enjoy the fruits of your labor for weeks to come, making your gardening efforts even more rewarding.
- What vegetables are easiest to grow for beginners? Start with easy-to-grow options like radishes, lettuce, and zucchini, which are forgiving and quick to harvest.
- How much sunlight do my vegetables need? Most vegetables require at least 6-8 hours of direct sunlight per day for optimal growth.
- Can I grow vegetables in containers? Absolutely! Many vegetables thrive in containers, making them perfect for small spaces.
- When is the best time to plant vegetables? This largely depends on your local climate, but generally, spring is the ideal time for most vegetables.
Choosing the Right Vegetables
This article provides essential tips and tricks for novice gardeners, covering everything from soil preparation to pest control, ensuring a successful and rewarding vegetable gardening experience.
When it comes to vegetable gardening, is like picking the perfect ingredients for a recipe. You wouldn’t want to throw just anything into a dish, right? The same goes for your garden! The process of selecting vegetables can be both exciting and overwhelming, especially for beginners. There are several factors to consider, including climate, seasonality, and your own personal preferences. Understanding these elements can make the difference between a bountiful harvest and a disappointing one.
First off, let’s talk about climate. Different vegetables thrive in different climates. For instance, if you live in a warmer region, you might want to focus on heat-loving plants like tomatoes, peppers, and zucchini. On the other hand, cooler climates are better suited for leafy greens and root vegetables like carrots and beets. To find out what grows best in your area, consider checking out a local gardening guide or talking to experienced gardeners in your community.
Next up is seasonality. Some vegetables are cool-season crops, while others flourish in the heat of summer. It’s essential to know when to plant your seeds or seedlings. For example:
| Vegetable | Best Season to Plant |
|---|---|
| Spinach | Spring and Fall |
| Tomatoes | Late Spring to Summer |
| Carrots | Spring and Late Summer |
| Peas | Early Spring |
Now, let’s not forget about your personal preferences! What do you and your family love to eat? Are there certain vegetables that you can’t get enough of? By growing vegetables that you genuinely enjoy, you’ll not only be more motivated to tend to your garden, but you’ll also appreciate the fruits of your labor much more. Plus, it’s a great way to save money on groceries!
Finally, consider the space you have available. If you’re working with a small balcony, you might want to opt for container gardening with compact varieties like baby carrots or herbs. If you have a sprawling backyard, then you can experiment with larger plants and even create a diverse garden with multiple types of vegetables. Remember, the goal is to create a garden that suits your lifestyle and preferences.
In summary, when choosing the right vegetables for your garden, keep in mind the following:
- Climate: Understand the temperature and weather patterns in your area.
- Seasonality: Know which vegetables grow best in each season.
- Personal Preferences: Grow what you love to eat.
- Space Availability: Plan according to your gardening space.
By taking these factors into account, you’ll set yourself up for a successful and enjoyable gardening experience. The key is to experiment and have fun along the way! Remember, even the most seasoned gardeners started as beginners, so don't be afraid to get your hands dirty and learn as you go!
Q: What vegetables are easiest to grow for beginners?
A: Some of the easiest vegetables for beginners include radishes, lettuce, and zucchini. They grow quickly and require minimal maintenance.
Q: How do I know when to plant my seeds?
A: It's essential to check your local frost dates and plant accordingly. Most seed packets will provide guidance on when to sow seeds based on your region.
Q: Can I grow vegetables in containers?
A: Absolutely! Many vegetables thrive in containers. Just ensure you choose the right size pot and use quality potting soil.
Q: What should I do if my plants are not growing?
A: Check the soil for drainage, ensure they are getting enough sunlight, and review your watering schedule. Sometimes, a little adjustment can make a big difference!

Preparing the Soil
When it comes to vegetable gardening, is like laying the groundwork for a masterpiece. Imagine trying to paint a stunning landscape on a crumbling canvas—it's just not going to work! Healthy soil is the foundation of a successful garden, and getting it right can mean the difference between a bountiful harvest and a disappointing one. So, let’s dig deep into the nitty-gritty of soil preparation.
The first step in preparing your soil is understanding what type you have. Soil can generally be categorized into three types: sandy, clay, and loamy. Each type has its own characteristics and benefits:
| Soil Type | Characteristics | Best For |
|---|---|---|
| Sandy | Well-draining but low in nutrients | Root vegetables like carrots and radishes |
| Clay | Dense and nutrient-rich but drains poorly | Heavy feeders like tomatoes and corn |
| Loamy | A balanced mix of sand, silt, and clay | Most vegetables thrive in loamy soil |
Once you’ve identified your soil type, it’s time to consider amendments. Soil amendments are materials added to enhance soil quality, and they can make a world of difference. Here are some common amendments that can help:
- Compost: This organic matter enriches your soil, improves its structure, and increases its moisture retention.
- Manure: Well-rotted manure adds nutrients and beneficial microorganisms to your soil.
- Peat Moss: This helps to improve soil aeration and moisture retention, especially in sandy soils.
But before you start throwing amendments into your garden, it’s essential to know what your soil needs. This is where soil testing comes into play. Soil tests can reveal the pH level and nutrient content of your soil, guiding you on what amendments to use. Many local gardening centers offer testing kits, or you can send a sample to a lab for a more comprehensive analysis.
Soil testing might sound technical, but it’s quite straightforward. Here’s how you can do it:
- DIY Kits: These are available at most garden stores and usually involve mixing soil with a testing solution to determine pH and nutrient levels.
- Professional Testing: Sending a sample to a lab can provide detailed insights into your soil's composition, including levels of nitrogen, phosphorus, potassium, and other essential nutrients.
Once you have your test results, you’ll want to pay close attention to the pH levels. pH is a measure of how acidic or alkaline your soil is, and it can significantly affect nutrient availability to plants. Most vegetables prefer a pH between 6.0 and 7.5. If your soil’s pH is too low (acidic), you can add lime to raise it; if it’s too high (alkaline), adding sulfur can help lower it.
Using organic amendments not only enriches your soil but also promotes sustainable gardening practices. Compost and manure aren't just good for your plants—they're also good for the planet! By enriching your soil organically, you can foster a healthy ecosystem that supports beneficial microorganisms and improves soil structure.
Now that you’ve prepared your soil, you’re one step closer to creating a thriving vegetable garden. Remember, the effort you put into your soil preparation will pay off when you see your plants flourish. Just like a chef meticulously selects ingredients for a gourmet dish, you too are crafting a garden masterpiece!
Q: How often should I test my soil?
A: It's a good idea to test your soil at least once a year, especially before planting season.
Q: Can I use store-bought fertilizers instead of organic amendments?
A: While store-bought fertilizers can be effective, organic amendments are generally better for long-term soil health.
Q: How do I know if my soil is too compacted?
A: If water pools on the surface instead of soaking in, or if you struggle to dig into it, your soil may be compacted.
Soil Testing Methods
Understanding the composition of your soil is a fundamental step in achieving a thriving vegetable garden. Just like a chef needs to know their ingredients, a gardener must be aware of their soil's makeup. Soil testing is the key to unlocking the secrets of your garden's potential, and it can seem daunting at first. However, it’s simpler than you might think! There are several methods you can use to test your soil, each providing valuable insights into its health and nutrient levels.
One of the most straightforward methods is the DIY Soil Test Kit. These kits are typically available at garden centers or online and include everything you need to analyze your soil. They usually test for pH levels, nitrogen, phosphorus, and potassium, which are essential nutrients for plant growth. To use a DIY kit, simply follow the instructions provided, usually involving mixing soil samples with a testing solution and observing the color change. This method is not only cost-effective but also gives you a hands-on approach to understanding your soil.
For those seeking more detailed analysis, sending a sample to a professional soil testing lab is an excellent option. This method involves collecting soil samples from various spots in your garden and sending them to a lab where they perform a comprehensive analysis. The results will provide you with a detailed report on the nutrient levels, pH, and even contaminants present in your soil. While this option may require a bit more investment, the in-depth information can be invaluable, especially for larger or more complex gardening projects.
Another method worth mentioning is the home pH test, which can be done using simple household items. You can use vinegar or baking soda to test the soil's pH. For instance, if you sprinkle baking soda on a small amount of soil mixed with water and it fizzes, your soil is likely acidic (below pH 7). Conversely, if vinegar creates a reaction, your soil might be alkaline (above pH 7). While this method won’t give you a complete nutrient profile, it’s a quick way to gauge your soil's acidity, which is crucial for plant health.
Once you’ve tested your soil, interpreting the results is equally important. A typical soil test report will include the pH level, nutrient concentrations, and recommendations for amendments. Here’s a simplified table to illustrate what these results might look like:
| Nutrient | Level (ppm) | Recommended Action |
|---|---|---|
| Nitrogen | 10 | Add organic matter |
| Phosphorus | 20 | Consider bone meal |
| Potassium | 30 | Add wood ash or greensand |
| pH Level | 6.0 | Add lime to raise pH |
By understanding these results, you can make informed decisions about soil amendments that will enhance the fertility of your garden. Remember, healthy soil is the backbone of a productive garden, and investing time in soil testing will pay off with bountiful harvests and vibrant plants!
- How often should I test my soil? It's recommended to test your soil every 2-3 years, or whenever you notice changes in plant health.
- Can I test my soil in the winter? Yes, you can test your soil year-round. Just ensure the soil is thawed if frozen.
- What if my soil is too acidic? You can amend acidic soil by adding lime, which helps raise the pH level.
pH Levels and Nutrients
When it comes to vegetable gardening, understanding pH levels is like knowing the secret handshake to a club. It’s crucial! The pH level of your soil affects how well your plants can absorb nutrients, which ultimately determines their health and productivity. Ideally, most vegetables thrive in soil with a pH between 6.0 and 7.5. If your soil is too acidic (below 6.0) or too alkaline (above 7.5), it can lead to nutrient deficiencies, stunted growth, or even plant death.
So, how do you check your soil's pH? You can purchase a soil pH testing kit from a garden center or use a simple DIY method with household items. Here’s a quick overview of how you can test your soil:
- DIY Method: Take a small sample of your soil and mix it with distilled water. Then, add either vinegar (to check for alkalinity) or baking soda (for acidity). If it fizzes, you have an alkaline or acidic soil.
- Store-Bought Kit: Follow the instructions on the kit, usually involving mixing soil with a testing solution, and compare the color change against a pH scale.
Once you know your soil's pH level, you can adjust it accordingly. For instance, if your soil is too acidic, adding lime can help raise the pH. Conversely, if it’s too alkaline, incorporating sulfur can lower the pH. Remember, it’s best to make gradual changes and retest your soil regularly to avoid shocking your plants.
Moreover, it’s essential to understand that pH affects nutrient availability. For example, certain nutrients like iron and manganese become less available in alkaline soils, while phosphorus can be locked out in acidic soils. Here’s a quick table summarizing nutrient availability based on pH levels:
| Nutrient | Optimal pH Range | Availability |
|---|---|---|
| Nitrogen | 6.0 - 7.5 | High |
| Phosphorus | 6.0 - 7.0 | Moderate to High |
| Potassium | 6.0 - 7.5 | High |
| Iron | 5.5 - 6.5 | High |
| Calcium | 6.0 - 8.0 | High |
In conclusion, maintaining the right pH level in your soil is essential for ensuring that your plants can access the nutrients they need to thrive. Regular testing and appropriate amendments will set you on the path to a bountiful vegetable garden. After all, a happy garden is a productive garden!
Q: How often should I test my soil's pH?
A: It’s a good practice to test your soil at least once a year, preferably before planting season, to ensure optimal conditions for your vegetables.
Q: Can I use household items to adjust pH levels?
A: Yes! For example, you can use lime to raise pH and sulfur to lower it. Just make sure to follow recommended guidelines for amounts to avoid over-adjusting.
Q: What happens if my soil pH is too low or too high?
A: If your soil pH is too low (acidic), plants may struggle to absorb essential nutrients. If it’s too high (alkaline), certain nutrients become unavailable, leading to deficiencies and poor plant health.
Organic Amendments
When it comes to nurturing a thriving vegetable garden, are your best friends. They not only enrich the soil but also promote a sustainable gardening practice that benefits both your plants and the environment. Imagine your garden as a living ecosystem, where every component plays a vital role in the health of your plants. Organic amendments act as the lifeblood of this ecosystem, providing essential nutrients and improving soil structure.
So, what are organic amendments? In simple terms, they are natural materials added to the soil to enhance its fertility and overall health. Some popular examples include compost, manure, and green manure. These amendments are rich in nutrients and help to improve soil texture, making it easier for roots to grow and access water. For instance, compost not only provides nutrients but also enhances the soil's ability to retain moisture, which is crucial during dry spells.
Using organic amendments is like giving your garden a multivitamin. They supply a range of nutrients that chemical fertilizers often lack. Moreover, organic amendments improve soil structure, which helps with drainage and aeration. This is particularly important for root vegetables like carrots and potatoes, which need loose, well-aerated soil to grow properly. The benefits of using organic amendments are numerous:
- Enhances soil fertility and structure
- Increases microbial activity, promoting a healthy ecosystem
- Improves moisture retention
- Reduces the need for chemical fertilizers
Now, let’s dive deeper into some of the most effective organic amendments:
| Amendment | Benefits | Application Tips |
|---|---|---|
| Compost | Rich in nutrients, improves soil structure | Mix into soil before planting or use as mulch |
| Manure | High in nitrogen, enhances microbial activity | Use well-aged manure to avoid burning plants |
| Green Manure | Improves soil fertility, suppresses weeds | Plant cover crops, then till them into the soil |
Incorporating these organic amendments into your gardening routine can make a significant difference. Not only will you see healthier plants, but you'll also contribute to a more sustainable environment. Remember, gardening is not just about growing food; it’s about creating a vibrant ecosystem that supports life. So, next time you dig into your garden, think about the power of organic amendments and how they can transform your gardening experience.
Creating a Garden Layout
When it comes to , think of it as designing a blueprint for your vegetable paradise. The way you arrange your plants can significantly impact their growth, health, and your overall gardening experience. Imagine your garden as a bustling city where each vegetable plays a vital role in the ecosystem. A well-planned layout ensures that every plant gets the sunlight, water, and space it needs to thrive. So, how do you create this harmonious garden city?
First, consider the sunlight requirements of your plants. Some vegetables, like tomatoes and peppers, are sun worshippers, craving at least 6-8 hours of direct sunlight daily. Others, such as lettuce and spinach, prefer a bit of shade during the hottest parts of the day. Take a moment to observe your garden space throughout the day and note where the sun shines the brightest. This will help you identify the best spots for your sun-loving plants.
Next, think about the space each plant needs. Crowding your vegetables can lead to competition for nutrients, water, and sunlight, ultimately stunting their growth. A good rule of thumb is to refer to the seed packets or plant tags for spacing recommendations. For instance, if you're planting carrots, they typically need about 2-4 inches of space between each plant. On the other hand, larger crops like squash might require 3-4 feet of space! To visualize this, you might want to sketch a simple layout on paper or use garden planning software.
Another important aspect is the height of your plants. Taller plants can cast shadows over shorter ones, which can be detrimental to their growth. To optimize your garden layout, consider placing taller plants, such as corn or sunflowers, on the north side of your garden bed. This way, they won't block the sunlight from reaching the shorter plants, like radishes or bush beans, which thrive in full sun. Think of it as a well-orchestrated performance where each plant takes its place on stage!
Additionally, incorporating pathways is essential for accessibility. You don’t want to trample on your precious plants every time you need to check on them. Create walkways between rows to allow easy access for weeding, harvesting, and watering. These paths can be made from mulch, gravel, or even stepping stones. Not only do they provide access, but they also help to prevent soil compaction, which can hinder root growth.
Lastly, consider companion planting as a strategy to enhance your garden layout. Certain plants thrive when grown together, while others may hinder each other's growth. For example, planting basil near tomatoes can improve their flavor and repel pests. On the other hand, avoid planting onions near peas, as they can stunt each other's growth. By understanding these relationships, you can create a garden layout that maximizes your plants' potential.
In summary, creating a successful garden layout involves careful planning and consideration of various factors such as sunlight, spacing, height, pathways, and companion planting. With a bit of thought and creativity, you can design a beautiful and productive vegetable garden that will yield delicious harvests for you and your family!
- What is the best time to start a vegetable garden? Generally, you should start your garden in the spring after the last frost, but this can vary based on your climate.
- How do I know if my soil is good for gardening? Conduct a soil test to check for nutrient levels and pH balance.
- Can I grow vegetables in containers? Absolutely! Many vegetables thrive in containers, making them perfect for small spaces.
- What should I do if my plants are not growing well? Check for issues such as pests, diseases, or nutrient deficiencies, and adjust your care routine accordingly.
Watering Techniques
When it comes to nurturing your vegetable garden, are absolutely critical. Think of watering as the lifeblood of your plants; without it, they simply can't thrive. But how do you ensure that you're giving your garden just the right amount of water? Overwatering can be just as damaging as underwatering, leading to root rot and other issues. So, let's dive into the various techniques and schedules that can help you keep your garden hydrated without drowning it!
One popular method is drip irrigation. This technique delivers water directly to the roots of your plants through a network of tubes and emitters. It's like giving your plants a refreshing drink right when they need it most! The benefits? Drip irrigation minimizes evaporation and runoff, ensuring that more water actually reaches your plants. Plus, it can save you money on your water bill. However, it does require an initial investment in equipment and a bit of setup time. On the other hand, traditional sprinklers are easier to install and can cover a larger area, but they often lead to water waste due to evaporation and overspray. So, which one should you choose?
To help you decide, consider the following factors:
- Garden Size: Larger gardens might benefit from a sprinkler system, while smaller plots could do well with drip irrigation.
- Plant Types: Delicate seedlings may require gentle watering, making drip systems preferable.
- Budget: If you're on a tight budget, traditional sprinklers might be the way to go initially.
Another vital aspect of watering is the schedule. Watering early in the morning or late in the afternoon is generally best, as it allows plants to absorb moisture before the heat of the day causes evaporation. A good rule of thumb is to aim for about 1 to 1.5 inches of water per week, either from rainfall or irrigation. You can easily measure how much water your garden is receiving by placing a small container, like a tuna can, in your garden while you water. Once it fills up to about an inch, you know you’ve done a good job!
But how do you know if you're overwatering? Keep an eye out for these signs:
- Yellowing leaves that look droopy.
- Soil that remains soggy for days.
- Root rot, which can be identified by a foul smell coming from the soil.
By keeping these techniques and tips in mind, you'll be well on your way to mastering the art of watering your vegetable garden. Remember, a little attention to detail can go a long way in ensuring your plants flourish and produce a bountiful harvest!
Q: How often should I water my vegetable garden?
A: Generally, watering 1 to 1.5 inches per week is ideal, either through rainfall or irrigation. Adjust based on weather conditions.
Q: Is it better to water in the morning or evening?
A: Watering in the morning is preferable as it allows plants to absorb moisture before the heat of the day causes evaporation.
Q: Can I use a hose to water my garden?
A: Yes, using a hose is fine, but be mindful of how much water you're applying. Consider using a nozzle that allows you to control the flow.
Q: What are the signs of overwatering?
A: Look for yellowing leaves, soggy soil, and root rot, which can be identified by a foul smell.

Drip Irrigation vs. Sprinklers
When it comes to watering your vegetable garden, the choice between drip irrigation and traditional sprinklers can significantly impact your gardening success. Each method has its unique advantages and disadvantages, and understanding these can help you make an informed decision tailored to your garden's specific needs. Let's dive into the details!
Drip irrigation is like a gentle rain that delivers water directly to the roots of your plants. This method minimizes evaporation and runoff, making it incredibly efficient. Imagine a slow, steady stream of water that seeps into the soil, nourishing your plants without drowning them. This targeted approach not only conserves water but also reduces the risk of fungal diseases since the leaves remain dry.
On the flip side, sprinklers offer a more traditional approach to watering. They can cover a larger area quickly and are generally easier to set up for a beginner gardener. However, sprinklers can lead to uneven watering, where some plants may get drenched while others remain parched. Plus, they can contribute to water waste through evaporation, especially during hot summer days.
To help you visualize the differences, here’s a quick comparison:
| Feature | Drip Irrigation | Sprinklers |
|---|---|---|
| Water Efficiency | Highly efficient, minimizes waste | Less efficient, potential for evaporation |
| Installation | Requires more setup time | Generally easy to install |
| Water Distribution | Direct to roots, reduces leaf wetness | Can lead to uneven watering |
| Maintenance | May require regular checks for clogs | Easy to maintain, but can have issues with wind |
So, which method should you choose? If you’re looking for efficiency and a sustainable approach, drip irrigation is the way to go. However, if you prefer a more straightforward setup and have a larger area to cover, sprinklers might be the better option. Ultimately, the choice depends on your specific gardening goals, the types of vegetables you’re growing, and your local climate conditions.
In conclusion, both drip irrigation and sprinklers have their place in the gardening world. By weighing the pros and cons of each method, you can ensure that your vegetable garden receives the right amount of water it needs to flourish. Remember, a well-watered garden is a happy garden!
- What is the main advantage of drip irrigation? Drip irrigation conserves water by delivering it directly to the plant roots, reducing evaporation and runoff.
- Are sprinklers suitable for all types of vegetables? While sprinklers can be used for most vegetables, they may not be ideal for plants that prefer drier conditions.
- How often should I water my garden using drip irrigation? It depends on the plant type and climate, but generally, watering a few times a week is sufficient.
Signs of Overwatering
Overwatering is a common pitfall for novice gardeners, and it can be just as detrimental to your plants as underwatering. Recognizing the is crucial for maintaining the health of your vegetable garden. One of the first indicators is the appearance of yellowing leaves. If you notice that the leaves of your plants are turning yellow, it may be a signal that they are sitting in too much water. This yellowing typically starts at the lower leaves and can spread upwards, making it a clear warning sign.
Another telltale sign is the presence of root rot, which can be difficult to detect until it’s too late. If your plants seem to be wilting, despite the soil being wet, it’s likely that the roots are suffocating due to a lack of oxygen. You can check for root rot by gently pulling the plant out of the soil. Healthy roots should be firm and white, while rotting roots will appear brown and mushy.
Additionally, you may observe fungal growth or mold on the surface of the soil. This can create an unsightly appearance and indicate that the soil is staying too damp for too long. Mold can also attract pests, which can further complicate your gardening efforts. To combat this, ensure you have adequate drainage in your pots or garden beds.
It's also important to consider the overall health of your plants. If they seem to be growing slowly or are stunted in their growth, it could be because they are drowning in water. A well-balanced garden will have plants that are thriving and growing towards the sunlight, not languishing in overly wet conditions.
Lastly, you might notice excessive leaf drop. When plants are overwatered, they may shed leaves in an attempt to conserve energy and resources. This can lead to an unsightly garden and a significant loss in potential yield. To maintain a healthy garden, it is essential to monitor your watering habits closely.
In summary, here are the key signs of overwatering:
- Yellowing leaves
- Root rot (brown, mushy roots)
- Fungal growth or mold on soil surface
- Stunted plant growth
- Excessive leaf drop
By keeping an eye out for these signs, you can take proactive steps to adjust your watering practices, ensuring your vegetable garden remains vibrant and productive. Remember, it’s always better to err on the side of caution with watering; your plants will thank you for it!
Q: How often should I water my vegetable garden?
A: The frequency of watering depends on various factors such as the type of vegetables, weather conditions, and soil type. Generally, it's best to water deeply but infrequently, allowing the soil to dry out slightly between waterings.
Q: What should I do if I suspect overwatering?
A: If you suspect overwatering, reduce the frequency of your watering schedule. Allow the soil to dry out completely before watering again. If root rot is present, consider repotting your plants in fresh, dry soil.
Q: Can overwatering be fixed?
A: Yes, overwatering can often be corrected by adjusting your watering habits and improving soil drainage. In severe cases, you may need to remove affected plants and replace the soil.
Pest Control Strategies
Managing pests effectively is key to a thriving vegetable garden. If you’ve ever planted a garden, you know that pests can be a gardener's worst nightmare. Imagine nurturing your plants for weeks, only to find them devoured by hungry insects! But don’t worry; with the right strategies, you can protect your garden and enjoy a bountiful harvest. There are various methods to keep those pesky critters at bay, and understanding these methods is essential for any novice gardener.
First off, it’s important to recognize that not all insects are bad. In fact, some can be incredibly beneficial! Beneficial insects such as ladybugs and lacewings prey on harmful pests, helping to maintain a natural balance in your garden. By encouraging these allies, you can create a healthier ecosystem. Consider planting flowers that attract these beneficial insects, such as marigolds and dill, which can serve as a natural pest deterrent.
On the other hand, there are times when pests can become overwhelming, and you may need to take action. Here are some effective pest control strategies you might consider:
- Natural Remedies: Many gardeners swear by homemade solutions like neem oil, which can deter a variety of pests without harming beneficial insects.
- Companion Planting: Some plants naturally repel pests. For example, planting basil near tomatoes can help keep aphids away.
- Physical Barriers: Using row covers or insect netting can protect your plants from pests while still allowing sunlight and rain to nourish them.
While organic methods are often preferred for their safety and sustainability, there are also chemical options available. However, it's crucial to use them responsibly. Always read labels carefully, and consider the impact on the environment. If you choose a chemical approach, opt for targeted treatments that minimize harm to beneficial insects and the surrounding ecosystem.
Remember, the key to successful pest control is vigilance. Regularly inspect your plants for signs of infestation, such as discolored leaves or holes in foliage. Early detection can make all the difference in managing pests before they wreak havoc on your garden. Keep a close eye on the weather as well; certain pests thrive in specific conditions, so adjusting your strategies accordingly can help you stay one step ahead.
In conclusion, pest control is an ongoing battle in the world of vegetable gardening. By combining natural methods with a little bit of chemical assistance when necessary, you can create a thriving garden that not only produces delicious vegetables but also supports a healthy ecosystem. Happy gardening!
Q: What are the signs of pest infestation?
A: Look for discolored leaves, visible insects, or holes in your plants. Regular inspections can help catch problems early.
Q: Are there any plants that repel pests?
A: Yes! Plants like marigolds, basil, and garlic can help deter pests naturally.
Q: How can I attract beneficial insects to my garden?
A: Planting a variety of flowers and herbs can attract beneficial insects. Consider adding plants like dill, fennel, and yarrow.
Q: Is it safe to use chemical pesticides in my vegetable garden?
A: While chemical pesticides can be effective, it's essential to use them responsibly and follow all safety guidelines to minimize harm to beneficial insects and the environment.
Beneficial Insects
When it comes to maintaining a thriving vegetable garden, the role of cannot be overstated. These little allies are nature's own pest control agents, and their presence can significantly reduce the need for chemical interventions. Imagine your garden as a bustling city, where beneficial insects act as the police force, keeping the troublesome pests in check. They not only help manage pest populations but also contribute to the overall health of your garden ecosystem.
One of the most well-known beneficial insects is the ladybug. These charming little beetles are voracious eaters of aphids, spider mites, and other harmful pests. A single ladybug can consume up to 5,000 aphids in its lifetime! Similarly, lacewings are another fantastic ally, as their larvae feed on a variety of soft-bodied insects, including aphids and thrips. By introducing these insects into your garden, you're effectively employing a natural pest control strategy that supports biodiversity.
Here are some other beneficial insects that can make a significant impact:
- Parasitic Wasps: These tiny wasps lay their eggs inside or on pest insects, eventually killing them. They are particularly effective against caterpillars and aphids.
- Predatory Mites: These mites attack spider mites and other pests, helping to keep their populations in check.
- Ground Beetles: These nocturnal hunters feed on a variety of pests, including slugs and cutworms, making them essential for organic gardening.
To attract these beneficial insects to your garden, consider planting a variety of flowers that provide nectar and pollen. Flowers such as marigolds, sunflowers, and yarrow are excellent choices. Additionally, creating a habitat that includes native plants, shrubs, and even small water features can encourage beneficial insects to take up residence in your garden.
It's also essential to avoid using broad-spectrum pesticides, as these can harm beneficial insects along with the pests you are trying to eliminate. Instead, opt for organic pest control methods that target specific pests while leaving beneficial insects unharmed. By fostering a friendly environment for these helpful creatures, you enhance the resilience of your garden and create a sustainable ecosystem.
In summary, beneficial insects are a gardener's best friends. They offer natural pest control solutions, promote biodiversity, and contribute to a healthy garden environment. By learning to recognize and attract these insects, you can create a thriving vegetable garden that flourishes year after year.
Q: How can I attract beneficial insects to my garden?
A: Plant a variety of flowering plants that provide nectar and pollen, such as marigolds and sunflowers. Additionally, avoid using harmful pesticides.
Q: What should I do if I notice a pest problem in my garden?
A: First, identify the pest and assess the level of damage. You can introduce beneficial insects or use organic pest control methods to manage the situation.
Q: Are all insects in my garden harmful?
A: No, many insects are beneficial and play crucial roles in pollination and pest control. It's essential to identify which insects are helpful before taking action.
Q: How do I know if beneficial insects are present in my garden?
A: Look for signs such as reduced pest populations and the presence of insects like ladybugs, lacewings, and predatory wasps.
Organic Pest Control Methods
When it comes to maintaining a vibrant and fruitful vegetable garden, are the way to go. Not only do they help safeguard your plants from harmful insects, but they also promote a healthier ecosystem. Imagine your garden as a bustling city, where every insect plays a role in the community. Some are the villains, while others are the heroes. By using organic methods, you're essentially enlisting the help of these heroes to combat the villains.
One of the most effective organic pest control strategies is to introduce beneficial insects into your garden. These little allies, such as ladybugs and lacewings, love to feast on aphids and other pesky bugs that threaten your plants. You can attract these beneficial insects by planting a variety of flowers and herbs, which provide them with nectar and pollen. Think of it as throwing a party for your garden's good guys!
Another powerful organic method is the use of natural repellents. Ingredients like neem oil, garlic, and diatomaceous earth can deter pests without harming the environment. For example, neem oil disrupts the life cycle of insects, making it difficult for them to reproduce. It’s like putting a roadblock in their path, preventing them from reaching your precious vegetables. To use these natural repellents effectively, simply mix them with water and spray them on your plants. Just remember to apply them in the early morning or late evening to avoid harming beneficial insects.
Creating a diverse garden is also a vital step in organic pest control. By planting a variety of vegetables and companion plants, you can confuse pests and reduce their chances of finding their favorite meals. For instance, marigolds are known to repel nematodes and other harmful insects while attracting beneficial ones. This diversity acts like a natural shield, protecting your garden from pest invasions.
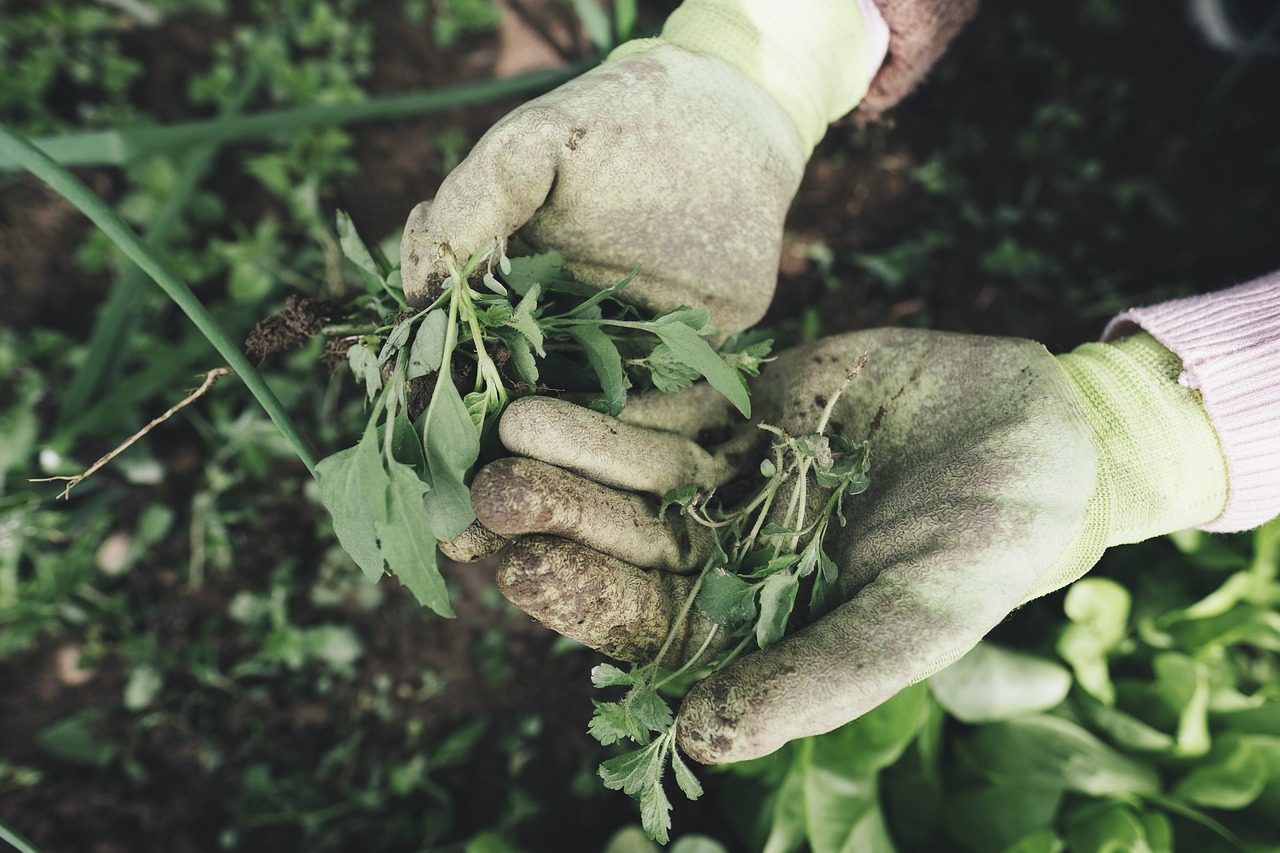
Additionally, practicing good garden hygiene can significantly reduce pest problems. Regularly removing dead leaves, weeds, and debris can help eliminate breeding grounds for pests. Think of it as cleaning up after a party; the less mess there is, the fewer uninvited guests will show up!
In summary, organic pest control methods are not just about eliminating pests; they are about creating a balanced ecosystem in your garden. By using beneficial insects, natural repellents, diverse planting, and maintaining cleanliness, you can effectively manage pests while nurturing the environment. This holistic approach not only protects your vegetables but also contributes to a sustainable gardening practice.
- What are the benefits of using organic pest control methods? Organic methods are safer for the environment, reduce chemical exposure, and promote biodiversity in your garden.
- How do I attract beneficial insects to my garden? Plant a variety of flowers and herbs that provide nectar and pollen to attract these helpful allies.
- Can I use homemade remedies for pest control? Yes! Many household ingredients like garlic and neem oil can be effective natural repellents.
- How often should I apply organic pest control methods? It depends on the severity of the pest problem, but regular monitoring and application can help keep pests at bay.
Harvesting Your Vegetables
Harvesting your vegetables is one of the most rewarding parts of gardening, akin to unwrapping a gift after months of hard work and anticipation. Knowing when and how to harvest is crucial for maximizing both flavor and yield. Timing is everything; you don’t want to pick too early or too late. Each vegetable has its own set of signs that indicate it’s ready to be picked. For instance, tomatoes should be harvested when they are a deep red color, while zucchini is best picked when it’s about 6 to 8 inches long. This not only ensures peak flavor but also encourages the plant to produce more fruits.
To make the most of your harvest, it’s essential to use the right techniques. Gently twist or cut the vegetables from their stems instead of yanking them, as this can damage the plant and hinder further growth. For leafy greens like lettuce or spinach, you can use scissors to snip off the outer leaves, allowing the inner leaves to continue growing. This method, called “cut and come again,” can extend your harvest season significantly. Remember, the fresher the vegetable, the better the taste, so aim to eat your harvest as soon as possible!
Understanding the signs of ripeness is key to successful harvesting. Each type of vegetable has its own unique indicators. For example, bell peppers can be harvested when they are green, but if you wait a little longer, they will turn red and become sweeter. Similarly, carrots can be pulled when they reach about an inch in diameter, but waiting a bit longer can enhance their flavor. Here’s a quick reference table to help you identify the right time to harvest some common vegetables:
| Vegetable | Harvest Time Indicators |
|---|---|
| Tomatoes | Deep red color, firm texture |
| Carrots | 1 inch in diameter, vibrant color |
| Zucchini | 6-8 inches long, shiny skin |
| Bell Peppers | Green or red, firm to touch |
| Lettuce | Outer leaves are large enough to harvest |
Once you’ve harvested your vegetables, the next step is ensuring they stay fresh for as long as possible. Different vegetables require different storage methods. For instance, leafy greens should be washed and stored in a damp paper towel inside a plastic bag in the fridge. On the other hand, root vegetables like potatoes and carrots can be stored in a cool, dark place to prolong their shelf life. Here are some effective storage techniques:
- Refrigeration: Ideal for leafy greens and herbs.
- Cool, dark storage: Best for root vegetables.
- Freezing: Great for preserving surplus vegetables, but blanch them first to maintain flavor and texture.
By understanding these harvesting and storage techniques, you can enjoy the fruits of your labor long after the growing season has ended. Remember, a successful harvest isn’t just about quantity; it’s about quality and flavor, which can elevate your culinary creations to a whole new level. So get out there, enjoy the process, and savor every bite of your garden's bounty!
1. When is the best time to harvest vegetables?
The best time to harvest vegetables varies by type. Generally, it’s best to harvest in the morning when temperatures are cooler, and the vegetables are crisp and full of moisture.
2. How can I tell if my vegetables are ripe?
Each vegetable has specific signs of ripeness. For example, tomatoes should be fully colored and firm; cucumbers should be picked while they are still young and tender.
3. Can I store harvested vegetables in the refrigerator?
Yes, many vegetables can be stored in the refrigerator, especially leafy greens and herbs. Just be sure to keep them in a breathable container to prevent moisture buildup.
4. What should I do with excess vegetables?
If you have more vegetables than you can eat, consider freezing, pickling, or sharing with friends and family to avoid waste.
Timing Your Harvest
This article provides essential tips and tricks for novice gardeners, covering everything from soil preparation to pest control, ensuring a successful and rewarding vegetable gardening experience.
Selecting the right vegetables for your garden is crucial. This section discusses factors such as climate, seasonality, and personal preferences to help beginners make informed choices.
Healthy soil is the foundation of a successful garden. Here, we explore soil types, amendments, and testing methods to ensure your garden has the nutrients it needs to thrive.
Understanding soil composition is vital. This subheading explains various soil testing methods and how to interpret results for optimal gardening success.
Learn about the importance of pH levels in soil health and how to adjust them to create a suitable environment for vegetable growth.
Discover the benefits of using organic amendments such as compost and manure to enrich your soil and promote sustainable gardening practices.
A well-planned garden layout maximizes space and sunlight. This section offers tips on designing your garden for optimal growth and accessibility.
Proper watering is essential for healthy plants. This subheading discusses various watering techniques and schedules to keep your garden hydrated without overwatering.
Explore the pros and cons of drip irrigation systems compared to traditional sprinklers, helping you choose the best option for your garden's needs.
Learn to recognize the signs of overwatering in your plants, ensuring you maintain the right balance for healthy growth.
Managing pests effectively is key to a thriving vegetable garden. This section covers natural and chemical methods for keeping your plants safe from harmful insects.
Discover how beneficial insects can help control pest populations naturally, promoting a healthy ecosystem in your garden.
Explore various organic pest control methods that are safe for your vegetables and the environment, ensuring a sustainable gardening approach.
Knowing when and how to harvest your vegetables is crucial for maximizing flavor and yield. This section provides guidance on the best practices for harvesting different types of vegetables.
Timing your harvest can be the difference between a mediocre meal and a culinary masterpiece. Just like a perfectly ripe fruit, vegetables have their own unique signals that tell you when they’re ready to be picked. For instance, tomatoes should be harvested when they are fully colored and slightly soft to the touch. On the other hand, leafy greens can be picked when they reach a desirable size, but it's best to leave some leaves on the plant to encourage further growth.
To ensure you’re harvesting at the right time, keep an eye on the following indicators:
- Color: Look for vibrant colors as a sign of ripeness. A dull appearance often means the vegetable is not ready.
- Size: Each vegetable has an ideal size for harvesting; refer to seed packets or gardening guides for specifics.
- Texture: Some vegetables, like cucumbers, should feel firm yet slightly yielding when ready for harvest.
Additionally, consider the time of day for harvesting. Early morning is often the best time, as plants are hydrated and their flavors are at their peak. However, if you’re harvesting root vegetables like carrots or potatoes, late afternoon is ideal since the soil is softer and easier to work with.
To help you visualize the best harvesting times, here’s a quick reference table:
| Vegetable | Best Time to Harvest | Indicators of Ripeness |
|---|---|---|
| Tomatoes | When fully colored | Soft to the touch |
| Cucumbers | Early morning | Firm and slightly yielding |
| Carrots | Late afternoon | Size and color |
| Lettuce | Anytime | Desirable size |
By paying attention to these signs and following the best practices, you’ll be able to enjoy a bountiful harvest that not only tastes great but also provides a sense of accomplishment. Remember, the joy of gardening is in the journey, so take your time and savor each moment!
Explore effective storage techniques to prolong the freshness of your harvested vegetables, ensuring you enjoy your garden's bounty for weeks to come.
Q: How can I tell if my vegetables are ready to be harvested?
A: Look for signs like color, size, and texture. Each vegetable has specific indicators that suggest it's ready to be picked.
Q: When is the best time of day to harvest my vegetables?
A: Early morning is often ideal for most vegetables, but root vegetables are best harvested in the late afternoon.
Q: How do I store my harvested vegetables to keep them fresh?
A: Store your vegetables in a cool, dark place. Some may require refrigeration, while others do best in a pantry.

Storing Your Harvest
After all the hard work you’ve put into your vegetable garden, the last thing you want is for your harvest to go to waste. Proper storage is essential to maintain the freshness and flavor of your vegetables, ensuring you can enjoy the fruits of your labor for weeks or even months. So, how do you go about storing your precious produce? Let’s dive into some effective storage techniques that will keep your vegetables tasting their best.
First and foremost, it’s important to know that different vegetables have different storage requirements. For instance, root vegetables like carrots and potatoes thrive in cool, dark places, while leafy greens prefer a more humid environment. Here’s a quick overview of some popular vegetables and their ideal storage conditions:
| Vegetable | Ideal Storage Temperature | Humidity Level |
|---|---|---|
| Carrots | 32°F (0°C) | High |
| Potatoes | 45°F (7°C) | Low |
| Tomatoes | 55°F (13°C) | Moderate |
| Leafy Greens | 32°F (0°C) | High |
Next, let’s talk about the importance of cleaning your vegetables before storage. It might be tempting to just toss them in the fridge, but giving them a gentle wash can help remove dirt and bacteria that could lead to spoilage. Just be sure to dry them thoroughly afterward, as excess moisture can promote mold growth. For leafy greens, consider wrapping them in a damp paper towel before placing them in a plastic bag to maintain humidity without causing sogginess.
Another crucial aspect of storing your harvest is understanding the concept of ripening. Some vegetables, like avocados and bananas, continue to ripen after being picked. If you have any of these in your stash, store them at room temperature until they reach your desired ripeness, then move them to the fridge to prolong their life. On the other hand, some vegetables should never be stored together as they can emit gases that accelerate ripening and spoilage. For example, keep your apples away from your potatoes!
For longer-term storage, consider methods like freezing, canning, or dehydrating. Freezing is a fantastic option for vegetables like peas, corn, and bell peppers. Just blanch them briefly in boiling water, cool them in ice water, and then pack them in airtight containers or freezer bags. Canning is a bit more involved but can be a rewarding way to preserve your harvest for months. Dehydrating is great for herbs and some fruits, allowing you to create flavorful additions to your meals year-round.
Finally, always keep an eye on your stored vegetables. Regularly check for any signs of spoilage, and remove any affected items immediately to prevent them from affecting the rest of your stash. Remember, the goal is to savor the taste of your homegrown veggies as long as possible!
- How long can I store my vegetables? - The storage life varies by vegetable; for example, carrots can last several weeks in the fridge, while tomatoes are best consumed within a week.
- Can I store vegetables together? - It’s best to store vegetables that emit ethylene gas, like apples, away from those that are sensitive to it, like potatoes.
- Is freezing vegetables worth it? - Absolutely! Freezing preserves flavor and nutrients, making it a great option for long-term storage.
Frequently Asked Questions
- What vegetables are best for beginners to grow?
For beginners, it's best to start with vegetables that are easy to grow and require minimal care. Some great options include radishes, lettuce, carrots, and zucchini. These vegetables are forgiving and can thrive in various conditions, making them perfect for novice gardeners.
- How do I prepare my soil for planting?
Preparing your soil involves several steps. First, you should test the soil to understand its pH and nutrient levels. Then, amend the soil with organic materials like compost or manure to enrich it. Finally, till the soil to ensure it's loose and ready for planting.
- What is the best way to water my vegetable garden?
Proper watering techniques are crucial for healthy plants. A drip irrigation system is often the best choice as it delivers water directly to the roots, minimizing waste. Alternatively, you can use a soaker hose or water by hand, ensuring the soil is moist but not soggy.
- How can I control pests in my vegetable garden?
Managing pests can be tricky, but there are effective methods. You can introduce beneficial insects like ladybugs that prey on harmful pests. Additionally, consider using organic pest control methods such as neem oil or insecticidal soap to keep your garden safe without harsh chemicals.
- When is the best time to harvest my vegetables?
The best time to harvest varies by vegetable, but a general rule is to pick them when they are fully mature and at their peak flavor. Look for signs like size, color, and firmness. For example, tomatoes should be fully colored and slightly soft to the touch before harvesting.
- How should I store my harvested vegetables?
To keep your vegetables fresh, store them in a cool, dark place. Most leafy greens do well in the refrigerator, while root vegetables can be stored in a cool cellar or root cellar. Make sure to remove any damaged or spoiled produce to prevent spoilage.


