
Eco-Friendly Techniques to Improve Soil Fertility
This article explores sustainable practices that enhance soil health and fertility, ensuring a productive ecosystem while minimizing environmental impact. Discover various methods, benefits, and tips for implementing these techniques effectively.
Soil fertility is crucial for plant growth and agricultural productivity. It refers to the ability of soil to provide essential nutrients to plants, which are vital for their growth and development. The components of soil fertility include nutrients, pH levels, and organic matter. Each of these factors plays a significant role in the overall health of the soil and, consequently, the plants that rely on it. Maintaining soil fertility is vital for sustainable farming practices, as it directly impacts crop yields and the quality of the produce.
Composting transforms organic waste into nutrient-rich soil amendments. By recycling kitchen scraps, yard waste, and other biodegradable materials, composting not only reduces landfill waste but also enriches the soil naturally. The composting process involves a few simple steps that anyone can follow to create their own compost pile, leading to healthier plants and improved soil quality.
Creating compost can be a rewarding experience. Start by selecting a suitable location for your compost pile or bin. Next, gather materials like fruit and vegetable scraps, grass clippings, and leaves. Maintain the pile by turning it regularly to aerate it and keep the moisture levels balanced. This ensures optimal decomposition and nutrient availability for your soil. The end result is a rich, dark compost that can be added to your garden beds, enhancing soil fertility.
When it comes to composting, not all materials are created equal. Here are some of the best organic materials to include:
- Kitchen Scraps: Vegetable peels, fruit cores, and coffee grounds.
- Yard Waste: Grass clippings, leaves, and small branches.
- Other Biodegradable Items: Shredded paper and cardboard (avoid glossy paper).
To achieve the best results from your compost, it's essential to manage moisture, aeration, and temperature. Aim for a moisture level that feels like a damp sponge. If the pile is too dry, add water; if it's too wet, add dry materials like straw or shredded paper. Aeration is crucial, so turn the pile regularly to allow oxygen to reach the microorganisms that break down the materials. Keeping the temperature within the ideal range (between 130°F and 160°F) will promote efficient decomposition.
The benefits of composting are numerous and impactful. By improving soil structure, enhancing nutrient content, and reducing waste, composting becomes an essential practice for eco-friendly gardening. Not only does it provide plants with the nutrients they need, but it also increases soil's ability to retain moisture, which is particularly beneficial during dry spells.
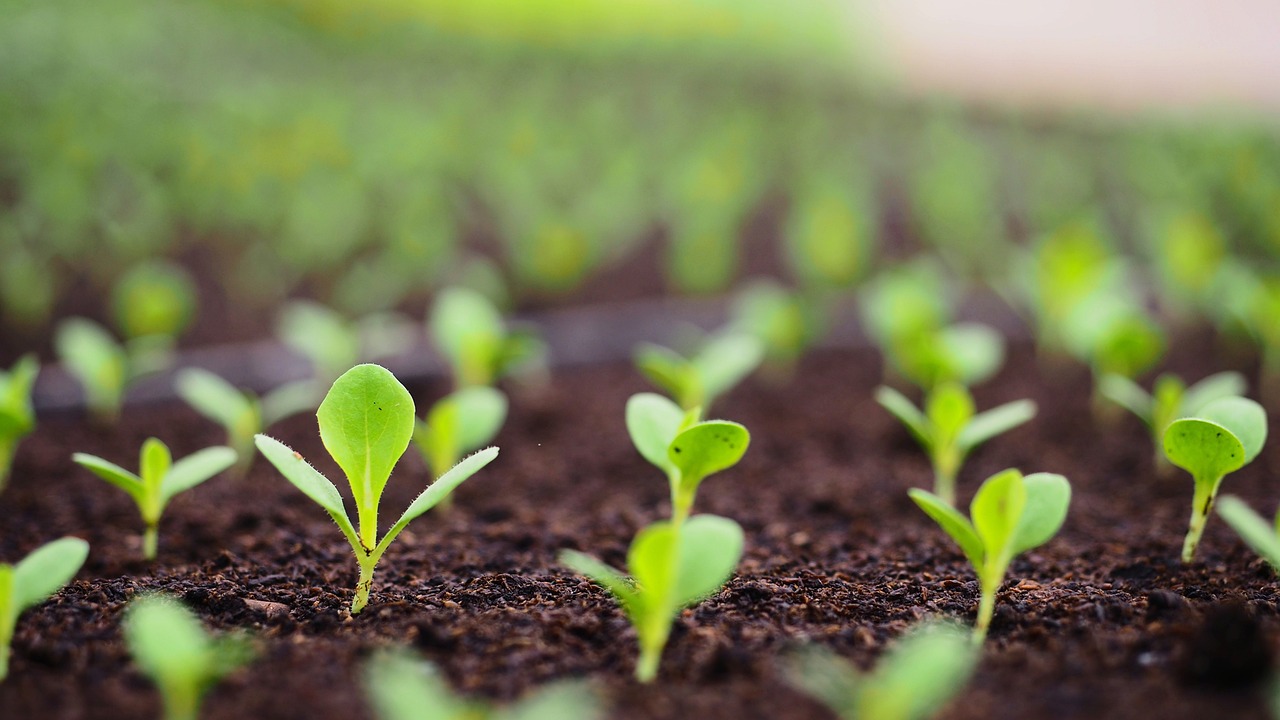
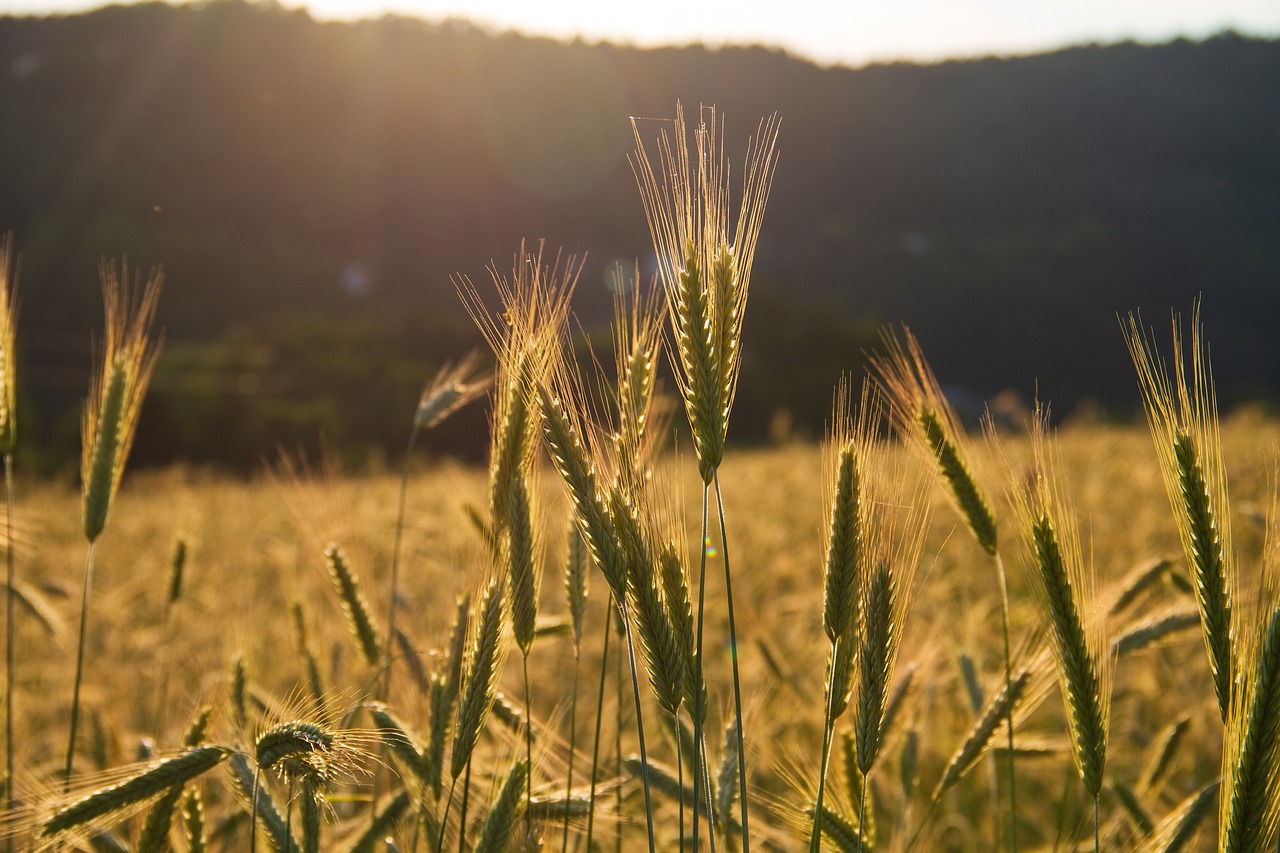
Cover cropping involves planting specific crops designed to improve soil health. These crops, often referred to as "green manure," are grown primarily to benefit the soil rather than for harvest. They play a crucial role in enhancing soil fertility by preventing erosion, improving soil structure, and increasing organic matter content.
There are various types of cover crops, including:
- Legumes: Such as clover and vetch, which fix nitrogen in the soil.
- Grasses: Like rye and oats, which help prevent erosion and improve soil structure.
These plants not only enhance soil fertility but also provide habitat for beneficial insects, contributing to a balanced ecosystem.
To effectively incorporate cover crops into your rotation, consider factors like timing and planting methods. It's essential to plant cover crops during the off-season when main crops are not growing. Termination methods, such as mowing or tilling, should be planned to ensure that the cover crops decompose and enrich the soil before planting the next crop.
Organic fertilizers are sustainable alternatives to synthetic products. They are derived from natural sources and provide essential nutrients to plants without the harmful effects associated with chemical fertilizers. By using organic fertilizers, you can improve soil fertility while promoting a healthier ecosystem.
Some common organic fertilizers include:
- Manure: Rich in nutrients, it enhances soil fertility significantly.
- Bone Meal: Provides phosphorus, essential for root development.
- Fish Emulsion: A fast-acting liquid fertilizer rich in nitrogen.
To ensure even distribution and optimal nutrient absorption by plants, it's important to apply organic fertilizers correctly. Spread the fertilizer evenly around the base of plants, and consider using a soil test to guide your application rates. This approach helps in achieving better results and promotes healthier plant growth.
Mulching is an effective technique for protecting soil and enhancing fertility. By covering the soil with a layer of organic or inorganic materials, mulching helps retain moisture, suppress weeds, and improve soil temperature. It is a simple yet powerful method to maintain soil health.
There are various types of mulch you can use, including:
- Organic Mulch: Such as straw, wood chips, and shredded leaves.
- Inorganic Mulch: Like landscape fabric or plastic sheeting.
Each type has its specific benefits, from enhancing soil health to regulating temperature, making it important to choose the right one for your garden.
To maximize the benefits of mulching, apply it at the right depth (usually 2-4 inches) and at the right time (preferably in spring or fall). Choose materials that complement your garden’s aesthetics and functionality, and remember to replenish the mulch as it decomposes over time.
Crop rotation is essential for maintaining soil fertility and preventing nutrient depletion. By alternating the types of crops grown in a particular area, you can enhance soil health and reduce the risk of pests and diseases.
Understanding the advantages of crop rotation is key to sustainable farming. It aids in pest control, enhances nutrient cycling, and improves soil structure, leading to healthier crops and a more resilient ecosystem. By rotating crops, you can also break the lifecycle of pests and diseases, reducing the need for chemical interventions.
To develop an effective crop rotation plan, consider your specific soil and crop needs. Identify which crops will follow others based on their nutrient requirements and pest susceptibility. This strategic approach ensures optimal nutrient management and sustained soil fertility over time.
Regular soil testing is crucial for understanding nutrient levels and pH balance. By conducting soil tests, you can make informed decisions about how to enhance soil fertility. This process helps you identify nutrient deficiencies and allows for tailored amendments to improve soil health.
There are several methods for conducting soil tests, including DIY kits available at garden centers and professional services. Collect samples from various locations in your garden to get an accurate representation of your soil's health. Follow the instructions carefully to ensure reliable results.
Once you receive your soil test results, it's essential to understand what they mean. Look for nutrient deficiencies and pH levels, as these will guide your soil fertility management strategies. Adjust your practices based on the results to optimize soil health and plant growth.
Adopting sustainable practices is essential for long-term soil fertility. Techniques such as integrated pest management and reduced tillage can significantly contribute to maintaining healthy soil ecosystems. By focusing on sustainable methods, you can ensure that your soil remains fertile for generations to come.
Integrated pest management (IPM) enhances soil fertility by promoting biodiversity and reducing chemical inputs. This holistic approach encourages the use of natural predators and biological controls, leading to healthier soils and crops. By fostering a balanced ecosystem, IPM can improve overall agricultural sustainability.
Reduced tillage practices preserve soil structure and fertility while minimizing erosion and enhancing moisture retention. By limiting soil disturbance, you can maintain the natural habitat of beneficial organisms and improve soil health over time. This practice is a cornerstone of sustainable agriculture.
In conclusion, implementing eco-friendly techniques is vital for improving soil fertility. By adopting practices such as composting, cover cropping, and organic fertilization, you can contribute to a healthier ecosystem. It's essential to embrace these sustainable methods for a brighter agricultural future.
1. What is the best way to start composting?
Begin by selecting a suitable location, gathering organic materials, and maintaining the right moisture and aeration levels.
2. How often should I test my soil?
It's recommended to test your soil at least once a year or before planting a new crop to ensure optimal nutrient management.
3. Can I use chemical fertilizers alongside organic practices?
While it's possible, it's best to focus on organic methods to maintain soil health and reduce environmental impact.
Understanding Soil Fertility
Soil fertility is the backbone of successful farming and gardening. It refers to the soil's ability to provide essential nutrients to plants, enabling them to grow strong and healthy. Think of soil fertility as a buffet for plants; the more diverse and nutrient-rich the offerings, the better the plants can thrive. But what exactly makes soil fertile? It's a combination of several key components that work together to create a vibrant ecosystem.
First and foremost, nutrients play a crucial role in soil fertility. These include primary nutrients like nitrogen (N), phosphorus (P), and potassium (K), as well as secondary nutrients such as calcium, magnesium, and sulfur. Each of these elements serves a specific purpose in plant growth. For example, nitrogen is vital for leaf development, while phosphorus promotes root and flower growth. Without these nutrients, plants can struggle to survive, leading to poor yields and unhealthy crops.
Another important aspect is the pH level of the soil. Soil pH affects nutrient availability; for instance, certain nutrients become less available to plants if the soil is too acidic or too alkaline. Ideally, most crops thrive in soil with a pH range of 6.0 to 7.5. Therefore, understanding and managing soil pH is essential for maintaining optimal fertility.
Lastly, organic matter is a vital component of fertile soil. It includes decomposed plant and animal materials that enrich the soil with nutrients and improve its structure. Organic matter enhances the soil's ability to retain moisture and provides a habitat for beneficial microorganisms. These microorganisms, in turn, help break down organic materials, releasing nutrients back into the soil for plants to use. A soil rich in organic matter is often dark, crumbly, and teeming with life, making it an ideal environment for plant growth.
In summary, understanding soil fertility involves recognizing the interplay between nutrients, pH levels, and organic matter. By maintaining a balanced and healthy soil ecosystem, farmers and gardeners can ensure that their plants receive the nourishment they need to flourish. So, how do we maintain and improve soil fertility? The following sections will explore various eco-friendly techniques that can enhance soil health sustainably.
- What is the best way to test soil fertility? Regular soil testing using DIY kits or professional services can help you assess nutrient levels and pH balance.
- How often should I amend my soil? It depends on your soil's current health, but annual testing and amendments based on results are generally recommended.
- Can I improve soil fertility without synthetic fertilizers? Absolutely! Techniques like composting, cover cropping, and using organic fertilizers can enhance soil fertility sustainably.

Composting for Soil Enrichment
Composting is one of the most effective and sustainable methods to enrich your soil naturally. By transforming organic waste into a rich, nutrient-dense amendment, composting not only enhances soil fertility but also reduces landfill waste. Imagine turning your kitchen scraps and yard debris into a black gold that nourishes your plants! This process mimics nature's recycling system, allowing you to create a vibrant ecosystem right in your backyard.
So, what exactly goes into compost? The composting process involves a variety of organic materials, which can be broadly categorized into two types: greens and browns. Greens are nitrogen-rich materials, such as:
- Fruit and vegetable scraps
- Grass clippings
- Coffee grounds
On the other hand, browns provide carbon and include materials like:
- Dry leaves
- Cardboard
- Wood chips
For a successful compost, it's essential to maintain a balance between these two categories, ideally in a ratio of about 2:1 (browns to greens). This balance ensures that the compost pile heats up properly, promoting the breakdown of materials and the release of nutrients.
Creating compost is not just about throwing scraps into a pile; it’s a science and an art! Start by selecting a suitable location for your compost bin—ideally, a spot that’s easily accessible and has good drainage. Begin layering your greens and browns, alternating between them to achieve that perfect balance. As you build your pile, make sure to keep it moist but not soggy; think of it like a damp sponge. Turning the pile every few weeks introduces oxygen, which is crucial for the microorganisms that break down the materials.
When it comes to materials, the more diverse, the better! Besides kitchen scraps and yard waste, you can also add:
- Eggshells
- Shredded newspaper
- Hair and fur
However, be cautious about what you include. Avoid adding meat, dairy, and oily foods, as they can attract pests and create odors. By selecting the right materials, you’ll create a compost that is not only nutrient-rich but also free from unwanted visitors.
Maintaining your compost is key to achieving a successful result. Monitor the moisture level regularly; if it feels too dry, add some water or more greens. If it’s too wet, add more browns to soak up excess moisture. Additionally, aim to turn your pile every 2-4 weeks. This aeration process speeds up decomposition and helps you avoid that dreaded compost smell. With a little patience and care, your compost will break down into a dark, crumbly substance in just a few months!
The benefits of composting extend far beyond just enriching your soil. By incorporating compost into your gardening routine, you can:
- Improve soil structure: Compost helps to create a crumbly texture in the soil, enhancing drainage and aeration.
- Enhance nutrient content: It releases essential nutrients slowly, providing a steady supply to your plants.
- Reduce waste: Composting diverts organic waste from landfills, significantly lowering your carbon footprint.
In essence, composting is a win-win situation. It not only benefits your garden but also contributes to a healthier planet.
1. How long does it take to make compost?
Typically, compost can take anywhere from a few weeks to several months to fully decompose, depending on factors like the materials used, moisture levels, and how often you turn the pile.
2. Can I compost meat and dairy?
It’s best to avoid composting meat, dairy, and oily foods as they can attract pests and create odors. Stick to plant-based materials for the best results.
3. How do I know when my compost is ready?
Your compost is ready when it looks dark, crumbly, and smells earthy. It should resemble rich soil and should no longer have recognizable pieces of the original materials.
The Composting Process
Composting is a fantastic way to transform your kitchen scraps and yard waste into nutrient-rich soil amendments that can significantly boost the fertility of your garden. The composting process involves several key steps that, when followed correctly, can yield a rich compost that your plants will love. First, you need to select the right materials to include in your compost pile. This is crucial because the balance of green (nitrogen-rich) and brown (carbon-rich) materials will determine how quickly and efficiently your compost breaks down.
To start the composting process, gather your materials. You should aim for a mix of:
- Green materials: These include items like vegetable scraps, grass clippings, and coffee grounds. They provide the nitrogen necessary for microbial growth.
- Brown materials: Think dried leaves, cardboard, and straw. These are rich in carbon and help balance the nitrogen-rich greens.
Once you have your materials, it's time to build your compost pile. Start with a layer of coarse materials, like twigs or straw, at the bottom to promote aeration. Then alternate layers of greens and browns, making sure to keep the pile moist but not soggy. The moisture level is essential; too little will slow down decomposition, while too much can lead to anaerobic conditions that produce foul odors.
Next, maintaining your compost pile is vital for optimal decomposition. Regularly turning the pile with a pitchfork or shovel helps aerate it, promoting the activity of aerobic bacteria, which are crucial for breaking down organic matter. Aim to turn your compost every few weeks, and monitor the temperature. A well-maintained compost pile can reach temperatures of 130-160°F (54-71°C), which is ideal for killing off pathogens and weed seeds.
As your compost breaks down, it will shrink in size and eventually become dark, crumbly, and earthy-smelling. This process can take anywhere from a few weeks to several months, depending on various factors, including the materials used and environmental conditions. When your compost is ready, you can use it to enrich your garden soil, providing essential nutrients for your plants and improving soil structure.
In summary, the composting process is not just about throwing waste into a pile; it's a careful balance of materials, moisture, and maintenance that leads to a rich, organic product. By investing a little time and effort into composting, you can significantly enhance your soil fertility and contribute to a healthier ecosystem.
Q: How long does it take for compost to be ready?
A: Typically, compost can take anywhere from 3 months to a year to mature, depending on how well you maintain the pile and the materials used.
Q: Can I compost meat and dairy products?
A: It's generally not recommended to compost meat and dairy due to the potential for odors and attracting pests. Stick to vegetable scraps and plant materials for best results.
Q: What should I do if my compost pile smells bad?
A: A smelly compost pile often indicates too much moisture or an imbalance of greens and browns. Try adding more brown materials and turning the pile to aerate it.
Q: Is it necessary to turn the compost pile?
A: While it's not strictly necessary, turning the compost helps aerate it and speeds up the decomposition process, leading to quicker results.
Materials for Composting
When it comes to composting, the choice of materials you use can significantly impact the quality of your compost. The key is to strike a balance between green materials and brown materials. Green materials are rich in nitrogen, while brown materials are high in carbon. This balance is essential for creating a healthy compost pile that breaks down efficiently and provides the nutrients your soil craves.
Some common green materials include:
- Kitchen scraps: Fruit and vegetable peels, coffee grounds, and eggshells are excellent sources of nitrogen.
- Grass clippings: Freshly cut grass is another nitrogen-rich addition that can help speed up the composting process.
- Green leaves: Soft, green leaves from plants can also contribute valuable nutrients.
On the other hand, brown materials are crucial for providing structure to your compost pile, allowing air to circulate and preventing it from becoming too compacted. Some effective brown materials include:
- Dried leaves: Shredded leaves from your yard are a fantastic source of carbon.
- Cardboard: When torn up into small pieces, cardboard can help aerate your compost.
- Straw or hay: These materials not only add carbon but also create air pockets in the pile.
In addition to these basic materials, you can also include:
- Wood chips: These add carbon and improve aeration.
- Newspaper: Shredded newspaper can be a good source of carbon, but use it sparingly to avoid excess acidity.
It's important to avoid adding certain materials that can harm your compost, such as:
- Meat and dairy products: These can attract pests and create odors.
- Oils and fats: Similar to meat, these can lead to unpleasant smells and attract unwanted animals.
- Diseased plants: If you add these, you risk spreading disease to your garden.
By carefully selecting the right combination of materials for your compost pile, you can create a rich, organic amendment that enhances soil fertility and supports a thriving garden ecosystem. Remember, the goal is to create an environment where microorganisms can thrive, breaking down organic matter into a nutrient-rich soil amendment. So, gather your greens and browns, and let nature do its magic!
1. What is the ideal ratio of green to brown materials for composting?
The ideal ratio is typically around 1 part green materials to 3 parts brown materials. This balance helps maintain proper aeration and moisture levels in your compost pile.
2. Can I compost meat and dairy products?
It's best to avoid composting meat and dairy products as they can attract pests and create unpleasant odors. Stick to plant-based materials for a healthier compost.
3. How often should I turn my compost pile?
Turning your compost pile every 4-6 weeks can help aerate it and speed up the decomposition process. However, if you prefer a "set it and forget it" method, that's fine too; just be aware it may take longer to break down.
4. How long does it take for compost to be ready?
Depending on the materials used and the conditions of your compost pile, it can take anywhere from a few months to a year for compost to be ready. Regular turning and maintaining moisture levels can speed up the process.
5. Can I compost weeds?
Yes, you can compost weeds, but make sure they haven’t gone to seed. If they have, it’s better to dispose of them in another way to prevent them from sprouting in your garden later.

Maintaining Your Compost
Keeping your compost pile healthy and productive is akin to nurturing a living organism. Just like a plant needs water, sunlight, and nutrients, your compost requires attention to moisture, aeration, and temperature to thrive. The first step in maintaining your compost is ensuring it has the right level of moisture. A compost pile should feel like a damp sponge—moist but not soggy. If it’s too dry, the decomposition process will slow down, and if it’s too wet, you risk creating a smelly mess. To achieve this balance, consider adding water during dry spells or mixing in dry materials, like leaves or straw, if it becomes too wet.
Aeration is another crucial factor in compost maintenance. Just as we need air to breathe, your compost needs oxygen to support the bacteria that break down organic matter. Regularly turning your compost pile with a pitchfork or shovel not only introduces air but also mixes the materials, promoting quicker decomposition. Aim to turn your compost every few weeks, or whenever it starts to look compacted. This process can be likened to giving your compost a good shake to wake it up!
Temperature is also an essential aspect of composting. A well-maintained compost pile will generate heat as the organic materials decompose. Ideally, the temperature should rise between 130°F and 160°F (54°C to 71°C). This heat helps kill off pathogens and weed seeds, ensuring a healthy end product. You can monitor the temperature with a compost thermometer, which can be inserted into the center of the pile. If you notice the temperature dropping, it may be time to turn the pile or add more nitrogen-rich materials, like grass clippings or kitchen scraps, to reignite the heating process.
To summarize, maintaining your compost effectively involves:
- Moisture Management: Keep it damp, not soggy.
- Aeration: Turn the pile regularly to introduce oxygen.
- Temperature Monitoring: Ensure it stays warm to promote decomposition.
By following these simple yet effective maintenance tips, you’ll create a thriving compost environment that not only enriches your soil but also reduces waste and promotes sustainability. Remember, composting is a journey, and with a little patience and care, you’ll be rewarded with black gold—nutrient-rich compost that your plants will love!
Q: How often should I turn my compost?
A: Aim to turn your compost every few weeks, or whenever it looks compacted. This helps aerate the pile and speeds up decomposition.
Q: What should I do if my compost smells bad?
A: A bad smell usually indicates that your compost is too wet or lacks oxygen. Try adding dry materials like leaves or straw and turning the pile to introduce air.
Q: Can I compost meat or dairy products?
A: It's best to avoid composting meat and dairy, as they can attract pests and create odors. Stick to vegetable scraps, yard waste, and other plant-based materials for a successful compost.

Benefits of Composting
Composting is not just a trendy buzzword in the world of gardening; it’s a powerful practice that offers a multitude of benefits for both your garden and the environment. By recycling organic waste, composting enriches the soil, promotes healthy plant growth, and reduces the need for chemical fertilizers. Imagine transforming your kitchen scraps and yard waste into a dark, crumbly substance that is teeming with life. That’s the magic of compost!
One of the most significant advantages of composting is its ability to improve soil structure. When you add compost to your garden, it enhances the soil’s texture, making it more aerated and better at retaining moisture. This is particularly important during dry spells when plants need all the water they can get. A well-aerated soil allows roots to breathe, leading to healthier plants that are more resilient to disease and pests.
Moreover, compost is a natural source of nutrients. Instead of relying on synthetic fertilizers that can leach into waterways and cause pollution, compost provides a slow-release source of essential elements such as nitrogen, phosphorus, and potassium. This gradual release ensures that plants have access to nutrients over time, which helps them grow stronger and more robust.
Here are some additional benefits of composting:
- Reduces Waste: Composting diverts organic materials from landfills, significantly reducing waste and lowering greenhouse gas emissions.
- Encourages Biodiversity: The microorganisms and beneficial insects that thrive in compost contribute to a healthier ecosystem in your garden.
- Cost-Effective: By using compost, you can reduce your spending on commercial fertilizers and improve your garden’s productivity naturally.
In essence, composting is a sustainable practice that not only enhances soil fertility but also fosters a healthier environment. Whether you’re a seasoned gardener or just starting out, incorporating compost into your soil management strategy is a step towards a more eco-friendly and productive garden.
Q: Can I compost meat and dairy products?
A: It’s best to avoid composting meat and dairy products as they can attract pests and create odors. Stick to plant-based materials for a healthier compost pile.
Q: How long does it take for compost to be ready?
A: The time it takes for compost to mature can vary, but typically it takes anywhere from 3 months to a year, depending on the materials used and how well the pile is maintained.
Q: What should I do if my compost pile smells bad?
A: A smelly compost pile usually indicates that it’s too wet or lacks aeration. Try adding dry materials like leaves or straw and turning the pile to introduce air.

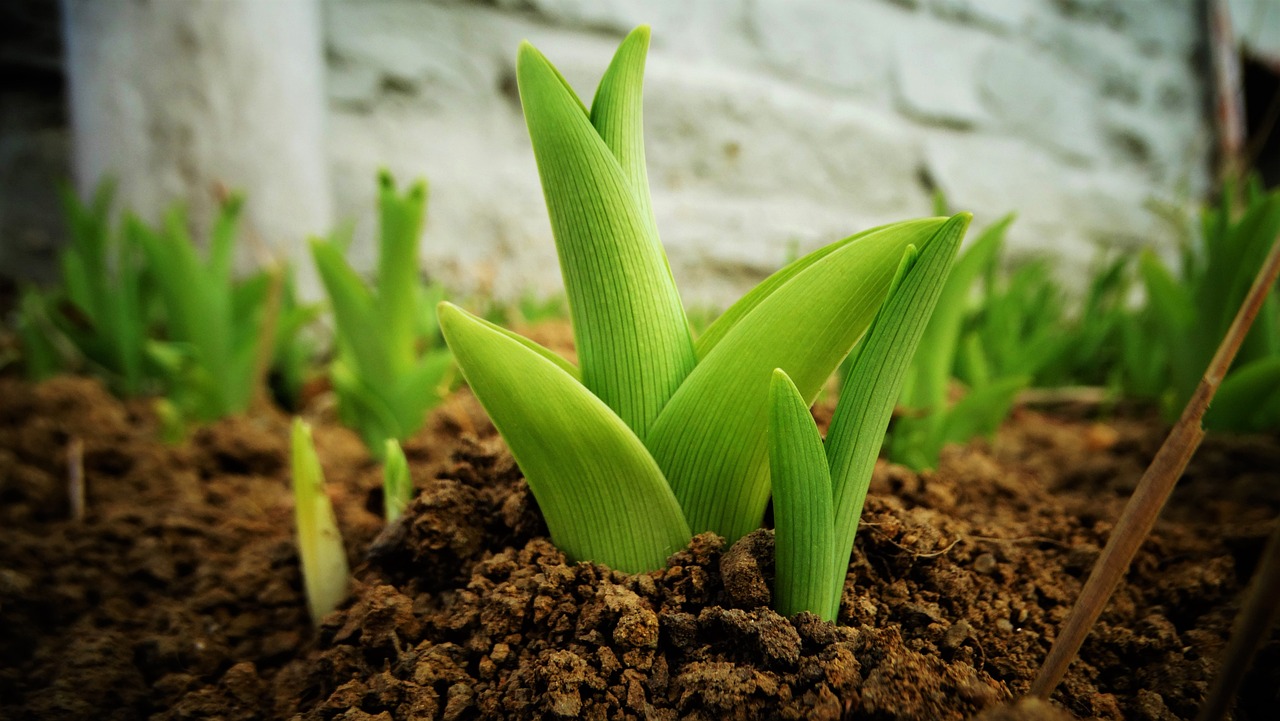
Cover Cropping
is a powerful agricultural practice that involves planting specific crops primarily to improve soil health rather than for harvest. Think of it as giving your soil a much-needed spa day! By planting cover crops, you’re not just enhancing the soil’s fertility; you’re also creating a vibrant ecosystem that supports a range of beneficial organisms. This practice is becoming increasingly popular among farmers and gardeners who are looking to boost their soil’s natural abilities while minimizing the use of synthetic fertilizers.
So, what exactly are the benefits of cover cropping? Well, first and foremost, these crops help to prevent soil erosion. When the ground is covered with plants, it holds the soil in place, making it less susceptible to being washed away by rain or blown away by wind. Additionally, cover crops can improve soil structure. Their roots create channels in the soil, allowing for better water infiltration and root penetration, which is essential for healthy plant growth.
Another significant advantage of cover crops is their ability to fix nitrogen in the soil. Legumes, such as clover and vetch, have a unique relationship with nitrogen-fixing bacteria that live in their root nodules. These bacteria take nitrogen from the air and convert it into a form that plants can use. This means that, when you incorporate these cover crops back into the soil, you’re essentially adding a natural fertilizer that enhances soil fertility without the need for synthetic options.
In addition to these benefits, cover crops also help suppress weeds. By planting them densely, you create competition for sunlight and resources, making it harder for unwanted plants to thrive. This is particularly beneficial in organic farming systems where chemical herbicides are not an option. So, not only do cover crops improve soil fertility, but they also contribute to a healthier, more balanced ecosystem.
When it comes to choosing the right cover crops, there are several options, each with its unique benefits:
- Legumes: These include clover, peas, and vetch, which are excellent for nitrogen fixation.
- Grasses: Such as rye and oats, which help with soil structure and erosion control.
- Brassicas: Like radishes, which can help break up compacted soil and improve drainage.
To reap the maximum benefits from cover cropping, it’s essential to implement them effectively. Timing is crucial—plant your cover crops at the right moment to ensure they establish before winter or other adverse conditions hit. Additionally, knowing when and how to terminate these crops is vital. You want to ensure they’re incorporated into the soil before they go to seed, which could lead to unwanted growth in the future.
In summary, cover cropping is a sustainable practice that not only enhances soil fertility but also promotes a healthy ecosystem. By choosing the right crops and implementing them thoughtfully, you can significantly improve the health of your soil, leading to more productive and resilient agricultural practices. So, why not give your soil the care it deserves and consider cover cropping in your next planting season?
Q: What are the best cover crops for my region?
A: The best cover crops depend on your local climate and soil type. Generally, legumes are great for nitrogen fixation, while grasses are excellent for erosion control. It's best to consult local agricultural extensions or resources for specific recommendations.
Q: How long should I keep cover crops in the ground?
A: Cover crops can typically be left in the ground for several months, but it’s essential to terminate them before they set seed. This ensures they decompose effectively and contribute to soil health without becoming a nuisance.
Q: Can I use cover crops in a small garden?
A: Absolutely! Cover crops can be beneficial in small gardens as well. You can plant them in the off-season or between your main crops to enhance soil fertility and health.

Types of Cover Crops
Cover crops are an incredible tool in sustainable agriculture, acting as a protective blanket over the soil while enhancing its fertility. These crops are specifically chosen not for harvest, but for their ability to improve soil health, prevent erosion, and suppress weeds. Among the diverse range of cover crops available, two main categories stand out: legumes and grasses.
Legumes, such as clover, vetch, and peas, are particularly beneficial because they have the unique ability to fix nitrogen in the soil. This means they take nitrogen from the atmosphere and convert it into a form that plants can use, enriching the soil naturally. When these plants decompose, they release this nitrogen, providing a natural fertilizer for subsequent crops. Imagine legumes as the friendly neighbors who always lend you a helping hand when you need it most!
On the other hand, grasses like rye, oats, and barley are excellent for improving soil structure and preventing erosion. Their extensive root systems help bind the soil together, reducing the risk of runoff during heavy rains. Additionally, grasses can help suppress weeds by outcompeting them for sunlight and nutrients. Think of them as the protective warriors of your garden, standing guard against unwanted intruders.
In summary, using a combination of legumes and grasses can create a powerful synergy in your soil. By incorporating both types of cover crops into your planting strategy, you can maximize benefits such as:
- Nitrogen fixation from legumes
- Soil structure improvement from grasses
- Erosion prevention through robust root systems
- Weed suppression via competition for resources
It's essential to choose cover crops that are well-suited to your specific climate and soil conditions. For instance, in colder regions, winter rye is often favored for its hardiness, while warmer areas might benefit from legumes like crimson clover. By understanding the types of cover crops available and their unique benefits, you can make informed decisions that lead to healthier soil and more productive gardens.
1. What are the main benefits of using cover crops?
Cover crops improve soil fertility, prevent erosion, suppress weeds, and enhance biodiversity in the ecosystem. They also help in moisture retention and can reduce the need for synthetic fertilizers.
2. How do I choose the right cover crop for my garden?
Consider your climate, soil type, and the specific benefits you want to achieve. For example, if you're looking to fix nitrogen, legumes are a great choice. If erosion control is your priority, grasses may be more suitable.
3. When should I plant cover crops?
Timing depends on your local climate and the types of cover crops you choose. Generally, cover crops are planted in the fall after harvesting your main crops and can be terminated before planting your next crop in the spring.
4. Can I use cover crops in a small garden?
Absolutely! Cover crops can be beneficial even in small spaces. You can plant them in between your main crops or during the off-season to improve soil health.

Implementing Cover Crops
Implementing cover crops into your agricultural routine is not just a trend; it’s a game-changer for soil health and fertility. So, how do you go about it? First off, you need to consider the timing of planting these crops. Ideally, cover crops should be sown during the off-season when your main crops aren’t growing. This ensures that your soil is never left bare, which can lead to erosion and nutrient loss. Think of it as giving your soil a cozy blanket to keep it warm and nourished during the colder months.
Next, let’s talk about planting methods. You can either broadcast the seeds or drill them into the soil, depending on the type of cover crop you choose. For instance, legumes like clover or vetch can be seeded using a no-till drill to ensure good soil contact, while grasses might be broadcasted to cover larger areas quickly. The goal is to create a dense mat of vegetation that can suppress weeds and improve soil structure.
Once your cover crops are growing, it’s essential to monitor their progress. You want to ensure they are healthy and thriving, as this will maximize the benefits they bring to your soil. This includes checking for pests and diseases, as well as ensuring they have adequate moisture. If you notice any issues, addressing them promptly can prevent bigger problems down the line. Think of your cover crops as the guardians of your soil; you wouldn’t let your guard down when it comes to protecting them!
When it comes time to terminate your cover crops, you have a few options. You can mow them down, till them into the soil, or use a roller crimper, which is a more eco-friendly approach. Each method has its pros and cons, so consider what aligns best with your overall farming goals. For example, mowing allows you to leave the organic matter on the surface, which can decompose and enrich the soil, while tilling integrates the biomass directly into the soil, enhancing nutrient availability.
In summary, implementing cover crops is a straightforward yet effective way to improve soil fertility. By carefully selecting the right crops, timing your planting, and managing them effectively, you can create a thriving ecosystem that benefits both your soil and your main crops. Remember, the health of your soil directly impacts the health of your plants, so investing in cover crops is like investing in the future of your farm.
- What are cover crops? Cover crops are plants grown primarily to improve soil health, prevent erosion, and manage weeds.
- When should I plant cover crops? Ideally, cover crops should be planted during the off-season after your main crops have been harvested.
- How do cover crops improve soil fertility? They enhance soil structure, add organic matter, and can fix nitrogen, which enriches the soil.
- Can I use cover crops in all types of soil? Yes, cover crops can be beneficial in various soil types, but the choice of species may vary based on soil conditions.
- What methods can I use to terminate cover crops? You can mow, till, or use a roller crimper to terminate cover crops before planting your main crops.

Organic Fertilizers
are a fantastic way to enhance soil fertility while being kind to the environment. Unlike synthetic fertilizers that can lead to soil degradation and water pollution, organic options provide a sustainable alternative that nourishes the soil and promotes healthy plant growth. These fertilizers are derived from natural sources, ensuring that you’re not only feeding your plants but also enriching the ecosystem.
There are several types of organic fertilizers, each with its unique benefits. For instance, manure is a popular choice, packed with nutrients that improve soil structure and moisture retention. Bone meal is another excellent option, rich in phosphorus, which is essential for root development and flowering. Additionally, fish emulsion offers a quick-release source of nitrogen, making it perfect for leafy greens and other fast-growing plants.
| Type of Organic Fertilizer | Main Nutrients | Benefits |
|---|---|---|
| Manure | Nitrogen, Phosphorus, Potassium | Improves soil structure, moisture retention |
| Bone Meal | Phosphorus, Calcium | Supports root development, flowering |
| Fish Emulsion | Nitrogen, Trace Elements | Quick nutrient release, promotes leafy growth |
When it comes to applying organic fertilizers, the technique is just as important as the product itself. You want to ensure that the nutrients are evenly distributed and absorbed effectively by your plants. For example, when using manure, it’s best to apply it during the fall or early spring to allow it to break down and release nutrients over time. On the other hand, fish emulsion can be used as a foliar spray for quick absorption, especially during the growing season.
Moreover, the timing of application can significantly influence the effectiveness of organic fertilizers. Applying them at the right time can boost plant growth and yield. For instance, adding bone meal at planting time can give your plants the phosphorus they need right from the start. Remember, the key is to observe your plants and understand their nutrient needs throughout their growth stages.
In conclusion, organic fertilizers are not just a trend; they are essential for anyone looking to maintain a healthy garden while being environmentally responsible. By choosing organic options, you’re contributing to a sustainable future and ensuring that your soil remains fertile for years to come. So, whether you’re a seasoned gardener or just starting, consider incorporating organic fertilizers into your gardening routine for a thriving ecosystem.
- What are the benefits of using organic fertilizers? Organic fertilizers improve soil health, enhance nutrient availability, and reduce the risk of chemical runoff into waterways.
- How often should I apply organic fertilizers? It depends on the type of fertilizer and the specific needs of your plants, but generally, applying them once in the spring and again mid-season is effective.
- Can I make my own organic fertilizer? Absolutely! Composting kitchen scraps and yard waste can create a nutrient-rich organic fertilizer right at home.

Types of Organic Fertilizers
When it comes to enhancing soil fertility, organic fertilizers are your best friends! Unlike synthetic fertilizers that can harm the environment, organic options are derived from natural sources, making them a sustainable choice for any gardener or farmer looking to improve their soil health. These fertilizers not only provide essential nutrients but also help in building soil structure, promoting microbial activity, and enhancing moisture retention.
There are several types of organic fertilizers, each with unique benefits. Here are some of the most popular:
- Compost: This is perhaps the most well-known organic fertilizer. Compost is made from decomposed organic matter such as kitchen scraps, yard waste, and other biodegradable materials. It enriches the soil with a balanced mix of nutrients, improves soil structure, and enhances water retention.
- Manure: Animal manure is rich in nitrogen, phosphorus, and potassium—three key nutrients that plants need. Well-aged manure from cows, chickens, or horses can significantly boost soil fertility. Just make sure to use it responsibly to avoid burning plants with excess nitrogen.
- Bone Meal: This slow-release fertilizer is made from crushed animal bones. It's particularly high in phosphorus, which is crucial for root development and flowering. If you're looking to promote strong root systems in your plants, bone meal is a fantastic option.
- Fish Emulsion: A liquid fertilizer derived from fish byproducts, fish emulsion is packed with nutrients and is quickly absorbed by plants. It's an excellent choice for a quick nutrient boost, especially during the growing season.
- Seaweed: Seaweed fertilizers are rich in trace minerals and growth hormones that help plants thrive. They can be used as a foliar spray or soil drench, promoting healthy growth and resilience against pests and diseases.
Each of these organic fertilizers has its own application methods and timing. For instance, compost can be mixed into the soil before planting or used as a top dressing during the growing season. Manure should be well-composted before application to prevent nutrient burn. Bone meal is typically worked into the soil at planting time, while fish emulsion and seaweed can be applied as needed throughout the growing season.
Incorporating these organic fertilizers into your gardening routine not only enhances soil fertility but also contributes to a healthier ecosystem. By choosing organic options, you're supporting sustainable practices that benefit both your plants and the environment. So, the next time you think about fertilizing your garden, consider going organic!
- What is the difference between organic and synthetic fertilizers? Organic fertilizers are derived from natural sources and improve soil health over time, while synthetic fertilizers provide immediate nutrients but can harm the soil ecosystem.
- How often should I apply organic fertilizers? It depends on the type of fertilizer and your plants' needs. Generally, applying organic fertilizers every 4-6 weeks during the growing season is effective.
- Can I make my own organic fertilizer? Absolutely! Composting kitchen scraps and yard waste is a great way to create your own organic fertilizer at home.

Application Techniques
When it comes to enhancing soil fertility, applying organic fertilizers effectively is key to ensuring that your plants receive the nutrients they need without causing harm to the environment. The right application technique can make a world of difference, transforming your garden into a thriving ecosystem. So, how do you go about it? Let’s dive into some effective methods!
One of the most important aspects of applying organic fertilizers is understanding the timing. Fertilizers should be applied when plants are actively growing, which is typically in the spring and early summer. This is when they can best utilize the nutrients. However, it’s also crucial to consider the type of fertilizer being used. For instance, slow-release fertilizers can be applied less frequently, while liquid fertilizers may require more regular applications.
Now, let’s talk about how to actually apply these fertilizers. Here are a few effective techniques:
- Broadcasting: This is a common method where the fertilizer is spread evenly over the soil surface. It’s essential to ensure an even distribution to avoid nutrient hotspots that can harm plants.
- Side-dressing: This technique involves applying fertilizer along the sides of growing plants. It’s particularly useful for crops that are heavy feeders, as it allows for targeted nutrient delivery.
- Foliar Feeding: Spraying a liquid fertilizer directly onto the leaves can provide quick nutrient uptake, especially for micronutrients that plants need in smaller amounts.
Regardless of the method you choose, it’s essential to follow the recommended application rates. Over-fertilizing can lead to nutrient runoff, harming local waterways and disrupting the ecosystem. To help visualize this, consider the following table that outlines common organic fertilizers and their recommended application rates:
| Fertilizer Type | Application Rate (per 100 sq. ft.) | Notes |
|---|---|---|
| Compost | 1-2 inches | Improves soil structure and nutrient content |
| Fish Emulsion | 1 cup | Best applied as a foliar spray or diluted in water |
| Bone Meal | 1-2 cups | Great for root development; apply before planting |
After applying the fertilizer, it’s also important to water the area thoroughly. This helps to activate the nutrients and allows them to penetrate the soil, making them available for your plants. Remember, the goal is to create a nutrient-rich environment that supports healthy plant growth while maintaining the integrity of the soil.
In conclusion, mastering the application techniques of organic fertilizers can significantly enhance soil fertility. By understanding the timing, methods, and appropriate rates, you’ll not only nourish your plants but also contribute to a healthier ecosystem. So roll up your sleeves and get ready to transform your garden into a flourishing paradise!
Q1: How often should I apply organic fertilizers?
A: It depends on the type of fertilizer and the specific needs of your plants. Generally, slow-release fertilizers can be applied every few months, while liquid fertilizers may need to be applied every few weeks during the growing season.
Q2: Can I over-fertilize my plants?
A: Yes, over-fertilizing can lead to nutrient imbalances and harm your plants. Always follow the recommended application rates and observe your plants for signs of stress.
Q3: What is the best time to apply organic fertilizers?
A: The best time to apply organic fertilizers is during the active growing season, typically in spring and early summer, when plants can utilize the nutrients most effectively.
Mulching for Soil Protection
Mulching is one of the most effective techniques for protecting your soil while simultaneously enhancing its fertility. Imagine your garden as a cozy blanket, where mulch acts as the protective layer that keeps the soil warm, moist, and healthy. Not only does it shield the soil from harsh weather conditions, but it also plays a crucial role in suppressing weeds and retaining moisture. When you apply mulch, you're essentially giving your soil a warm hug that helps it thrive.
There are various benefits of mulching that make it an indispensable practice for any eco-conscious gardener. First and foremost, mulching helps to maintain soil moisture, reducing the need for frequent watering. This is especially beneficial during hot summer months when the sun's rays can dry out the soil quickly. Additionally, by suppressing weeds, mulch minimizes competition for nutrients and water, allowing your plants to flourish. Think of it as giving your plants a competitive edge in the race for survival.
When it comes to choosing the right type of mulch, you have a couple of options: organic and inorganic materials. Organic mulches, such as straw, wood chips, and shredded leaves, break down over time, enriching the soil with nutrients. On the other hand, inorganic mulches, like plastic or rubber, do not decompose but can be effective in controlling weeds and retaining moisture. Each type has its own advantages, so it's essential to consider your specific gardening goals when making a selection.
| Type of Mulch | Benefits | Considerations |
|---|---|---|
| Organic | Enhances soil fertility, retains moisture, suppresses weeds | Needs to be replenished regularly as it decomposes |
| Inorganic | Long-lasting, effective weed control, moisture retention | Does not improve soil quality, can heat the soil |
Applying mulch effectively is key to maximizing its benefits. Ideally, you should apply a layer of mulch that is about 2-4 inches deep, ensuring that it covers the soil without smothering your plants. Timing is also crucial; applying mulch in early spring can help keep the soil temperature stable as the weather warms up. When selecting materials, consider using locally sourced options to minimize environmental impact and support your community.
In conclusion, mulching is not just a simple gardening practice; it's a powerful tool in your eco-friendly arsenal. By protecting your soil, enhancing its fertility, and reducing the need for chemical inputs, you are contributing to a healthier ecosystem. So, the next time you think about your garden, remember that a layer of mulch is more than just decoration—it's a vital component of sustainable gardening.
- What is the best type of mulch for my garden? The best type of mulch depends on your specific needs. Organic mulches are great for improving soil fertility, while inorganic mulches are effective for long-term weed control.
- How often should I replenish my mulch? Organic mulch typically needs to be replenished every year or as it decomposes, while inorganic mulch can last several years.
- Can I use grass clippings as mulch? Yes, grass clippings can be used as mulch, but it's best to let them dry out first to prevent matting and odors.

Types of Mulch
When it comes to mulching, choosing the right type can significantly impact your garden's health and productivity. Mulch serves as a protective layer on the soil surface, helping to retain moisture, suppress weeds, and regulate soil temperature. There are two primary categories of mulch: organic and inorganic. Each type has its unique benefits and applications, making it essential to understand their differences before making a selection.
Organic mulch is derived from natural materials and breaks down over time, enriching the soil with nutrients. Common examples include:
- Bark chips: These are excellent for flower beds and around trees, providing a natural look while suppressing weeds.
- Straw: This lightweight material is perfect for vegetable gardens, as it decomposes quickly and adds organic matter to the soil.
- Grass clippings: A readily available option, grass clippings can be used fresh or dried to provide nitrogen to the soil.
- Wood chips: These are ideal for paths and garden beds, breaking down slowly to improve soil structure over time.
On the other hand, inorganic mulch is made from non-biodegradable materials. While it doesn't contribute nutrients to the soil, it offers long-lasting benefits. Options include:
- Plastic sheeting: This is often used in vegetable gardens to warm the soil and prevent weeds, although it can limit water infiltration.
- Landscape fabric: A great choice for perennial beds, it allows water and nutrients to pass through while blocking weeds.
- Gravel and stones: These materials are perfect for pathways and areas where you want to minimize maintenance, as they don’t decompose.
Choosing the right mulch depends on your garden's specific needs. For instance, if you're looking to improve soil quality while controlling weeds, organic options are your best bet. However, if you're after durability and low maintenance, inorganic choices may be more suitable. Remember, the key is to consider how each type of mulch can serve your garden's ecosystem while enhancing soil fertility.
In conclusion, understanding the types of mulch available can empower you to make informed decisions that benefit your garden. Whether you opt for organic or inorganic mulch, each has unique properties that can enhance your soil's health and overall garden productivity.
1. What is the best type of mulch for vegetable gardens?
Organic mulches like straw or grass clippings are highly recommended as they break down and enrich the soil while suppressing weeds.
2. How often should I replace my mulch?
Organic mulch should be replenished every year or two, depending on how quickly it decomposes. Inorganic mulch can last much longer but should be checked regularly for effectiveness.
3. Can I use mulch around trees and shrubs?
Absolutely! Mulch is beneficial for trees and shrubs as it helps retain moisture, suppress weeds, and regulate soil temperature. Just be sure to keep it a few inches away from the trunk to prevent rot.
4. Is it necessary to remove old mulch before adding new?
It's not always necessary, but removing old mulch can help reduce pest problems and diseases. If you choose to leave it, ensure it’s not too thick to allow for air circulation.

Applying Mulch Effectively
When it comes to enhancing soil fertility and protecting your garden, is a game-changer. Mulch acts as a shield for your soil, helping to retain moisture, suppress weeds, and regulate temperature. But how do you ensure that you're getting the most out of this gardening technique? Let's dive into some essential strategies!
First off, timing is crucial. Ideally, you should apply mulch in the spring after the soil has warmed up but before the weeds start to take over. This timing allows your plants to benefit from the moisture retention properties of the mulch while minimizing competition from unwanted weeds. However, if you're dealing with newly planted beds or fall gardens, don't hesitate to apply mulch in the fall to protect the soil during winter.
Next, consider the depth of your mulch layer. A common recommendation is to apply a layer of mulch that is about 2 to 4 inches deep. Too little won't provide the benefits you seek, while too much can suffocate your plants and retain excessive moisture, leading to root rot. It's a delicate balance, much like adding just the right amount of seasoning to a dish—too little and it's bland, too much and it's overwhelming!
Now, let's talk about the materials. Organic mulches, such as straw, grass clippings, or shredded leaves, not only protect your soil but also break down over time, enriching it with nutrients. In contrast, inorganic mulches like stones or plastic can be useful for moisture retention but don't contribute to soil fertility. Here’s a quick comparison:
| Type of Mulch | Benefits | Drawbacks |
|---|---|---|
| Organic Mulch | Improves soil fertility, retains moisture, suppresses weeds | Needs to be replenished regularly as it decomposes |
| Inorganic Mulch | Long-lasting, effective for moisture retention | Does not improve soil fertility, can retain heat excessively |
Another key aspect is the placement of the mulch. Ensure that you keep it a few inches away from the stems and trunks of your plants. This practice prevents moisture buildup around the base, which can lead to rot. Think of it as giving your plants a little breathing room—after all, just like us, they need space to thrive!
Finally, don’t forget to monitor your mulch throughout the growing season. Regularly check for any areas that may have thinned out or decomposed too quickly. Replenishing mulch as needed is vital to maintaining its effectiveness. By keeping your mulch in check, you’re ensuring your plants have a consistent layer of protection and nourishment.
- How often should I replace my mulch? Organic mulches typically need to be replenished every year, while inorganic options can last longer.
- Can I use mulch in vegetable gardens? Absolutely! Just be mindful of the type you choose and how it interacts with your plants.
- Is it okay to use grass clippings as mulch? Yes! Just ensure they are dry and not too thick to avoid matting.
Crop Rotation Practices
Crop rotation is an essential practice in sustainable agriculture that involves alternating the types of crops grown in a specific area across different seasons or years. This technique is not just a method of planting; it’s a strategic approach to maintaining and enhancing soil fertility while preventing various agricultural problems. By rotating crops, farmers can naturally replenish soil nutrients, break pest and disease cycles, and improve soil structure. Imagine your soil as a living organism; just like we need a varied diet for optimal health, so does your soil!
One of the primary benefits of crop rotation is the enhanced nutrient cycling. Different crops have unique nutrient requirements and uptake patterns. For instance, legumes, such as peas and beans, have the remarkable ability to fix nitrogen from the atmosphere into the soil, enriching it for subsequent crops. When planted after nitrogen-hungry crops like corn, legumes can significantly improve soil fertility. This practice not only reduces the need for synthetic fertilizers but also promotes a healthier soil ecosystem.
Moreover, crop rotation can help with pest and weed management. When the same crop is planted in the same location year after year, pests and diseases that target that crop can build up in the soil. By rotating crops, you disrupt their life cycles, making it harder for them to establish and thrive. This can lead to a natural reduction in pest populations, reducing the reliance on chemical pesticides. Additionally, different crops can outcompete weeds, further reducing their prevalence.
To implement effective crop rotation practices, consider the following principles:
- Plan Your Rotations: Create a rotation plan that includes a variety of crops, ideally incorporating legumes, grains, and root vegetables.
- Time Your Planting: Pay attention to the growing seasons of each crop to maximize nutrient uptake and minimize competition.
- Monitor Soil Health: Regular soil testing can help you understand nutrient levels and adjust your crop choices accordingly.
Implementing a crop rotation plan can be straightforward. Start by assessing your garden or farm layout and determine which crops you want to grow. For example, a simple rotation could look like this:
| Year | Crop 1 | Crop 2 | Crop 3 |
|---|---|---|---|
| 1 | Corn | Beans | Squash |
| 2 | Beans | Potatoes | Greens |
| 3 | Potatoes | Greens | Corn |
This simple rotation helps to ensure that your soil remains healthy and nutrient-rich, while also minimizing pests and diseases. Remember, the key to successful crop rotation is variety and balance. Rotate crops not just for the sake of rotation but to create a thriving ecosystem that supports your plants and, ultimately, your agricultural goals.
In conclusion, crop rotation is more than just a planting technique; it's a holistic approach to farming that fosters a sustainable relationship between crops and soil health. By understanding the principles of crop rotation and implementing them in your gardening or farming practices, you can significantly improve soil fertility and contribute to a more sustainable agricultural future.
Q: How often should I rotate my crops?
A: It's generally recommended to rotate your crops annually, but the specific timing can depend on the types of crops you're growing and your local climate conditions.
Q: Can I plant the same type of crop every year if I use fertilizers?
A: While fertilizers can help replenish nutrients, planting the same crop year after year can lead to soil degradation and increased pest problems. Crop rotation is a more sustainable approach.
Q: What are some good cover crops to use in rotation?
A: Legumes, such as clover and vetch, are excellent choices for cover crops because they fix nitrogen in the soil. Other options include rye and buckwheat, which can help suppress weeds and improve soil structure.
Benefits of Crop Rotation
Crop rotation is more than just a farming technique; it's a strategic approach to maintaining soil health and enhancing agricultural productivity. By alternating the types of crops grown in a particular area, farmers can significantly improve soil fertility and structure. One of the primary benefits of crop rotation is nutrient management. Different plants have varying nutrient requirements and uptake patterns. For instance, legumes, such as beans and peas, are known for their ability to fix nitrogen in the soil, replenishing this vital nutrient that other crops deplete.
Moreover, crop rotation helps in pest and disease control. Many pests and diseases are crop-specific; by rotating crops, farmers can disrupt the life cycles of these pests and reduce their populations. This natural form of pest management minimizes the need for chemical pesticides, which can harm the environment. For example, if a farmer grows corn one year and then follows it with soybeans the next, the pests that thrive on corn would struggle to find their preferred host, effectively reducing their numbers.
Another significant advantage of crop rotation is its role in improving soil structure. Different root systems contribute to better soil aeration and water infiltration. Deep-rooted crops can help break up compacted soil layers, while shallow-rooted plants can enhance organic matter at the surface. This diversity in root systems promotes a healthier soil ecosystem, allowing beneficial microorganisms and earthworms to thrive.
Additionally, crop rotation can lead to increased crop yields. By managing nutrients and minimizing pests, farmers often see a boost in the productivity of their crops. A well-planned rotation can result in healthier plants that are more resilient to environmental stressors, such as drought or disease. The table below summarizes the key benefits of crop rotation:
| Benefit | Description |
|---|---|
| Nutrient Management | Enhances soil nutrient levels through the use of diverse crops. |
| Pest and Disease Control | Reduces pest populations by disrupting their life cycles. |
| Soil Structure Improvement | Promotes better aeration and water retention through varied root systems. |
| Increased Crop Yields | Boosts productivity by improving overall plant health. |
In conclusion, the benefits of crop rotation extend far beyond mere crop yield. It's a holistic approach that fosters a sustainable farming environment, ensuring that soil remains fertile and productive for generations to come. By understanding and implementing crop rotation, farmers can not only enhance their immediate agricultural outcomes but also contribute to a healthier ecosystem.
- What is crop rotation? Crop rotation is the practice of growing different types of crops in the same area in sequential seasons to improve soil health and reduce pests.
- How does crop rotation improve soil fertility? Different crops have unique nutrient needs and contribute to soil health in various ways, such as nitrogen fixation by legumes.
- Can crop rotation help with pest control? Yes, by changing crops annually, farmers can disrupt pest life cycles and reduce infestations.
- What are some common crop rotations? A common rotation might include corn, soybeans, and wheat, each providing different benefits to the soil.
Designing a Crop Rotation Plan
Creating an effective crop rotation plan is not just about choosing what to plant next; it's about understanding the intricate relationships between different crops and the soil. A well-thought-out rotation plan can significantly enhance soil fertility, prevent pest build-up, and improve overall crop yields. So, where do you start? Here’s a simple guide to help you design a crop rotation plan that works for your garden or farm.
First, consider the nutrient needs of your crops. Different plants have varying requirements for nutrients, and rotating them can help balance the nutrient levels in the soil. For instance, legumes, such as beans and peas, are fantastic for enriching the soil with nitrogen, which is essential for leafy greens. On the other hand, heavy feeders like corn or tomatoes will deplete the soil of nutrients more quickly. By alternating these types of crops, you can maintain a healthier nutrient profile in your soil.
Next, think about pest and disease management. Many pests and diseases are crop-specific, meaning that if you plant the same crop in the same spot year after year, you're likely to encounter the same problems repeatedly. To mitigate this, rotate your crops to break the lifecycle of pests and diseases. For example, if you had a problem with aphids on your cabbage last year, try planting a different family of vegetables, like carrots or onions, in that area this year.
It’s also important to consider the growth habits of your plants. Some crops grow tall and may shade out others, while others spread out and can compete for space and resources. To maximize your garden space, plan your rotation so that you can take advantage of the different growth habits. For example, you might plant tall sunflowers alongside shorter plants like lettuce, allowing both to thrive without competing too much.
When designing your crop rotation plan, a simple table can be incredibly helpful. Here’s an example of how you might structure your rotation:
| Year | Crop Type | Nutrient Contribution | Pest/Disease Management |
|---|---|---|---|
| 1 | Legumes (e.g., beans) | High nitrogen | Helps prevent root diseases |
| 2 | Leafy Greens (e.g., spinach) | Moderate nitrogen | Less susceptible to pests |
| 3 | Root Vegetables (e.g., carrots) | Utilizes nutrients from deeper soil | Breaks pest cycles |
| 4 | Fruit-bearing Plants (e.g., tomatoes) | High nutrient demand | Reduces disease build-up |
Lastly, remember to document your plan. Keep track of what you planted where and the outcomes. This information will be invaluable for future planning and adjustments. Over time, you’ll develop a deeper understanding of your soil’s health and the specific needs of your crops, allowing you to refine your rotation plan for even better results.
- How often should I rotate my crops? It's typically recommended to rotate your crops every year, but some gardeners may choose to rotate every two or three years depending on their specific conditions.
- What are the best crops for rotation? Legumes, leafy greens, root vegetables, and fruit-bearing plants are all excellent choices that can help balance nutrient levels and manage pests.
- Can I grow the same crop in the same spot every year? While it's possible, it's not advisable as it can lead to nutrient depletion and increased pest and disease problems.
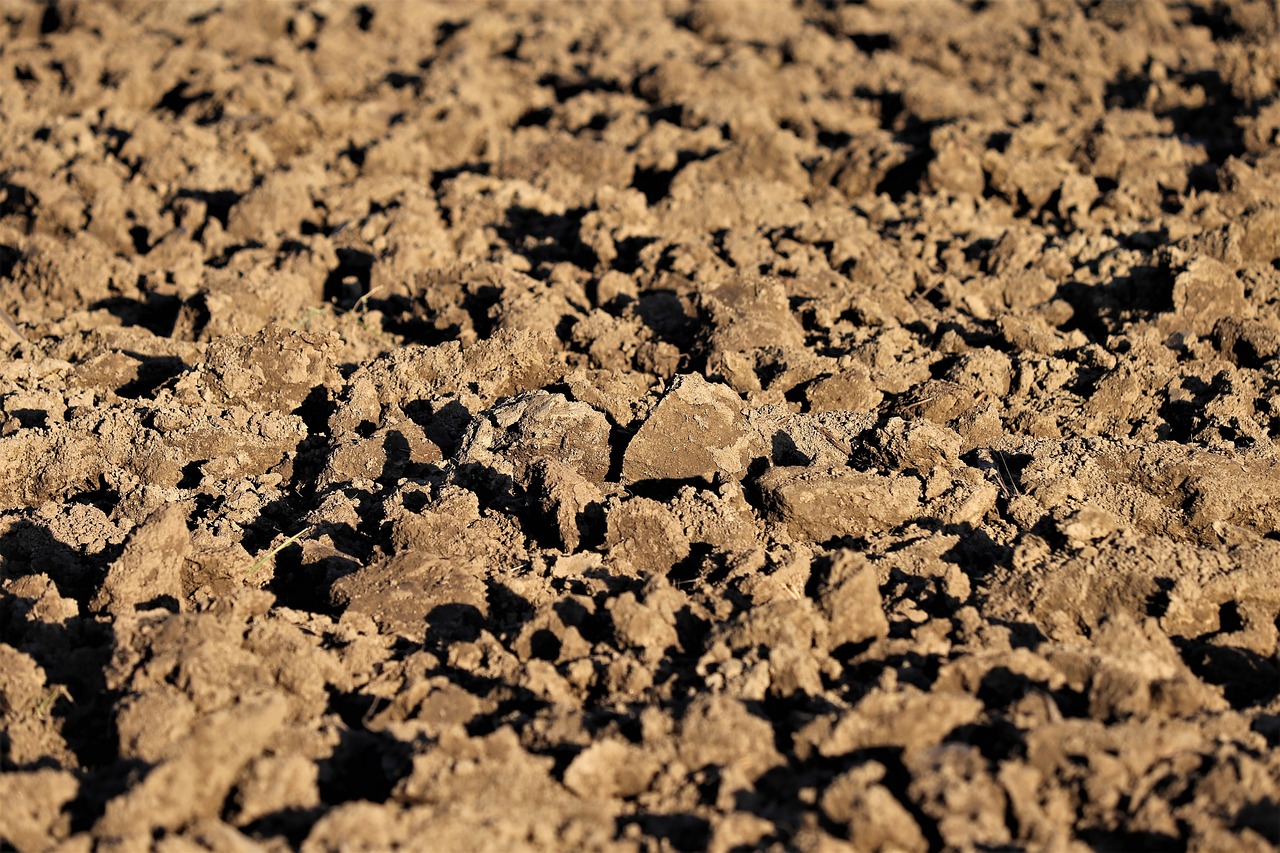
Soil Testing and Analysis
Regular soil testing is crucial for understanding the health of your soil and its nutrient levels. Just like a doctor checks your health through various tests, soil testing helps you assess what your soil needs to thrive. Without it, you might be guessing in the dark, applying fertilizers that your soil doesn’t need, or worse, missing out on essential nutrients that could boost your plants' growth. So, how do you go about it?
First, let's talk about the importance of soil analysis. By conducting soil tests, you can gain insights into the pH levels, nutrient content, and organic matter in your soil. This information is invaluable because it allows you to tailor your gardening or farming practices to better suit the specific needs of your soil. For example, if your soil is too acidic, you might need to add lime to raise the pH, or if nitrogen is lacking, you could incorporate certain organic fertilizers.
When it comes to conducting soil tests, there are a couple of methods you can choose from. You can either use DIY soil testing kits available at garden centers or send samples to a professional lab for a more detailed analysis. The DIY kits are great for quick checks and can give you a basic idea of your soil's nutrient levels. However, if you're serious about your gardening or farming, a professional analysis is worth the investment. This usually provides a more comprehensive breakdown of nutrient levels and recommendations for amendments.
Once you have your soil test results, the next step is to interpret them. Understanding what those numbers and letters mean can be a bit daunting at first, but it’s essential for effective soil management. For instance, a common soil test result might look something like this:
| Nutrient | Level (ppm) | Recommended Range |
|---|---|---|
| Nitrogen (N) | 10 | 20-50 |
| Phosphorus (P) | 15 | 10-40 |
| Potassium (K) | 200 | 100-300 |
| pH Level | 6.5 | 6.0-7.0 |
In this example, you can see that the nitrogen level is below the recommended range, indicating that you might need to add some organic fertilizers rich in nitrogen. The phosphorus level is adequate, while potassium is well within the desired range. The pH level is also good, suggesting that your soil is in a healthy state for most plants. This analysis helps you make informed decisions and apply the right amendments to enhance soil fertility.
In conclusion, soil testing and analysis are foundational practices for anyone looking to improve soil fertility sustainably. By understanding your soil's unique needs, you can create a thriving ecosystem that supports healthy plant growth. So, don’t skip this step! It’s your roadmap to a flourishing garden or farm.
- How often should I test my soil? It’s recommended to test your soil every 2-3 years, or annually if you're making significant changes to your garden or farming practices.
- What time of year is best for soil testing? The best time to test your soil is in the fall or spring before planting. This way, you can make necessary amendments before planting season.
- Can I test my soil for free? Some local agricultural extensions or community gardens offer free soil testing. Check with your local resources!
Conducting Soil Tests
Understanding the composition of your soil is like reading a treasure map; it guides you to the nutrients your plants need to thrive. Conducting soil tests is an essential step in managing soil fertility effectively. By analyzing your soil, you can uncover its nutrient levels, pH balance, and organic matter content, which are crucial for making informed decisions about amendments and fertilizers. But how do you go about testing your soil?
There are primarily two methods for conducting soil tests: using DIY kits or hiring professional services. DIY kits are readily available at garden centers and online, making them a convenient option for homeowners. They typically include everything you need to collect samples and analyze them for basic nutrients like nitrogen (N), phosphorus (P), and potassium (K), as well as pH levels. On the other hand, professional soil testing services offer a more comprehensive analysis, providing detailed insights into micronutrient levels and soil texture. While this option may come at a higher cost, the depth of information gained can be invaluable for serious gardeners and farmers.
To conduct a soil test, follow these simple steps:
- Gather Tools: You’ll need a clean container, a trowel, and a soil testing kit or access to a lab.
- Collect Samples: Take samples from various spots in your garden to get a representative mix. Aim for a depth of about 6-8 inches.
- Mix and Prepare: Combine the samples in your container, removing any debris like roots or stones. Allow the soil to dry before proceeding with the test.
- Follow Instructions: If using a DIY kit, carefully follow the instructions provided for accurate results. For lab tests, send your samples as directed.
Once you receive the results, interpreting them is the next critical step. Soil test results usually come with a report that outlines nutrient concentrations and pH levels. Understanding these results can help you identify nutrient deficiencies. For example, if the report indicates low nitrogen levels, you may need to consider adding organic fertilizers like compost or manure to boost fertility. Similarly, if the pH is too acidic or alkaline, you can amend the soil with lime or sulfur to bring it to a more neutral level, which is generally ideal for most plants.
In summary, conducting soil tests is a straightforward yet powerful way to enhance your gardening efforts. By knowing exactly what your soil needs, you can make targeted amendments that lead to healthier plants and a more productive garden. Remember, a well-informed gardener is a successful gardener!
Q: How often should I test my soil?
A: It's recommended to test your soil at least once every 2-3 years, or annually if you're making significant changes to your garden.
Q: Can I test my soil in the spring?
A: Yes, but it's best to test in the fall when the soil is dry, as moisture can affect the accuracy of the results.
Q: What should I do if my soil test shows deficiencies?
A: You can amend your soil with organic fertilizers or compost tailored to the specific nutrients that are lacking.
Q: Are DIY soil test kits reliable?
A: While they can provide a good general idea of your soil's health, for more detailed analysis, consider sending samples to a professional lab.
Interpreting Soil Test Results
Understanding the results of your soil tests is a crucial step in managing soil fertility effectively. Once you receive your soil test report, it may seem overwhelming at first, but breaking it down into key components can simplify the process. The report typically includes information on nutrient levels, pH balance, and organic matter content, each of which plays a significant role in soil health.
Firstly, nutrient levels are usually expressed in parts per million (ppm) or as a percentage. Essential nutrients like nitrogen (N), phosphorus (P), and potassium (K) should be within specific ranges for optimal plant growth. Here’s a quick reference table showing ideal ranges for these nutrients:
| Nutrient | Ideal Range (ppm) |
|---|---|
| Nitrogen (N) | 10-20 |
| Phosphorus (P) | 20-50 |
| Potassium (K) | 100-200 |
Next, the pH level of your soil is another critical factor. It affects nutrient availability and microbial activity. Most plants thrive in a pH range of 6.0 to 7.5. If your soil is too acidic (below 6.0) or too alkaline (above 7.5), you may need to amend it. For instance, adding lime can help raise the pH, while sulfur can lower it. Understanding your soil's pH can lead to better decisions on what amendments to apply.
Lastly, the organic matter content is vital for soil structure and fertility. A higher percentage of organic matter generally indicates better soil health, as it improves water retention and nutrient availability. Aim for at least 3-5% organic matter in your soil. If your results show a lower percentage, consider incorporating compost or other organic materials to enrich the soil.
In summary, interpreting soil test results involves analyzing nutrient levels, pH, and organic matter. By understanding these components, you can make informed decisions to enhance soil fertility and promote healthier plant growth. Remember, a well-nourished soil leads to a thriving garden!
- How often should I test my soil? It's recommended to test your soil at least once every 2-3 years, or more frequently if you're making significant changes to your garden.
- What should I do if my soil pH is too low? You can raise the pH by adding lime, which will help neutralize acidity and improve nutrient availability.
- Can I rely solely on soil tests for fertilizer recommendations? While soil tests provide valuable insights, it's also important to consider plant needs, crop rotation, and environmental conditions.

Implementing Sustainable Practices
Adopting sustainable practices is more than just a trend; it's a necessity for anyone looking to maintain and improve soil fertility in a way that respects our planet. Think of soil as a living entity, a complex ecosystem that requires care and attention. By implementing sustainable practices, you not only enhance soil health but also contribute to a larger movement towards environmental stewardship. It's like nurturing a garden; the more love and attention you give it, the more it thrives!
One of the most effective ways to implement sustainable practices is through integrated pest management (IPM). This strategy focuses on promoting biodiversity and using natural pest control methods instead of relying heavily on chemical pesticides. By fostering a diverse ecosystem, you create a balance where natural predators can keep pest populations in check. Imagine your garden as a bustling community, where every organism has a role to play. IPM not only protects your crops but also enhances soil fertility by minimizing harmful chemical runoff that can degrade soil health.
Additionally, reduced tillage techniques are crucial in preserving soil structure and fertility. Traditional farming often involves turning over the soil, which can lead to erosion and loss of essential nutrients. By minimizing soil disturbance, you help maintain its natural structure, allowing for better moisture retention and healthier root systems. Think of it like keeping a cozy blanket on your bed; the more you disturb it, the less effective it becomes at keeping you warm!
To give you a clearer picture of how these practices can be integrated, consider the following table that outlines some common sustainable practices and their benefits:
| Practice | Benefits |
|---|---|
| Integrated Pest Management (IPM) | Reduces chemical use, promotes biodiversity, enhances soil health |
| Reduced Tillage | Preserves soil structure, minimizes erosion, retains moisture |
| Cover Cropping | Improves soil health, prevents erosion, enhances nutrient cycling |
| Composting | Enriches soil with nutrients, reduces waste, improves soil structure |
Incorporating these sustainable practices into your gardening routine may seem daunting at first, but remember, every small step counts! Start by assessing your current methods and identifying areas for improvement. You might find that simply reducing your reliance on chemical fertilizers can lead to significant benefits over time. It's like turning a ship; it takes time to change direction, but once you do, the journey becomes smoother.
Moreover, education plays a vital role in implementing these practices effectively. Stay informed about the latest sustainable techniques and research. Engage with local gardening communities or online forums where you can share experiences and learn from others. Knowledge is power, and in the world of sustainable agriculture, it can lead to flourishing gardens and healthier soils.
As you embark on this journey towards sustainable practices, remember that the goal is not just to improve soil fertility but to create a thriving ecosystem that benefits all life forms. By making conscious choices and adapting your methods, you're contributing to a healthier planet for future generations. So, are you ready to take the plunge into sustainable gardening? Your soil—and the Earth—will thank you!
Q: What is integrated pest management?
A: Integrated pest management (IPM) is a sustainable approach that combines different management strategies and practices to control pests while minimizing harmful effects on the environment.
Q: How does reduced tillage benefit soil health?
A: Reduced tillage helps maintain soil structure, reduces erosion, and enhances moisture retention, leading to healthier soil and improved fertility.
Q: Can I start composting at home?
A: Absolutely! Composting at home is a fantastic way to recycle organic waste and create nutrient-rich soil for your garden. Start with kitchen scraps and yard waste, and follow the composting process to enrich your soil naturally.
Q: How often should I test my soil?
A: It's a good practice to test your soil every 2-3 years to monitor nutrient levels and pH balance, ensuring that your soil remains healthy and fertile.

Integrated Pest Management
Integrated Pest Management (IPM) is a holistic approach to managing pests in a way that is both effective and environmentally friendly. Rather than relying on chemical pesticides alone, IPM combines various strategies to minimize pest damage while promoting a healthy ecosystem. Imagine a well-orchestrated symphony where each instrument plays its part to create a harmonious outcome—this is how IPM works in the garden. By understanding the life cycles of pests and their natural enemies, gardeners can implement targeted interventions that reduce the need for harmful chemicals.
One of the key principles of IPM is monitoring. Regularly checking your plants for signs of pest activity allows you to catch infestations early before they escalate. This proactive approach not only saves your plants but also reduces the overall need for pesticides. For example, if you notice a few aphids on your roses, you might choose to introduce beneficial insects like ladybugs rather than spraying a pesticide that could harm both the pests and beneficial organisms.
Another important aspect of IPM is the use of cultural practices. These are methods that enhance the resilience of your plants and make them less susceptible to pests. Some effective cultural practices include:
- Choosing pest-resistant plant varieties.
- Practicing crop rotation to disrupt pest life cycles.
- Maintaining healthy soil through composting and mulching.
By implementing these practices, you’re not just fighting pests; you’re building a robust ecosystem that supports plant health. For instance, healthy soil leads to strong plants that can withstand pest pressure better than weakened ones. This interconnectedness is a cornerstone of sustainable gardening.
Biological control is another pillar of IPM. This involves using natural predators or parasites to keep pest populations in check. For example, introducing parasitic wasps can significantly reduce caterpillar populations in your garden. It’s like having a natural security system that protects your plants without the collateral damage associated with synthetic chemicals.
Lastly, when all else fails, and pest populations exceed acceptable levels, IPM allows for the judicious use of chemical controls. However, these should always be the last resort and chosen carefully to minimize harm to beneficial insects and the environment. This balanced approach ensures that your garden remains a sanctuary for both plants and wildlife.
In summary, Integrated Pest Management is not just a method; it’s a mindset. By embracing IPM, you are not only protecting your plants but also contributing to a healthier ecosystem. It’s about working with nature rather than against it, ensuring that your gardening practices are sustainable for years to come.
- What is the main goal of Integrated Pest Management?
The main goal of IPM is to manage pest populations in an environmentally friendly way while minimizing the use of chemical pesticides. - How can I monitor pests in my garden?
Regular inspections of your plants, looking for signs of pest damage or activity, are essential for early detection and management. - Can I use chemical pesticides in IPM?
Yes, but they should be used as a last resort and selected carefully to minimize harm to beneficial organisms. - What are some examples of biological control?
Introducing beneficial insects like ladybugs or using parasitic wasps are common methods of biological control in IPM.
Reduced Tillage Techniques
Reduced tillage techniques are a game changer for anyone looking to maintain soil health while maximizing productivity. By minimizing the disruption of soil, these methods help preserve its structure and fertility, which is essential for sustainable agriculture. Imagine your soil as a living organism; when you till it too much, you're essentially waking it up from a deep sleep, disrupting its natural processes and the beneficial organisms that reside within. This disruption can lead to erosion, loss of nutrients, and a decline in soil health over time.
So, what exactly does reduced tillage entail? It’s not about abandoning tillage altogether; rather, it’s about finding a balance. Farmers can use techniques like no-till, strip-till, or minimum tillage to cultivate their land while keeping the soil intact. Each of these methods has its unique approach:
- No-Till: This method involves planting crops directly into undisturbed soil. Farmers use specialized equipment that cuts through the residue from the previous crop, allowing for seed placement without turning the soil.
- Strip-Till: Here, only narrow strips of soil are tilled, leaving the rest of the field untouched. This technique helps reduce erosion while still preparing a seedbed.
- Minimum Tillage: This technique involves minimal disturbance of the soil, allowing for some tilling but significantly less than conventional methods.
One of the biggest benefits of reduced tillage is its ability to improve soil moisture retention. When soil is left undisturbed, it can better absorb rainwater and maintain moisture levels, which is crucial during dry spells. This not only helps crops thrive but also reduces the need for irrigation, leading to significant water conservation.
Additionally, reduced tillage techniques can enhance soil organic matter over time. As the soil structure remains intact, organic materials, such as crop residues, can decompose naturally, enriching the soil with nutrients. This process supports a thriving ecosystem of beneficial microorganisms that play a vital role in nutrient cycling.
However, implementing reduced tillage techniques does require some planning and adjustment. Farmers need to consider factors such as crop rotation, cover cropping, and the specific needs of their soil. For instance, integrating cover crops can help maintain soil health and prevent erosion during off-seasons. It’s all about creating a holistic approach to farming that respects the natural processes of the ecosystem.
In conclusion, reduced tillage techniques offer a sustainable path forward for farmers and gardeners alike. By embracing these methods, we can protect our precious soil resources, enhance fertility, and promote a healthier agricultural system. So, if you're looking to improve your soil health while minimizing your environmental impact, consider adopting reduced tillage practices in your gardening or farming routine.
1. What is reduced tillage?
Reduced tillage refers to farming practices that minimize the disturbance of soil during land preparation, helping to maintain soil structure and health.
2. How does reduced tillage benefit soil health?
By reducing soil disturbance, these techniques improve moisture retention, enhance organic matter content, and support beneficial microbial activity.
3. Can I use reduced tillage methods in my home garden?
Absolutely! Many home gardeners can benefit from reduced tillage by using techniques like no-till gardening, which helps maintain soil health and reduces erosion.
4. What equipment do I need for reduced tillage?
Depending on the method you choose, you may need specialized equipment such as no-till drills or strip-till planters. However, many gardeners can adapt existing tools to fit reduced tillage practices.
5. Is reduced tillage suitable for all types of crops?
While many crops can thrive under reduced tillage practices, it’s essential to consider the specific needs of your plants and soil conditions before implementation.
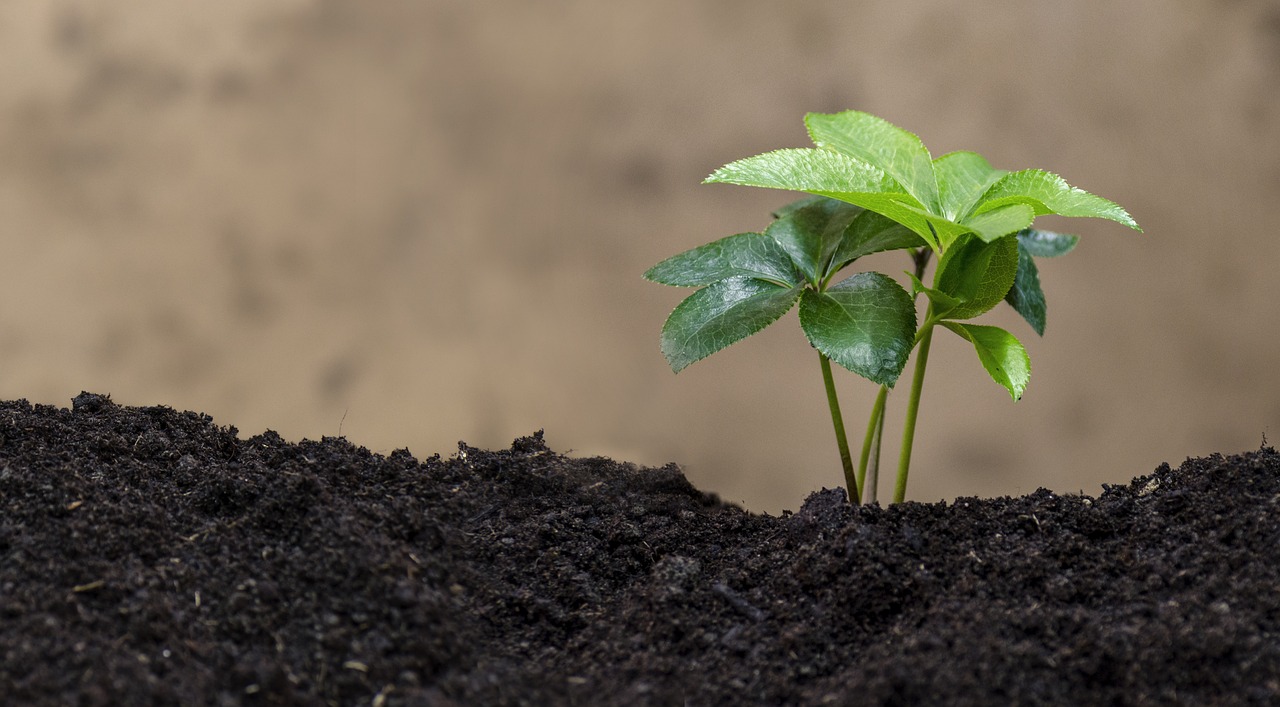
Conclusion and Future Directions
In conclusion, embracing eco-friendly techniques is not just a trend; it's a necessity for enhancing soil fertility and ensuring a sustainable future for agriculture. By adopting practices such as composting, cover cropping, and using organic fertilizers, we can significantly improve the health of our soil. These methods not only enrich the nutrient profile of the soil but also foster a vibrant ecosystem that supports diverse plant and animal life.
The journey towards sustainable soil management is ongoing, and it requires a commitment to continuous learning and adaptation. As we move forward, it's essential to stay informed about new research and innovations in soil health. This may include exploring advanced composting techniques, integrating technology into soil testing, or discovering new cover crops that can thrive in varying climates.
Moreover, community involvement plays a crucial role in promoting these sustainable practices. By sharing knowledge and resources, we can create a network of support that encourages more people to adopt eco-friendly farming methods. Whether you're a seasoned farmer or a backyard gardener, your efforts contribute to a larger movement towards healthier soils and a more sustainable planet.
As we look to the future, consider the following steps to enhance soil fertility:
- Regularly test your soil to understand its needs and adjust your practices accordingly.
- Experiment with different cover crops and organic fertilizers to find what works best for your environment.
- Engage with local agricultural organizations to stay updated on best practices and innovations.
- Educate others about the importance of soil health and eco-friendly techniques.
By implementing these strategies, we can ensure that our soil remains healthy and productive for generations to come. Remember, every small action contributes to a larger impact. Together, we can cultivate a future where soil fertility is not just maintained but enhanced, leading to a thriving ecosystem.
Here are some common questions regarding eco-friendly techniques for improving soil fertility:
- What is the best time to start composting? Composting can be started at any time of the year, but it's best to begin in the spring or fall when organic materials are plentiful.
- How long does it take for compost to be ready? Depending on the method used, compost can take anywhere from a few weeks to several months to mature.
- Can I use chemical fertilizers along with organic methods? While it's possible, it's recommended to minimize chemical use to maintain soil health and avoid potential harm to beneficial organisms.
- What are some signs of healthy soil? Healthy soil typically has a crumbly texture, a rich earthy smell, and supports a variety of organisms like earthworms and beneficial insects.
Frequently Asked Questions
- What is soil fertility?
Soil fertility refers to the ability of soil to provide essential nutrients to plants, enabling them to grow healthy and strong. It encompasses various factors such as nutrient content, pH levels, and organic matter, all of which are vital for sustainable agriculture.
- How does composting improve soil fertility?
Composting enriches soil by transforming organic waste into nutrient-rich amendments. By adding compost to your soil, you enhance its structure, improve moisture retention, and boost nutrient content, creating a thriving environment for plants.
- What are cover crops, and why are they beneficial?
Cover crops are plants grown primarily to improve soil health rather than for harvest. They help prevent erosion, enhance nutrient cycling, and improve soil structure. Legumes, for example, can fix nitrogen in the soil, which is essential for plant growth.
- What types of organic fertilizers are available?
Organic fertilizers include a variety of natural materials such as manure, bone meal, and fish emulsion. Each of these contributes essential nutrients to the soil, promoting healthy plant growth without the adverse effects of synthetic fertilizers.
- How does mulching help maintain soil fertility?
Mulching protects soil from erosion, retains moisture, and suppresses weed growth. By using organic materials like straw or wood chips, you also add nutrients back into the soil as they decompose, further enhancing fertility.
- What is crop rotation, and why is it important?
Crop rotation is the practice of alternating different crops in a specific sequence over time. This technique helps prevent nutrient depletion, reduces pest buildup, and enhances soil health, leading to more productive and sustainable farming.
- How can I conduct a soil test?
You can conduct a soil test using DIY kits available at garden centers or by sending samples to professional laboratories. Regular testing helps you understand nutrient levels and pH balance, guiding you in making informed decisions for soil improvement.
- What sustainable practices can I adopt for soil health?
To maintain soil health, consider practices like integrated pest management (IPM), reduced tillage, and organic amendments. These methods promote biodiversity, preserve soil structure, and minimize environmental impact, ensuring a healthier ecosystem.


