
Home Composting Made Easy - An Eco-Friendly Guide
Are you tired of tossing your kitchen scraps into the trash, only to watch them end up in a landfill? If so, you're in the right place! This guide will provide you with essential tips and techniques for starting your own home composting system, making it easier to reduce waste and enrich your garden soil sustainably. Composting at home is not just a trend; it’s a lifestyle choice that benefits both you and the planet. Imagine transforming your food waste into nutrient-rich compost that nourishes your plants and helps the environment at the same time. Doesn’t that sound like a win-win situation?
Composting offers numerous environmental and economic benefits that can motivate you to take the plunge into this rewarding practice. First off, composting significantly reduces landfill waste. Did you know that organic materials make up a large portion of what we throw away? By composting, you’re helping to divert these materials from landfills, which in turn reduces methane emissions—a potent greenhouse gas. Not only that, but composting enriches soil health, promoting healthier plants and reducing the need for chemical fertilizers. Think of it as giving your garden a natural vitamin boost!
Moreover, composting can save you money. Instead of purchasing expensive fertilizers and soil amendments, you can create your own right at home. This not only cuts costs but also ensures that you know exactly what’s going into your garden. Plus, it fosters a sense of accomplishment. There’s something incredibly satisfying about seeing your waste turn into something beneficial for your plants. It’s like magic, but better because it’s real!
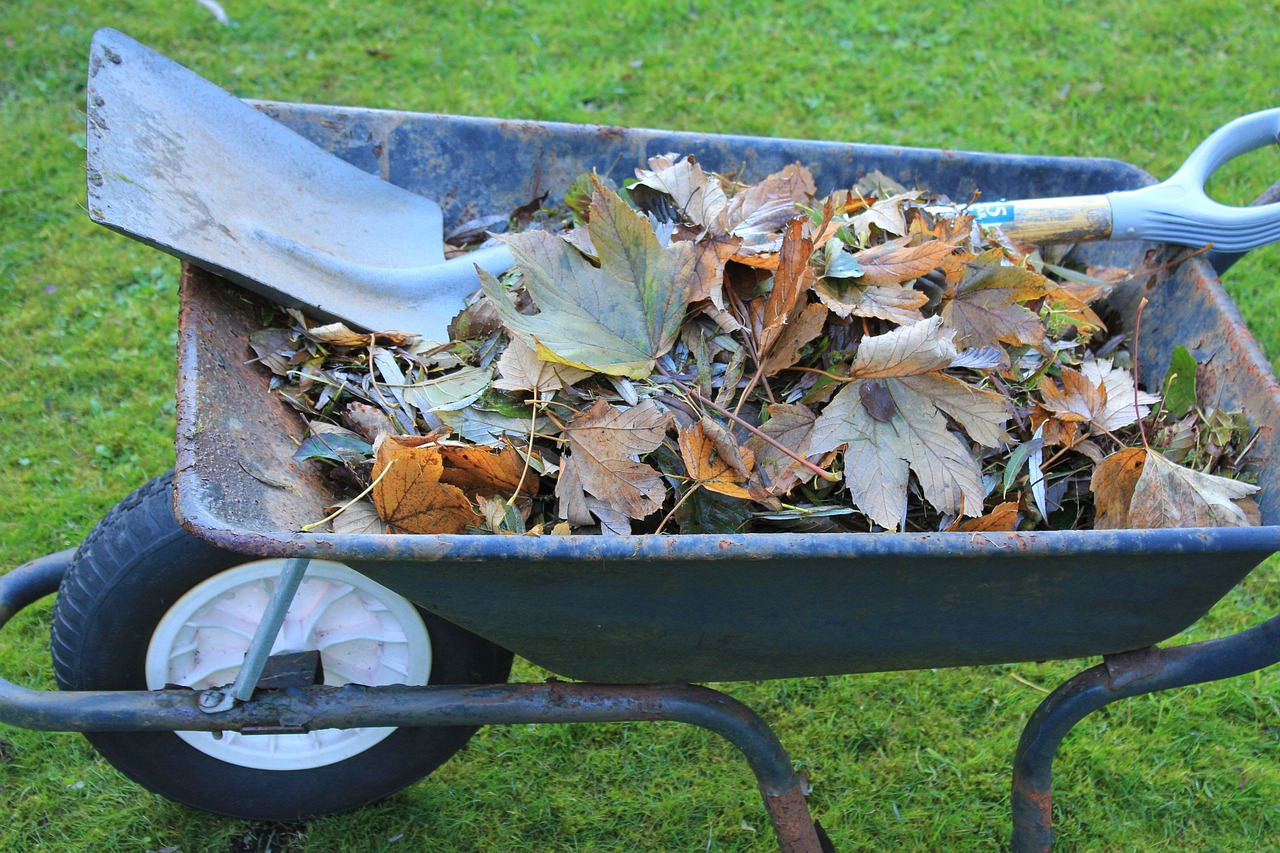
Now that you’re excited about the benefits, let’s dive into how to get started with composting. Starting a composting system requires minimal effort, and you don’t need to be a gardening expert to do it. The first step is to choose a compost bin. This can be anything from a store-bought model to a simple pile in your backyard. Next, select a location that’s convenient for you—ideally, a spot that’s easily accessible but also has some shade to prevent your compost from drying out too quickly. Finally, gather your materials; this includes kitchen scraps, yard waste, and other organic materials that will break down over time.
Selecting the appropriate compost bin is crucial for successful composting. There are various types of bins available, each with its unique benefits. Some popular options include:
- Open Bins: Simple and cost-effective, ideal for large amounts of waste.
- Closed Bins: Help keep pests out and control odors, perfect for smaller spaces.
- Tumbler Bins: Easy to turn, speeding up the composting process.
When choosing a bin, consider your available space, the volume of waste you produce, and whether you prefer a DIY option or a store-bought solution.
Creating your own compost bin can be a rewarding project. You don’t need fancy materials; often, you can use pallets, old trash cans, or even a simple pile in your backyard. The beauty of DIY compost bins is that they can be tailored to your specific composting requirements. For example, if you have a lot of yard waste, a larger bin made from pallets may be ideal. Just remember to ensure proper aeration and drainage to keep your compost healthy!
If you prefer convenience, store-bought compost bins are available in various sizes and styles. Popular options include:
| Bin Type | Features | Price Range |
|---|---|---|
| Plastic Compost Bin | Durable, lightweight, and easy to assemble | $30 - $100 |
| Compost Tumbler | Easy to turn, speeds up composting | $50 - $150 |
| Worm Bin | Great for indoor composting, uses worms to break down waste | $40 - $120 |
This variety allows you to make an informed choice based on your needs and budget.
Understanding what materials can be composted is essential for success. Composting materials are typically divided into two categories: green and brown materials. Green materials include items like fruit and vegetable scraps, coffee grounds, and grass clippings. These are rich in nitrogen, which is crucial for the composting process. On the other hand, brown materials include dry leaves, cardboard, and straw, providing carbon, which is equally important.
However, not everything belongs in your compost pile. Avoid adding meat, dairy, and oily foods, as these can attract pests and create odors. Instead, focus on the ideal materials that will give you the best results.
Regular maintenance is key to creating high-quality compost. This involves turning the pile to aerate the materials, monitoring moisture levels, and troubleshooting common issues. Turning your compost pile is crucial as it speeds up the decomposition process. Use a pitchfork or shovel to mix the materials, ensuring that air gets to the microorganisms breaking down the waste.
Turning your compost pile aerates the materials and speeds up the decomposition process. The best time to turn your compost is every few weeks, depending on how quickly it’s breaking down. If you notice that your compost is too wet, turn it more frequently to help dry it out. Conversely, if it’s too dry, you may need to add water or more green materials.
Every composter faces challenges. Common issues include odor, pests, and slow decomposition. If your compost smells bad, it may be too wet or have too many green materials. Adjusting the balance of greens and browns can help. For pests, consider covering your compost pile or using a closed bin. Slow decomposition can often be remedied by turning the pile more frequently or adding water.
Once your compost is ready, knowing how to use it effectively is important. You can apply compost in your garden to enhance soil fertility, improve plant growth, and even reduce the need for chemical fertilizers. Spread a layer of compost around your plants, mix it into your garden beds, or use it as a top dressing for your lawn. The possibilities are endless, and your plants will thank you for it!
Q: How long does it take for compost to be ready?
A: Compost can take anywhere from a few weeks to several months to break down, depending on factors like temperature, moisture, and the materials used.
Q: Can I compost meat and dairy?
A: It's best to avoid composting meat, dairy, and oily foods, as they can attract pests and create odor issues.
Q: What can I do if my compost smells bad?
A: If your compost smells, it may be too wet or have too many green materials. Try adding more brown materials and turning the pile to aerate it.
Q: Is it necessary to turn my compost?
A: While it’s not strictly necessary, turning your compost helps speed up the decomposition process and aerates the materials, leading to better results.
Benefits of Composting
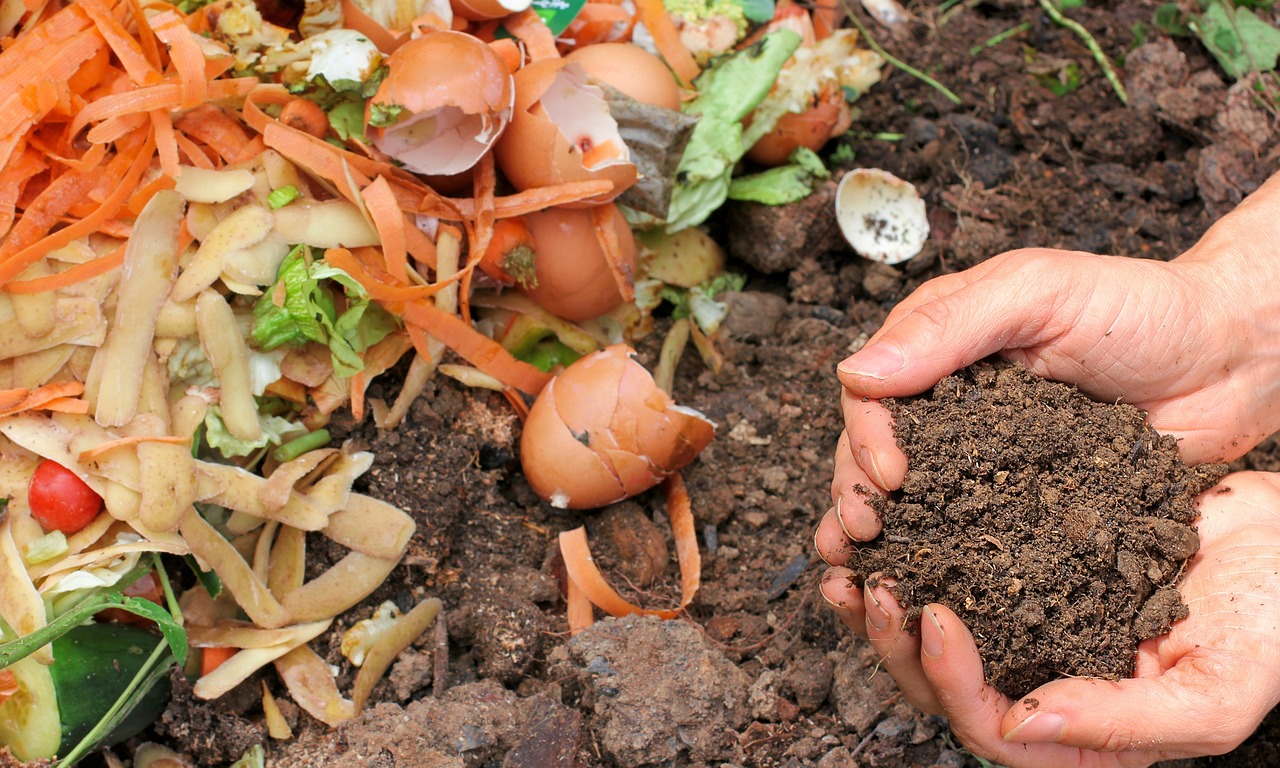
Composting is more than just a trendy buzzword; it’s a powerful solution to some of our planet's most pressing environmental issues. Imagine transforming your kitchen scraps and yard waste into a rich, nourishing resource for your garden. That’s the magic of composting! By engaging in this eco-friendly practice, you can significantly reduce landfill waste while simultaneously enriching your soil health. It's like giving your garden a nutritional boost while helping the planet. Let’s dive into some of the key benefits that make composting a must-try for every eco-conscious individual.
First and foremost, composting helps to reduce landfill waste. Did you know that nearly 30% of what we throw away could be composted? By composting, you are taking a stand against the overwhelming amount of organic waste that ends up in landfills, where it decomposes anaerobically and emits harmful greenhouse gases like methane. By composting at home, you’re not just cleaning up your kitchen; you’re actively participating in a larger movement towards sustainability.
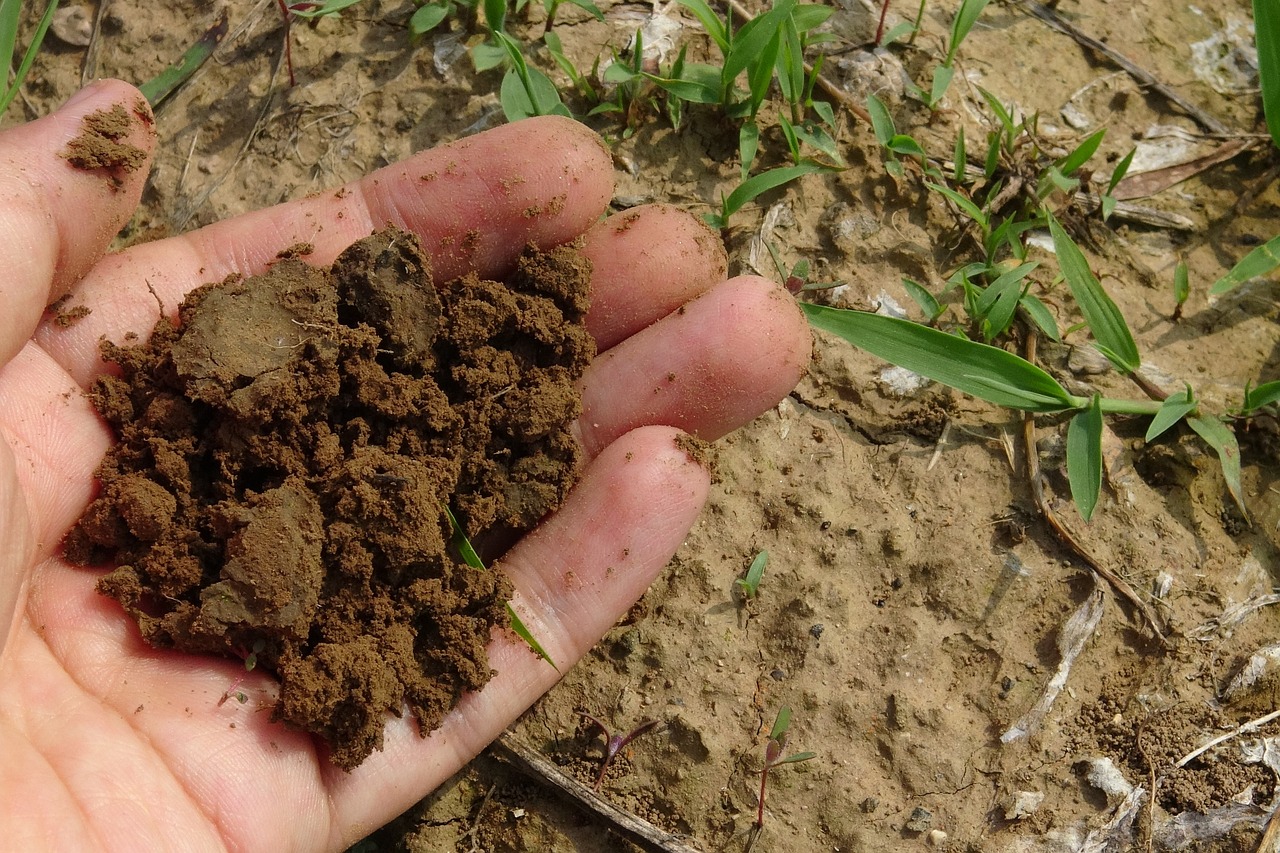
Another fantastic benefit of composting is its ability to enrich soil health. When you add compost to your garden, you’re introducing a wealth of nutrients that can enhance soil structure, improve moisture retention, and promote healthy plant growth. Think of compost as a superfood for your garden—it’s packed with essential vitamins and minerals that your plants crave! This not only helps your plants thrive but also reduces the need for chemical fertilizers, which can be harmful to the environment.
Composting also leads to financial savings. By producing your own compost, you can cut down on the costs associated with purchasing fertilizers and soil amendments. Plus, healthy soil means healthier plants, which can lead to better yields if you’re growing your own fruits and vegetables. It’s a win-win situation! Not to mention, the satisfaction of knowing you’ve created something beneficial from waste is priceless.
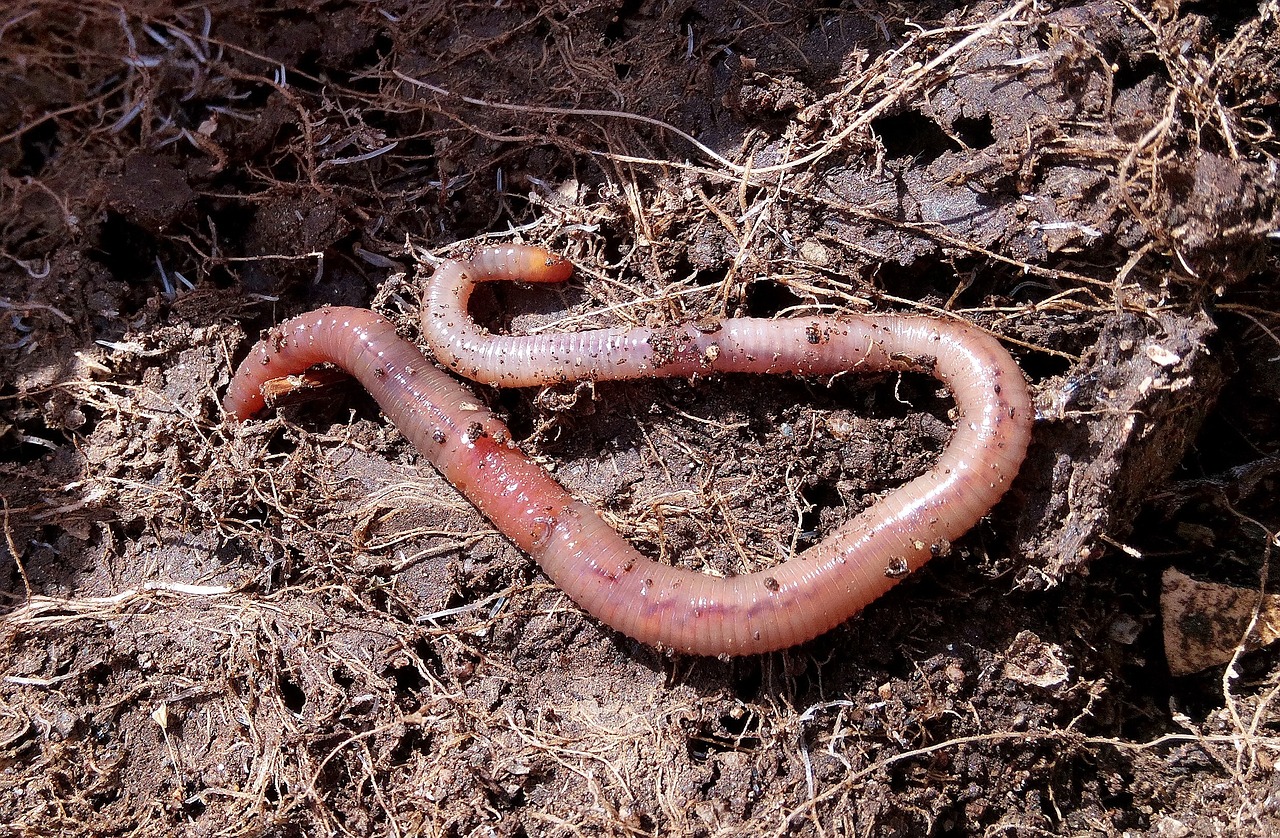
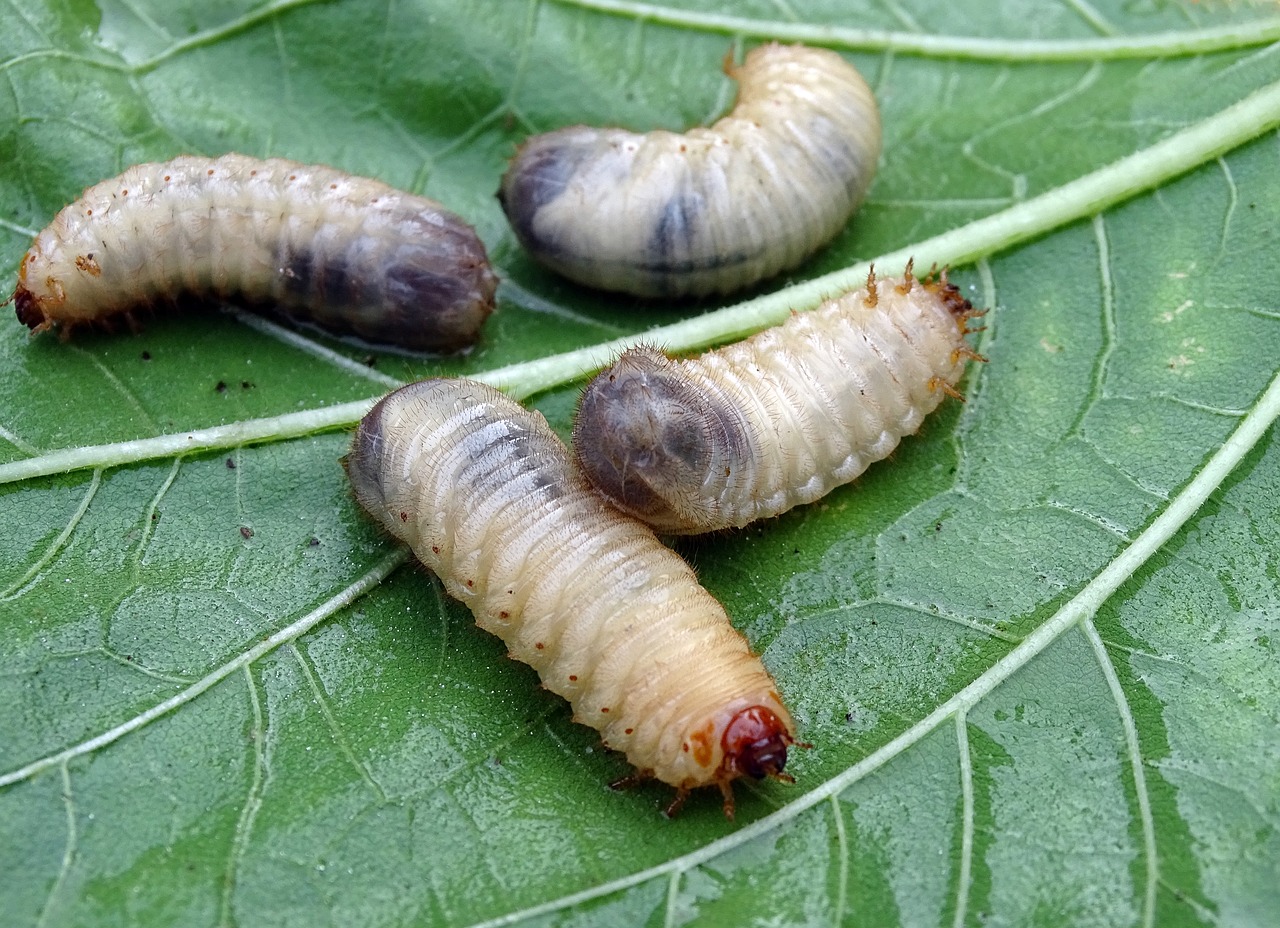
Moreover, composting encourages biodiversity in your garden. Healthy compost is teeming with beneficial microorganisms and earthworms that help break down organic matter and enhance soil fertility. This bustling ecosystem can lead to a more resilient garden, capable of fending off pests and diseases naturally. Think of it as creating a little universe in your backyard, where all the elements work together harmoniously.
In addition to these benefits, composting can also be a great educational tool, especially for families. Getting kids involved in composting can teach them valuable lessons about sustainability, the environment, and the importance of reducing waste. It’s a hands-on way to instill a sense of responsibility and awareness about how our actions impact the planet.
In summary, the benefits of composting are vast and varied. From reducing landfill waste to enriching your garden and saving money, composting is an effective way to contribute to a healthier planet. So, why not give it a try? You might just find that you love the process as much as the results!
Getting Started with Composting
So, you’ve decided to dive into the world of composting—fantastic choice! Not only is it a great way to reduce waste, but it also transforms your kitchen scraps and yard waste into nutrient-rich soil for your garden. The beauty of composting lies in its simplicity; you don’t need to be an expert gardener to get started. In this section, we’ll walk you through the essential steps to kick off your composting journey.
First things first, you’ll need to choose the right compost bin. This is where all the magic happens, so picking a bin that suits your space and lifestyle is crucial. If you live in an apartment, a compact bin might be ideal, while homeowners with a backyard might opt for a larger, more traditional compost setup. There are various types of compost bins available, from tumblers to stationary bins, each with its own set of benefits. Take a moment to consider your needs and space before making a decision.
Once you have your bin, the next step is to select a suitable location. Ideally, you want a spot that’s easily accessible but also out of the way. A shady area is preferable, as it helps maintain moisture levels without overheating the compost. If you have a backyard, a corner near your garden could be the perfect spot. Just remember, the easier it is for you to reach, the more likely you are to stick with it!
Now, let’s talk about gathering materials. Composting requires a balance of two main types of materials: greens and browns. Greens are nitrogen-rich materials like fruit scraps, vegetable peels, and coffee grounds, while browns are carbon-rich materials such as dry leaves, cardboard, and straw. The ideal ratio is about 2:1 browns to greens. This balance is essential for creating a healthy compost pile. Here’s a quick breakdown:
| Type | Examples |
|---|---|
| Greens | Fruit scraps, vegetable peels, grass clippings, coffee grounds |
| Browns | Dry leaves, straw, cardboard, paper |
As you gather materials, be mindful of what you can and cannot compost. Some items, such as meat, dairy, and oily foods, should be avoided as they can attract pests and create unpleasant odors. Stick to plant-based materials for the best results.
With your bin, location, and materials ready, you’re all set to start composting! Just layer your greens and browns in the bin, and give it a good mix to kickstart the decomposition process. Remember, composting is a bit like cooking; it requires the right ingredients and a little patience. Before you know it, you’ll be on your way to creating your own rich compost that will nourish your garden.
Q: How long does it take for compost to be ready?
A: Typically, compost can take anywhere from 3 months to a year to fully decompose, depending on various factors like temperature, moisture, and the materials used.
Q: Can I compost in the winter?
A: Yes! Composting can continue in the winter, but the process may slow down. Just ensure your bin is insulated and keep adding materials to maintain activity.
Q: What should I do if my compost smells bad?
A: Bad odors usually indicate an imbalance in your compost. Try adding more browns to absorb excess moisture and turning the pile to aerate it.
Choosing the Right Compost Bin
When it comes to composting, one of the first and most crucial decisions you'll make is selecting the right compost bin. Think of your compost bin as the heart of your composting system; it needs to be just right to ensure everything runs smoothly. The ideal compost bin not only fits your space but also suits your composting style. Whether you have a sprawling backyard or a cozy balcony, there’s a perfect compost bin waiting for you!
There are several types of compost bins available, each with its unique advantages. For instance, bin-style composters are enclosed and help keep pests out while allowing air to circulate. They are great for maintaining a neat appearance in your garden. On the other hand, open compost piles are simple and cost-effective, but they require more maintenance and can attract unwanted critters. If you’re looking for something in between, consider a tumbler composter. These bins can be rotated, which helps aerate the compost and speeds up the decomposition process.
When choosing your compost bin, consider the following factors:
- Space: How much room do you have? If you're tight on space, a compact bin or a tumbler might be your best bet.
- Volume: How much compost do you plan to produce? Larger families or avid gardeners may need a bigger bin.
- Material: Compost bins come in various materials like plastic, wood, and metal. Each has its pros and cons regarding durability and insulation.
- Accessibility: Will you be able to easily access your compost bin for adding materials and turning the pile?
For those who enjoy a bit of DIY, creating your own compost bin can be a fun and rewarding project. You can tailor it to fit your specific needs and even use recycled materials, which adds an eco-friendly touch to your composting journey. Just remember to ensure proper airflow and drainage to keep your compost thriving!
If convenience is what you're after, there are plenty of store-bought options to choose from. Popular brands offer bins in various sizes and styles, designed to cater to different gardening needs. Some even come with built-in features like aeration vents and composting guides to help you get started. When selecting a store-bought compost bin, look for features that align with your composting goals and personal preferences.
In the end, the right compost bin will make your composting experience enjoyable and efficient. It’s all about finding what works best for you—your space, your lifestyle, and your composting ambitions. So, take your time, do a little research, and choose a bin that you will love using for years to come!
Q: How do I know which compost bin is right for me?
A: Consider your available space, the amount of compost you want to produce, and whether you prefer a DIY solution or a store-bought option. Each type has its benefits—choose one that fits your lifestyle!
Q: Can I make my own compost bin?
A: Absolutely! Many people enjoy creating their own compost bins using wood pallets, wire mesh, or even plastic containers. Just ensure that your design allows for good airflow and drainage.
Q: What if I don’t have a backyard?
A: No worries! You can still compost on a balcony or even indoors with a worm composting system (vermicomposting). There are compact composters designed specifically for small spaces.
DIY Compost Bins
Creating your own compost bin can be both a rewarding project and a fantastic way to contribute to a healthier environment. Not only does it allow you to recycle kitchen scraps and yard waste, but it also gives you the freedom to customize your composting system to fit your specific needs and space constraints. The beauty of DIY compost bins lies in their simplicity and affordability. Let’s explore some easy options that you can implement with minimal tools and effort.
One of the most popular DIY compost bin designs is the wooden pallet bin. Wooden pallets are often available for free or at a very low cost from local businesses. By stacking four pallets in a square formation, you can create a sturdy and spacious compost bin. This design allows for excellent airflow, which is crucial for the composting process. Just remember to line the bottom with some wire mesh to keep pests out!
Another great option is to use a plastic storage bin. With just a few modifications, such as drilling holes for aeration, you can transform an ordinary bin into an effective composting system. This method is particularly useful for those with limited outdoor space or who live in apartments. Just be sure to keep an eye on moisture levels since plastic bins can sometimes retain too much moisture.
If you’re feeling a bit more adventurous, consider building a compost tumbler. This design involves a barrel on a rotating frame, allowing you to easily mix and aerate your compost. While it might require a bit more effort to construct, the benefits are immense. A tumbler can speed up the decomposition process significantly, giving you rich compost in as little as a few weeks!
When embarking on your DIY compost bin journey, keep in mind some essential materials you’ll need:
- Wooden pallets or plastic bins
- Wire mesh (for pest control)
- Drill and drill bits (for aeration holes)
- Hinges and latches (if building a door for easy access)
In conclusion, a DIY compost bin is not only a practical solution for managing organic waste but also a fun project that can enhance your gardening experience. Whether you opt for a simple wooden pallet bin or a more sophisticated tumbler, you’ll be taking a significant step towards sustainability. Plus, nothing beats the satisfaction of using compost that you created yourself!
Q: How long does it take for compost to be ready in a DIY bin?
A: The time it takes for compost to mature can vary based on factors such as the materials used, the size of the bin, and how often you turn it. Generally, it can take anywhere from a few weeks to several months.
Q: Can I compost meat and dairy in my DIY bin?
A: It's best to avoid composting meat and dairy products as they can attract pests and create odors. Stick to vegetable scraps, yard waste, and other compostable materials.
Q: What should I do if my compost pile smells bad?
A: A smelly compost pile usually indicates an imbalance of materials. Try adding more carbon-rich "brown" materials, such as dried leaves or cardboard, and make sure to aerate the pile regularly.
Store-Bought Options
When it comes to composting, not everyone has the time or resources to create a DIY compost bin. Thankfully, there are plenty of that cater to various needs and preferences. Whether you have a small apartment balcony or a spacious backyard, there’s a compost bin out there that's perfect for you. These bins come in a range of sizes, styles, and materials, making it easy to find one that fits seamlessly into your lifestyle.
One of the most popular types of store-bought compost bins is the tumbler compost bin. These bins are designed to be rotated, allowing for easy aeration of the compost materials. This not only speeds up the decomposition process but also minimizes the effort needed to turn the compost. Tumblers often come in compact sizes, making them ideal for small spaces. You can find models with a single chamber or dual chambers, allowing you to compost while another batch is maturing.
Another option is the bin-style composters, which are typically made from plastic or metal. These bins are usually stationary and come with a lid to keep pests out while allowing moisture and air to circulate. The design often features ventilation holes that promote airflow, crucial for the composting process. These bins can vary in size, from small units that fit on a patio to larger bins that can handle significant amounts of kitchen and yard waste.
For those who prioritize aesthetics, decorative compost bins are also available. These bins are designed to blend into your garden or outdoor space, often resembling planters or garden furniture. They allow you to compost without compromising your home’s visual appeal. While they may be a bit pricier, they can be a stylish addition to your eco-friendly efforts.
Here’s a quick comparison of popular store-bought composting options:
| Type | Advantages | Considerations |
|---|---|---|
| Tumbler Compost Bin | Fast decomposition, easy to turn | May require more space |
| Bin-Style Composter | Good airflow, pest-resistant | Requires manual turning |
| Decorative Compost Bin | Aesthetic appeal, blends with garden | Higher cost |
When choosing a store-bought compost bin, consider factors such as the amount of waste you generate, the space you have available, and your budget. It’s also essential to think about the materials used in the bin, as some may be more durable than others. With so many options on the market, you’re sure to find a compost bin that suits your needs and encourages you to start your composting journey.
1. How do I know which compost bin is right for me?
Consider your available space, the amount of waste you generate, and whether you prefer a manual or automated option. It’s also helpful to read reviews and do some research on the specific models you're interested in.
2. Can I compost meat and dairy in store-bought bins?
Generally, it’s best to avoid composting meat and dairy products, as they can attract pests and lead to odor issues. Stick to fruits, vegetables, coffee grounds, and yard waste for the best results.
3. How often do I need to turn my compost?
If you’re using a tumbler, you can turn it every few days. For stationary bins, aim for every 1-2 weeks to keep the materials aerated and encourage decomposition.
4. What if my compost smells bad?
A foul odor usually indicates that your compost is too wet or has too many green materials. Add more brown materials, like dried leaves or cardboard, and ensure proper aeration by turning the pile.
Composting Materials
Understanding the materials that can be composted is crucial for creating a successful compost pile. Composting essentially involves transforming organic waste into nutrient-rich soil that can be used to enrich your garden. But not all materials are created equal! You need to strike a balance between "greens" and "browns." Greens are rich in nitrogen, while browns provide carbon. Together, they create the perfect environment for microbes to thrive and break down the organic matter.
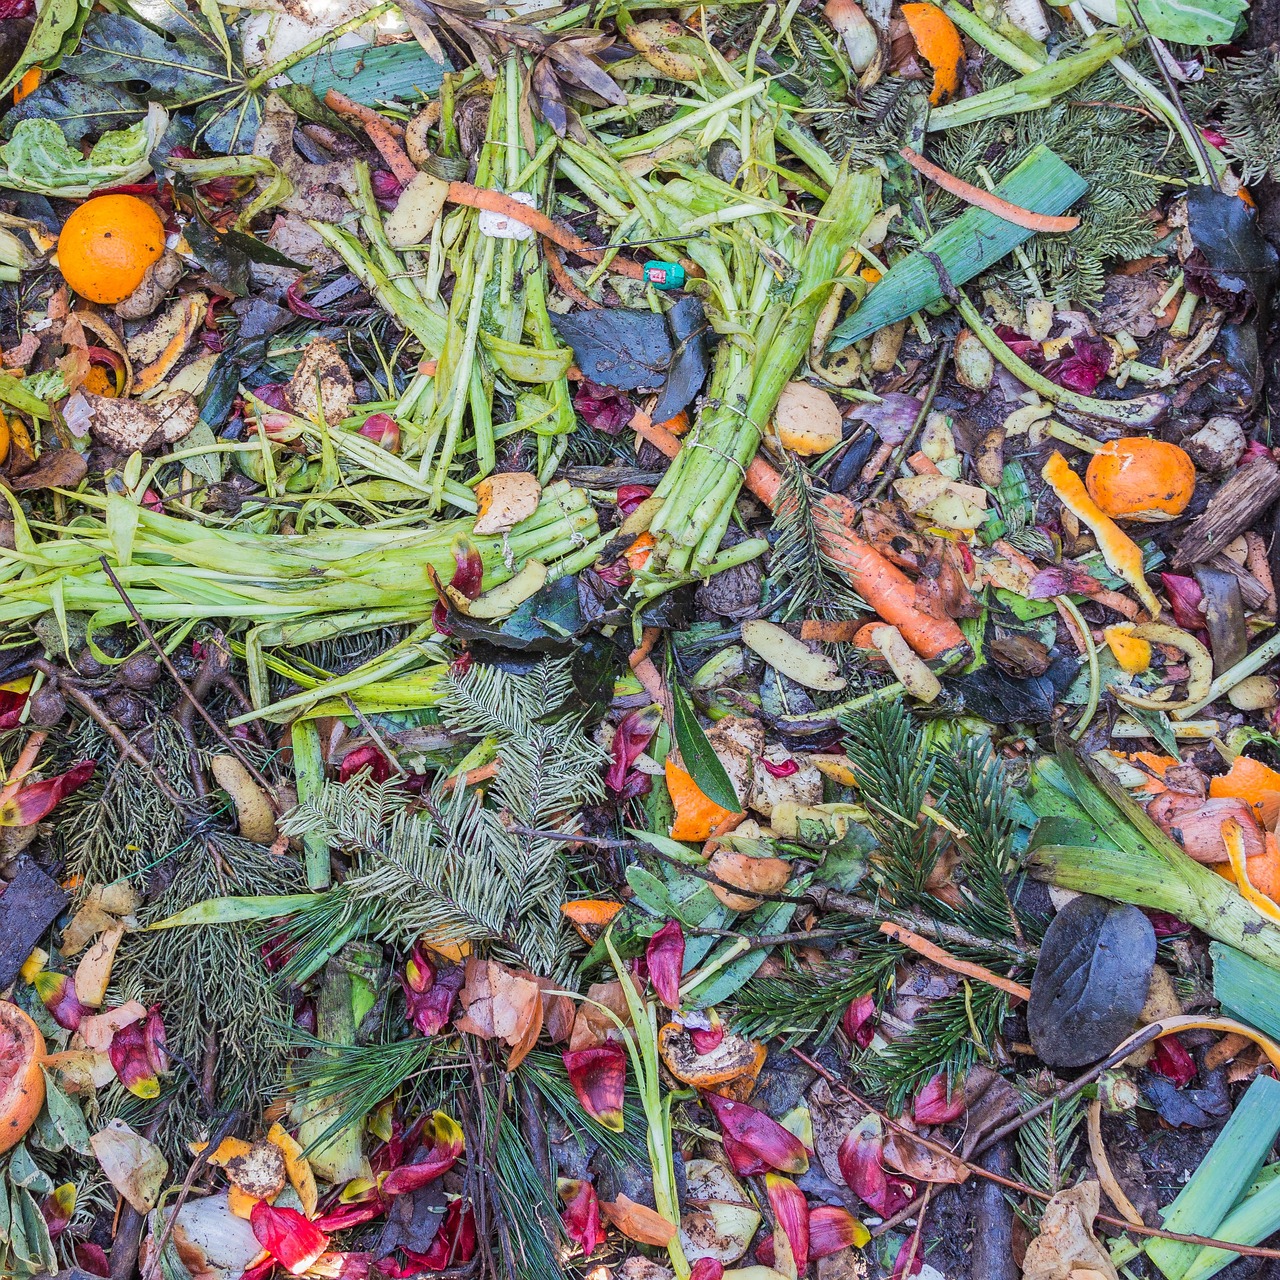
Let's dive into what you can and cannot compost. On the green side, think of items like fruit and vegetable scraps, coffee grounds, and grass clippings. These materials are high in moisture and nutrients, which help kickstart the decomposition process. On the other hand, brown materials include dried leaves, twigs, cardboard, and paper. These provide the necessary carbon to balance out the nitrogen from the greens.
Here’s a quick breakdown of compostable materials:
| Type | Examples |
|---|---|
| Greens | Fruit and vegetable scraps, coffee grounds, grass clippings, and eggshells |
| Browns | Dried leaves, straw, cardboard, and shredded paper |
However, not everything belongs in your compost pile. Some materials can attract pests or create unpleasant odors. Avoid composting items like meat, dairy products, and oily foods, as these can lead to a smelly and uninviting compost pile. Additionally, items like diseased plants, weeds with seeds, and pet waste should also be kept out of your compost to prevent contamination and ensure a healthy composting process.
In summary, a successful compost pile needs a mix of both greens and browns, while steering clear of problematic materials. By paying attention to what you add to your compost, you can create a thriving ecosystem that benefits your garden and the environment. Remember, composting is not just about reducing waste; it’s also about enriching the earth and fostering a sustainable lifestyle!
- What can I compost? You can compost fruit and vegetable scraps, coffee grounds, grass clippings, dried leaves, and cardboard.
- What should I avoid composting? Avoid meat, dairy, oily foods, diseased plants, and pet waste.
- How long does it take to make compost? Composting can take anywhere from a few weeks to several months, depending on conditions and materials used.
- Can I compost in winter? Yes! Composting can continue in winter, but it may slow down. Insulating your compost pile can help.
Maintaining Your Compost
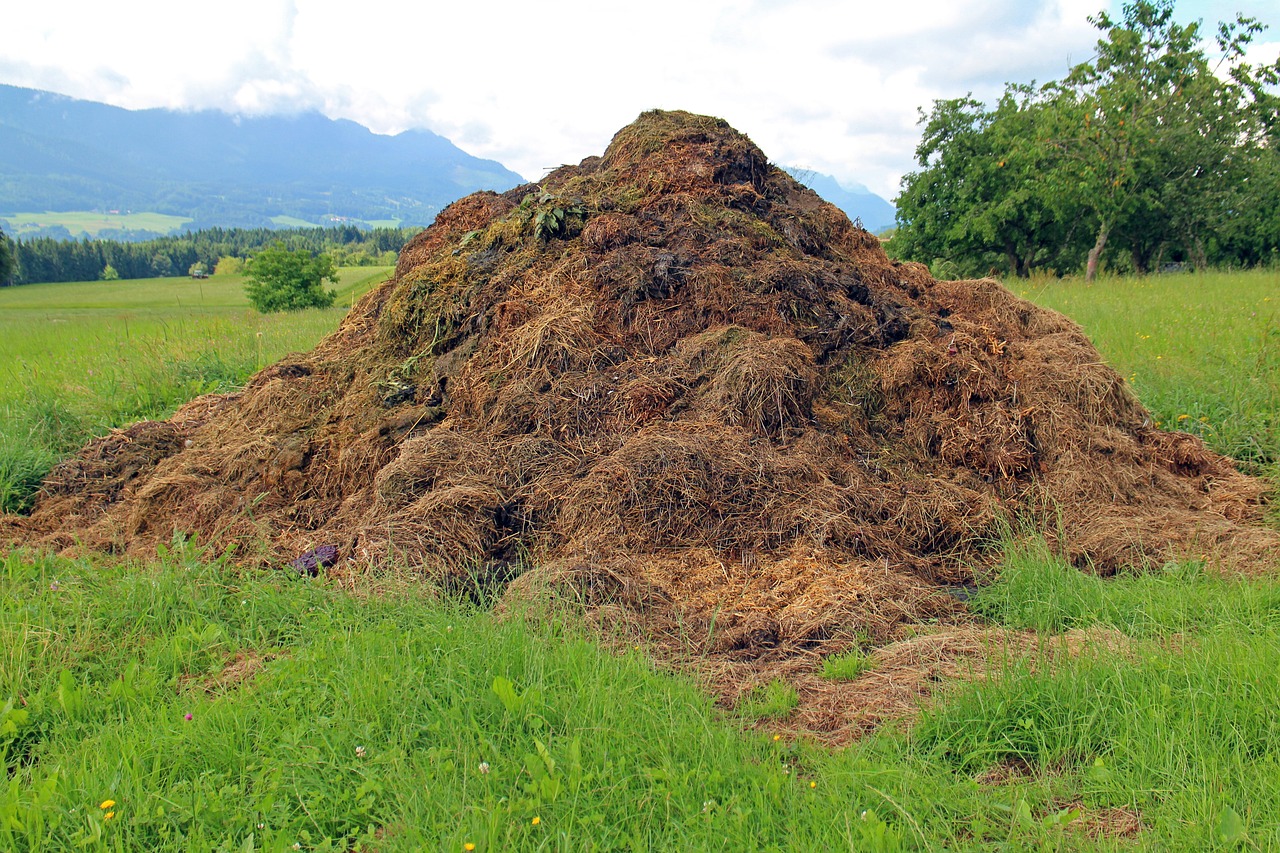
Regular maintenance is the backbone of successful composting. Think of it as nurturing a living organism; your compost pile needs attention and care to thrive. The process of decomposition is dynamic, and maintaining your compost ensures that it breaks down efficiently, creating rich, dark humus that will transform your garden. So, what does it take to keep your compost in top shape? Let’s dive in!
First and foremost, turning your compost is crucial. This simple action aerates the pile, allowing oxygen to penetrate and facilitating the breakdown of organic materials. Without sufficient oxygen, your compost can become anaerobic, leading to unpleasant odors and slow decomposition. Aim to turn your compost every few weeks, or whenever you notice that the materials are compacting. A pitchfork or compost aerator works wonders for this task, making it easier to mix and fluff the pile.
But turning is just one piece of the puzzle. You also need to monitor moisture levels. Compost should be like a damp sponge—moist but not soggy. If your compost is too dry, decomposition will slow down significantly. On the other hand, if it’s too wet, it can become a smelly, slimy mess. To maintain the right moisture balance, you can add water during dry spells or incorporate dry materials like straw or shredded paper if it gets too wet. A good rule of thumb is to check the moisture level every time you turn the pile.
Another key aspect of compost maintenance is troubleshooting common issues. Every composter faces challenges, and being aware of potential problems can help you tackle them head-on. Here are some common issues you might encounter:
- Odor: A foul smell often indicates that your compost is too wet or lacking oxygen. Turn the pile and add dry materials to balance it out.
- Pests: If you notice unwanted critters, it's usually a sign that food scraps are too exposed. Cover your compost with a layer of browns to deter pests.
- Slow decomposition: If things are moving at a snail's pace, consider adding more greens to boost nitrogen levels, or turn the pile more frequently to improve aeration.
By keeping an eye on these factors, you can ensure that your compost remains healthy and productive. Remember, composting is a journey, not a destination. With a little patience and consistent effort, you will be rewarded with nutrient-rich compost that can revitalize your garden and contribute to a more sustainable lifestyle.
1. How often should I turn my compost?
Turning your compost every few weeks is ideal to ensure aeration and speed up the decomposition process.
2. What if my compost smells bad?
A bad smell usually means your compost is too wet or compacted. Turn the pile and add dry materials to help balance it out.
3. Can I compost meat and dairy?
It's generally not recommended to compost meat and dairy as they can attract pests and create odors. Stick to fruit and vegetable scraps, yard waste, and other compostable materials.
4. How long does it take for compost to be ready?
Depending on various factors like materials used and maintenance, compost can take anywhere from a few weeks to several months to be ready for use.
Turning Your Compost
Turning your compost is one of the most vital practices you can adopt to ensure your compost pile thrives. Think of it as giving your compost a good shake to mix things up! By aerating the materials, you speed up the decomposition process, allowing those friendly microorganisms to do their magic more effectively. Without turning, your compost can become compacted and anaerobic, which can lead to unpleasant odors and slow breakdown. So, how do you turn your compost properly? Let's dive into the best techniques and tools to make this task as easy as pie!
First off, you’ll want to choose the right tools. A pitchfork or a compost aerator can be your best friends in this endeavor. These tools help you lift and mix the compost without too much hassle. If you're using a compost bin, a compost tumbler is a fantastic option that allows you to easily rotate your compost without needing to dig in. Just give it a spin, and voilà, your compost is aerated!
When it comes to the actual turning process, timing is everything. Ideally, you should turn your compost every few weeks. However, if your pile is particularly large or you notice it getting too wet or compacted, you may want to turn it more frequently. Here’s a simple step-by-step guide to turning your compost:
- Step 1: Start by removing the outer layer of the compost pile, which is usually less decomposed.
- Step 2: Use your pitchfork to lift and mix the inner materials. This helps incorporate oxygen and redistributes moisture.
- Step 3: Replace the outer layer back on top of the newly turned compost.
- Step 4: Check the moisture level. It should feel like a damp sponge; if it’s too dry, add some water.
By following these steps, you’ll create an environment that encourages the breakdown of organic matter, resulting in rich, nutrient-dense compost that your garden will love. Remember, turning your compost isn't just a chore; it’s an opportunity to observe the changes happening in your pile. You might even discover worms and other beneficial organisms that signify your compost is on the right track!
Now, you might be wondering, how do you know when to stop turning? Generally, once your compost has turned into a dark, crumbly substance and has a pleasant earthy smell, it's time to stop. This transformation is a sign that the composting process is complete, and your hard work has paid off!
In summary, turning your compost is not just about aeration; it’s about nurturing the entire composting ecosystem. So grab your tools and give your compost the attention it deserves. Your garden will thank you!
Q: How often should I turn my compost?
A: Ideally, you should turn your compost every few weeks. However, if it’s particularly wet or compacted, you may want to do it more frequently.
Q: What tools do I need to turn my compost?
A: A pitchfork or compost aerator works well. If you have a compost tumbler, that’s a fantastic option for easy turning!
Q: How can I tell if my compost is ready?
A: Your compost is ready when it turns into a dark, crumbly substance with a pleasant earthy smell. This indicates that the decomposition process is complete.
Common Composting Issues
Composting is a fantastic way to reduce waste and enrich your garden, but like any good thing, it comes with its challenges. You might find yourself facing a few common composting issues that can make the process frustrating. But don’t worry! With a little knowledge, you can tackle these problems head-on. One of the most frequent issues is odor. If your compost pile starts to smell like rotten eggs or ammonia, it’s a sign that something is off. This usually occurs due to an imbalance of nitrogen and carbon. To fix this, you can add more brown materials, such as dried leaves or cardboard, to help absorb excess moisture and odors.
Another common problem is the presence of pests. While some critters can actually help with the decomposition process, others, like fruit flies or rodents, can be a nuisance. To keep pests at bay, make sure to bury food scraps deep within the compost pile and avoid adding meat or dairy products, which can attract unwanted visitors. If you notice pests, turning your compost pile can help by aerating it and disrupting their habitat.
Slow decomposition is another issue that many beginners encounter. If your compost pile isn’t breaking down as quickly as you’d like, it could be due to a lack of moisture or insufficient aeration. Aim for a moisture level that feels like a damp sponge. If it’s too dry, sprinkle some water on it, but if it’s too wet, add more brown materials to soak up the moisture. Regularly turning your compost can also speed up the decomposition process by introducing oxygen, which is vital for the microorganisms that break down the organic matter.
Here’s a quick summary of some common composting issues and their solutions:
| Issue | Possible Cause | Solution |
|---|---|---|
| Odor | Imbalance of nitrogen and carbon | Add more brown materials |
| Pests | Attraction to food scraps | Bury scraps deep and avoid meat/dairy |
| Slow Decomposition | Lack of moisture or aeration | Adjust moisture and turn the pile regularly |
By understanding these common composting issues and their solutions, you can ensure that your composting journey is smooth and productive. Remember, every composter faces challenges, but with a little patience and adjustment, you can create rich, healthy compost that your garden will love!
Q: How often should I turn my compost?
A: It’s best to turn your compost every 1-2 weeks to aerate it and speed up decomposition.
Q: Can I compost meat and dairy?
A: It’s generally advised to avoid composting meat and dairy, as they can attract pests and create odors.
Q: What should I do if my compost pile is too wet?
A: If your compost pile is too wet, add more brown materials like dried leaves or cardboard to absorb the moisture.
Q: How long does it take for compost to be ready?
A: Compost can take anywhere from a few weeks to several months to fully decompose, depending on various factors like temperature and materials used.
Using Finished Compost
Once you've nurtured your compost to perfection, the real magic begins! Using finished compost can transform your garden, giving your plants the nutrients they crave while improving soil structure. Think of compost as a superfood for your soil—it’s packed with organic matter and beneficial microorganisms that can elevate your gardening game to new heights. So, how do you apply this black gold effectively? Let’s dive in!
First and foremost, you’ll want to understand when your compost is ready. Finished compost typically has a dark, crumbly texture and a pleasant earthy smell. If it still has identifiable food scraps or a strong odor, it might need more time to decompose. Once it’s ready, you can use it in several ways:
- Top Dressing: Spread a layer of finished compost on top of your garden beds. This method not only enriches the soil but also helps retain moisture and suppress weeds.
- Soil Amendment: Mix compost into your garden soil before planting. This practice enhances soil fertility and improves drainage, making it easier for roots to establish.
- Potting Mix: Blend compost with potting soil for container gardening. This combination provides plants with a nutrient-rich environment, promoting healthy growth.
In addition to these applications, finished compost can also be used as a natural fertilizer. When you incorporate it into your gardening routine, you reduce the need for chemical fertilizers, which can be harsh on the environment. Instead, you're creating a sustainable cycle of growth. Just imagine your plants thriving, their roots reaching deep into the nutrient-rich compost, and you, the proud gardener, enjoying the fruits of your labor.
Moreover, using compost can also help in preventing soil erosion. By improving soil structure, compost enhances the soil's ability to retain moisture and nutrients, making it less prone to washing away during heavy rains. This is particularly important for maintaining healthy ecosystems and preventing nutrient runoff into waterways.
But wait, there’s more! Finished compost can even be used in landscaping projects. If you're planning to create new flower beds or improve existing ones, mixing compost into the soil can help establish a vibrant and thriving landscape. It's like giving your garden a rejuvenating spa treatment!
To summarize, using finished compost is an excellent way to enrich your garden while promoting sustainability. It’s not just about throwing some compost on the ground and calling it a day; it’s about understanding how to use this resource to its fullest potential. By applying it correctly, you can create a thriving garden that not only looks good but also contributes positively to the environment.
Here are some common questions about using finished compost:
- How much compost should I use? A good rule of thumb is to apply a layer of 1 to 2 inches for top dressing, or mix in about 25-30% compost with your garden soil when planting.
- Can I use compost for all plants? Yes, finished compost is suitable for most plants, but be cautious with sensitive species. Always observe how your plants respond.
- Is it safe to use compost around edible plants? Absolutely! Just ensure that your compost is fully decomposed and free from any harmful materials.
Frequently Asked Questions
- What can I compost at home?
You can compost a variety of materials! Aim for a mix of green materials like vegetable scraps, coffee grounds, and grass clippings, along with brown materials such as dried leaves, cardboard, and straw. Just remember to avoid meat, dairy, and oily foods, as they can attract pests and create odors.
- How long does it take for compost to be ready?
The time it takes for compost to mature can vary widely, typically ranging from two months to a year. Factors like the materials used, moisture levels, and how often you turn the pile can speed up or slow down the process. The key is to keep an eye on your compost and look for a dark, crumbly texture when it's ready!
- Do I need a compost bin to start composting?
Nope! While a compost bin can help contain your compost and keep it tidy, you can also create a compost pile directly on the ground. Just make sure it’s in a well-drained area and turn it regularly to aerate the materials. If you prefer a more organized approach, consider DIY compost bins or store-bought options!
- What should I do if my compost smells bad?
Bad odors are often a sign that your compost is too wet or has too many green materials. Try adding more brown materials like dried leaves or shredded paper to balance it out. Turning the pile can also help aerate it and alleviate odors. If all else fails, check for food scraps that might be causing the stink and remove them!
- Can I compost in winter?
Absolutely! Composting can continue in winter, although the process may slow down due to colder temperatures. To keep things composting, make sure your pile is adequately insulated and add materials that generate heat, like fresh grass clippings or manure. Just remember to turn it less frequently during the cold months.
- How do I know when my compost is finished?
Your compost is ready when it looks dark, crumbly, and has an earthy smell. If you can’t recognize any of the original materials, you’re on the right track! You might also notice that it has shrunk in size. If you’re unsure, give it a little more time and check back in a few weeks.
- Can I use compost directly on my plants?
Yes! Finished compost is a fantastic addition to your garden. You can use it as a top dressing, mix it into the soil, or create compost tea to water your plants. Just be sure to apply it in moderation, as too much can overwhelm your plants.
- What can I do if my compost pile attracts pests?
Pests are often attracted to food scraps, so be sure to bury them deep within the pile. Adding a layer of browns on top can also help deter unwanted critters. If issues persist, consider using a closed compost bin to keep pests at bay while still allowing for proper aeration.


